Verify the Assured Security - Malware Scan Results
This section provides the information of the Assured Security - Malware Scan result. After the Assured Security - Malware Scan is completed, you can view the scan result and log information from logs, Nodes, Data store view, Recovery Point Server and Assured Security Proxy Machines.
To view the status of the Assured Security - Malware Scan from the node view, follow these steps:
- On the UDP Console, click the resources tab.
- From the left pane, navigate to Nodes > All Nodes.
- From the Actions drop-down list of a node that you want to view status of the scan, select the Show Assured Security - Malware Scan Results. To view the Assured Security - Malware Scan results, select the recovery point and check the Malware Scan column.
- The Malware Scan column displays the following four types of status messages:
- Clean: The scan is complete, and no malicious content was found. The recovery point is clean and secure.
-
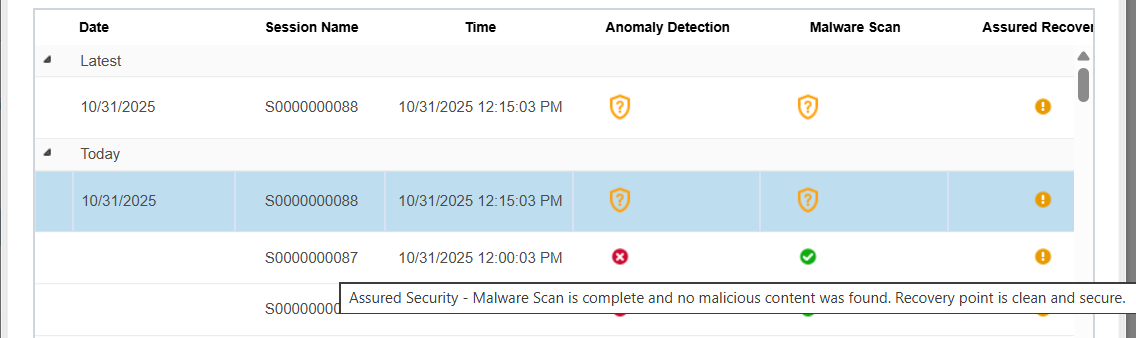
- Scan Not Initiated: The recovery point is not scanned for anomalies.
-

- Scan Failed: The Malware scan is incomplete. Retry or check your system settings.
-

- Malicious content detected: The scan detects malicious content. To display the list of malicious content, click Download.
- Note: To remove the malicious content, take the immediate action.
-

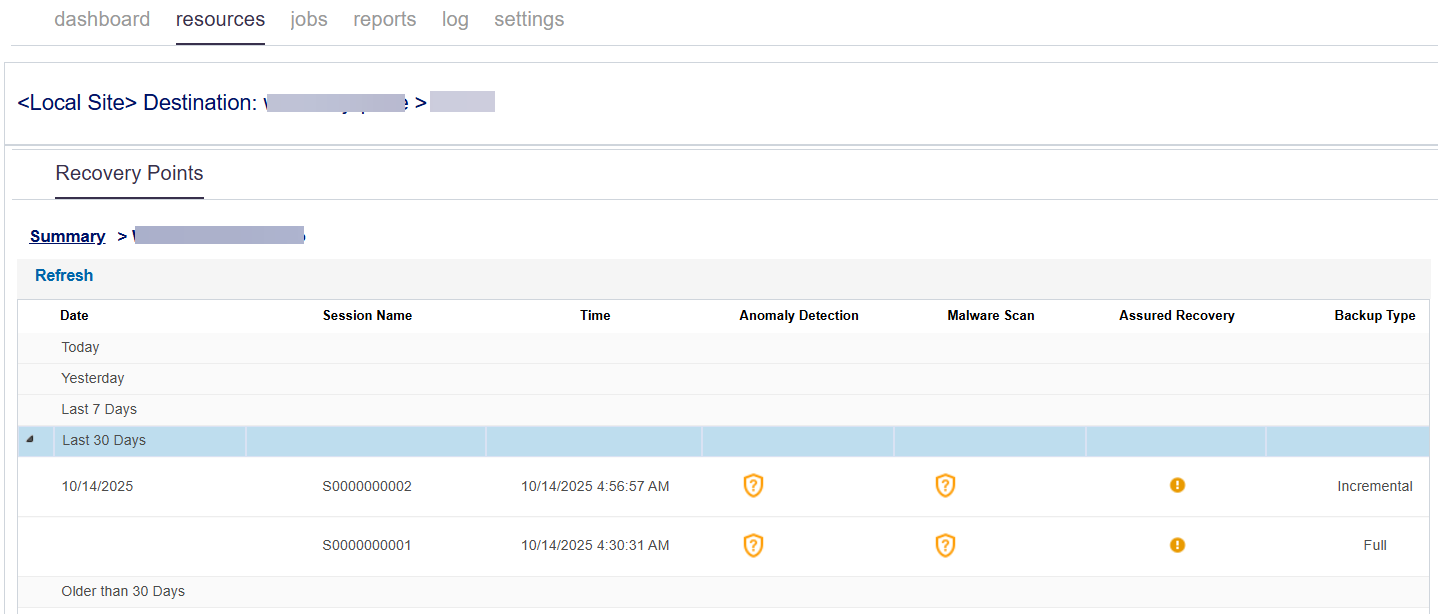
To view the status of the Assured Security - Malware Scan from the data store view, follow these steps:
- On the UDP Console, click the resources tab.
- From the left pane, navigate to Destinations > Recovery Point Servers.
- The Destinations: Recovery Point Servers page appears.
- Expand the recovery point server, right-click the data store, and then select Browse Recovery Points.
- On the Recovery Points page, click the recovery point for which you want to view the Assured Security - Malware Scan results.
- The Summary > <node name> screen appears.
- On the Date column, expand one of the time frames (Today, Yesterday, Last 7 Days, Last 30 Days, and Older than 30 Days) as desired, and then select the Recovery Point.
- To view the Assured Security - Malware Scan results, check the Malware Scan column for the selected recovery point.
-
To view the status of the Assured Security - Malware Scan from the shared folders view, follow these steps:
- On the UDP Console, click the resources tab.
- From the left pane, navigate to Destinations > Shared Folders.
- The Destinations: Shared Folders page appears.
- Select the desired shared folders path and then click OK on the Recovery Point Browser dialog.
- On the Recovery Points page, click the recovery point for which you want to view the Assured Security - Malware Scan results.
- The Summary > <node name> screen appears.
- On the Date column, expand one of the time frames (Today, Yesterday, Last 7 Days, Last 30 Days, and Older than 30 Days) as desired, and then select the Recovery Point.
- To view the Assured Security - Malware Scan results, check the Malware Scan column for the selected recovery point.
-
To view the status of the Assured Security - Malware Scan from the Agent UI Restore view, follow these steps:
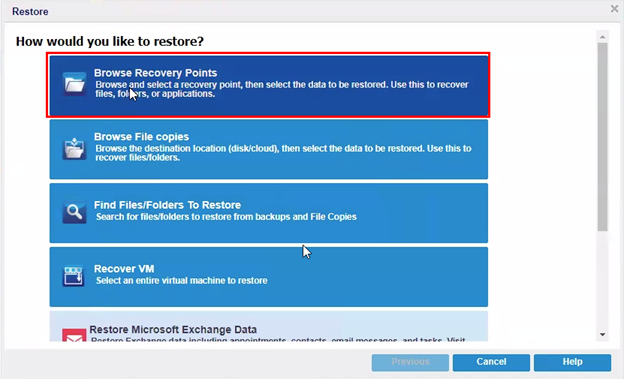
- Access the restore method selection dialog in one of the following ways:
- Log into Arcserve UDP Console.
- Navigate to resources > Node > All Nodes.
- Right-click the node, and then click Restore.
- Log into Arcserve UDP Agent (Windows).
- From the home page, select Restore.
- On the Restore dialog, click the Browse Recovery Points option.
-
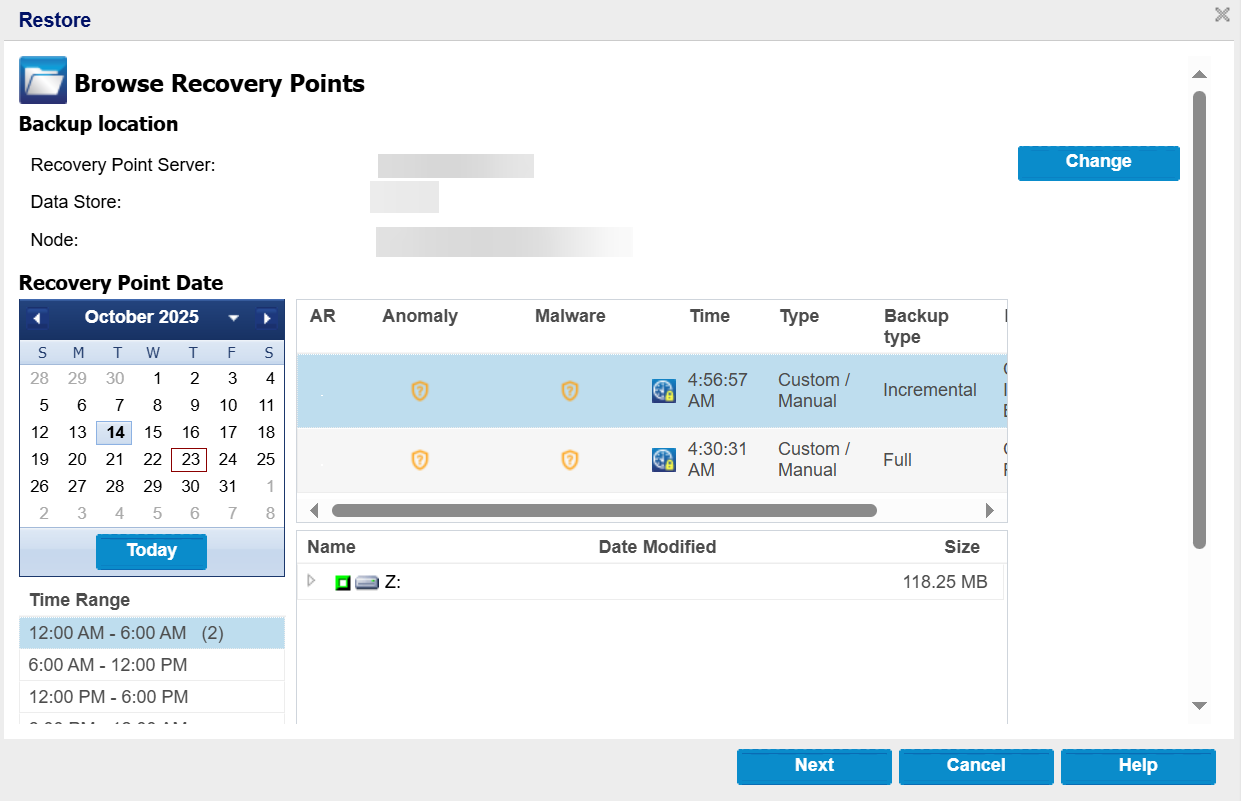
- On the Browse Recovery Points page, select a Recovery point from the calendar available on the left side.
- To view the Assured Security - Malware Scan results, check the Malware column for the selected recovery point.
From Arcserve UDP Console:
All the added nodes are displayed in the center pane.
You are automatically logged into the agent node console, and the Restore dialog is opened.
From Arcserve UDP Agent (Windows):
The Restore dialog opens.
To view the status of the Assured Security - Malware Scan, follow these steps:
- On the UDP Console, click the log tab.
- Select the Job Type as Assured Security - Malware Scan and specify the Node Name for which you want to know the scan status.
- The Log results are displayed for that Node.
- To view the status of the scan, check the Message column.
- The Assured Security - Malware Scan displays the following types of status messages:
- Failed:
- The recovery point is found with malicious content and job is failed.
- Job failure because of few other reasons like unable to mount, windows defender is not installed, unable to get lock, etc.
- Successful: The recovery point is clean, and job is successfully completed.
- Incomplete:
- The job is incomplete when the scanning of few files or directories is skipped.
- The job is incomplete when the scan timedout for few files or directories.
- Skipped: The job is skipped as there is no new session or when there is an active Assured Security - Malware Scan job running.
- Canceled:
- The job is canceled due to action of the user.
- The job is canceled as the datastore is stopped.
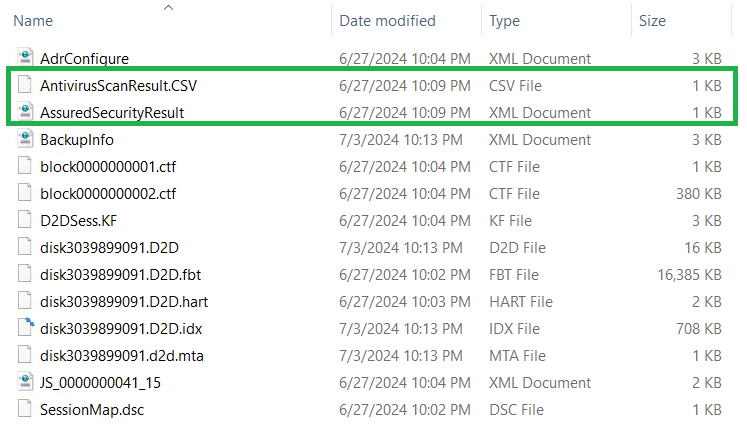
You can find the AssuredSecurityResult and AntivirusScanResult files for every Recovery Point session in the following path:
<DatastoreCommonpath>\NodeName[NodeID]\Vstore\SessionNumber
You can find the log information of the Assured Security - Malware Scan for every Recovery Point session in the following path:
<UDPHOME>\Engine\Logs
The file name format is AssuredSecurityScan-(NodeName)-(SessionNumber)-JID(JobID)-PID(ProcessID)