Previous Topic: Multistream OptionNext Topic: Activity Log Messages


Perform a Document Level Backup

Before you submit a document level backup job, ensure that the Exchange Server services are started on your Exchange server and that the Arcserve Universal Agent is started.

Note: The following procedure applies to all versions of the Arcserve Backup Agent for Microsoft Exchange Server, however be aware of the following considerations:
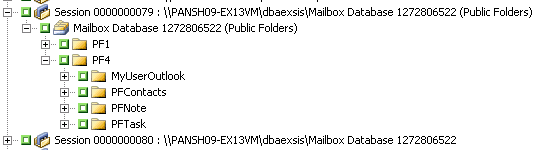
To perform a document level backup

  1. From the Arcserve Backup Home Page, select Backup from the Quick Start menu.

    The Backup Manager window opens.

  2. From the Backup Manager window, expand the Microsoft Exchange Server -- Document Level object to select the items that you want to back up.

    Note: Special mailboxes, such as Mail Connectors, System Attendant, Internet Mail Service, and MS Schedule+, cannot be selected for backup. These are special system mailboxes and should not be backed up. Hidden mailboxes also cannot be backed up.

  3. If the Browsing Filter opens (the browsing filter displays automatically when there are more than 500 items), set filters to specify the items you want to search through and click OK.
  4. Select the items that you want to back up.
  5. To select a backup method at the document level, right-click Microsoft Exchange Server -- Document Level, select Agent Option, select a backup method, and then click OK.

    For more information about backup methods, see Document Level Backup Methods.

  6. If you want to exclude mailboxes, folders, or attachments from your backup job, right-click Microsoft Exchange Server -- Document Level, select Filter, set up your filters, and then click OK. For more information on filters, see Filter Criteria.
  7. (Optional) Enable server-side features such as CRC checking, data encryption, or data compression, if desired. See the Arcserve Backup Administration Guide for more information.
  8. Click the Destination tab and select a backup destination.
  9. Click the Schedule tab. If you want to use a custom schedule, select a Repeat Method and, if you did not select a backup method at the document level, select a backup method. If you want to use a rotation scheme, select the Use Rotation Scheme option and set up your scheme.

    For more information on scheduling jobs and rotation schemes, see the online help or the Arcserve Backup Administration Guide.

  10. Click the Submit toolbar button.

    The Security and Agent Information dialog opens.

  11. From the Security and Agent Information dialog, ensure that the correct user name and password are filled in for each object. If you need to enter or modify a user name or password, click the Security button, make your changes, and then click OK.
  12. Click OK.

    The Submit Job dialog opens.

  13. From the Submit Job dialog, select Run Now to run the job immediately, or select Run On and select a future date and time when you want the job to run.

    Enter a description for your job.

    If you selected multiple sources to back up and want to set the priority in which the job sessions initiate, click Source Priority. Use the Top, Up, Down, and Bottom buttons to change the order in which the jobs are processed. When you finish setting priorities, click OK.

    On the Submit Job page, click OK to submit your job.

After you submit your backup job, you can go to the Job Status Manager and double-click the active job to view real-time job properties. If you have Complete Messaging Single Instance Storage enabled, all of the fields related to size will reflect the size prior to single instance storage optimization. The actual size of the backup after single instance storage optimization opens in the Activity Log and is labeled “(xx)MB Written to Media”.

More information:

Filter Criteria

Document Level Backup Global Options

Specify Backup Options for a Document Level Backup Job