

When you install the agent on local nodes, the installation procedure registers and creates the cluster resources for you automatically. This section describes how to register and create the cluster resources manually.
To register the cluster resources manually
Cluster.exe restype "Arcserve Backup Exchange Agent Notifier" /create /dll: CaExCluRes.dll /type:"Arcserve Backup Exchange Agent Notifier"
Note: If your resource type is already registered, Arcserve Backup Exchange Agent Notifier displays under the Cluster Configuration\Resource Types branch in the Cluster Administrator.
Cluster.exe/REGEXT:”C:\WINDOWS\cluster\CAExCluResEx.dll”
Click Next.
The Possible Owners dialog opens. The nodes in the cluster on which the resource can be brought online display in the Possible owners box.
The Dependencies dialog opens.
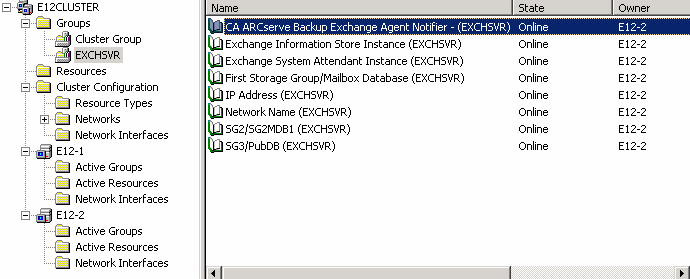
The following diagram illustrates that the Arcserve Backup Exchange Agent Notifier resource is displayed:
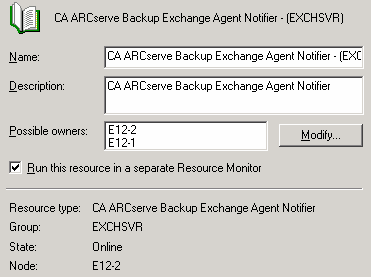
The following diagram illustrates how the options should appear on the Arcserve Backup Exchange Agent Notifier, General tab:
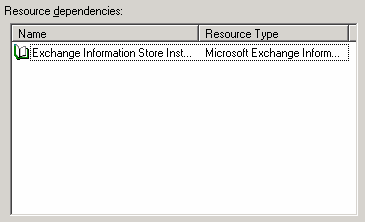
The following diagram illustrates how the options should appear on the Arcserve Backup Exchange Agent Notifier, Dependencies tab:
The following diagram illustrates how the options should appear on the Arcserve Backup Exchange Agent Notifier, Advanced tab:
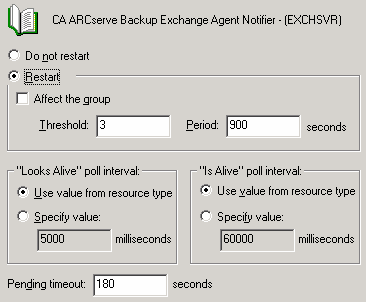
Note: On the Advanced tab, make sure the Affect the group check box is not selected. This ensures that the state of the resource does not affect the Exchange Server virtual group.
|
Copyright © 2015 Arcserve.
All rights reserved.
|
|