

You can use the Arcserve Backup Server Admin or the Central Agent Admin to change the assigned priority classifications of your Arcserve Backup nodes. These tiers are used to filter the information displayed on the Arcserve Backup Dashboard by the priority level of the monitored nodes.
The Node Tier Configuration dialog contains three priority categories (High Priority, Medium Priority, and Low Priority), and is automatically populated when a node is added to your system and browsed. By default, a High Priority tier is configured to include all Arcserve Backup servers (Primary and Member) and any nodes with Arcserve Backup application agents installed (such as Oracle, Microsoft Exchange Server, Microsoft SQL Server, Microsoft Sharepoint Server, and so on), and a Low Priority tier is configured to include all other nodes (having file system agents installed). The Medium Priority tier is not configured to include any nodes, and is available for customized use.
The node assignments for each tier can be reconfigured and customized to meet your individual needs by using the Node Tier Configuration dialog, which is accessed from the Arcserve Backup Server Admin or from the Backup Manager (right-click Windows Systems in Source tab) or from the Central Agent Admin (right-click Windows Systems).
To configure node tiers
The Node Tier Configuration dialog opens, displaying the nodes assigned to each Tier category (High Priority, Medium Priority, Low Priority).
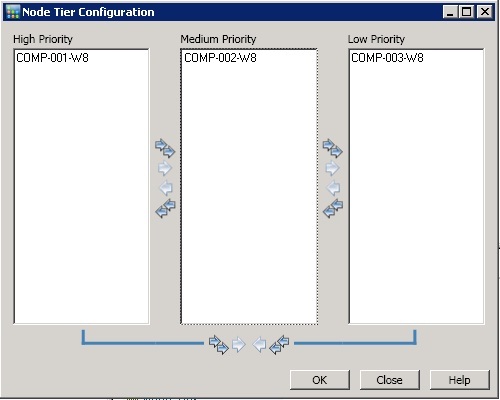
Note: Multiple nodes can be selected for tier assignment by using the "CTRL" or "SHIFT" key combinations.
The node tier assignments have been changed to meet your individual needs.
To view connections under the local computer
The connection details of that computer appear on the right pane.
To configure debug levels
The Configure Debug Level dialog appears.
You have now configured the debug level for that computer.
To enable or disable SRM client
|
Copyright © 2016
|
|