

Disaster Recovery Scenarios › Scenarios for Restoring to an Alternate Server › Restore Data to an Alternative Server Using the SAP BACKINT Agent
Restore Data to an Alternative Server Using the SAP BACKINT Agent
You can restore to an alternate location using the SAP BACKINT agent using the Arcserve Backup server. You must install the Arcserve Backup on Computer A and the SAP options on Computer B and Computer C.
To restore data to an alternate server using the SAP BACKINT agent
- Install the Arcserve Backup server component on Computer A.
- Install the Arcserve Backup Enterprise Option for SAP R/3 for Oracle on Computer C.
- From the Windows Start menu, click Start, All Programs, Arcserve, Arcserve Backup and click SAP R3 Oracle Option BACKINT Configuration on Computer C.
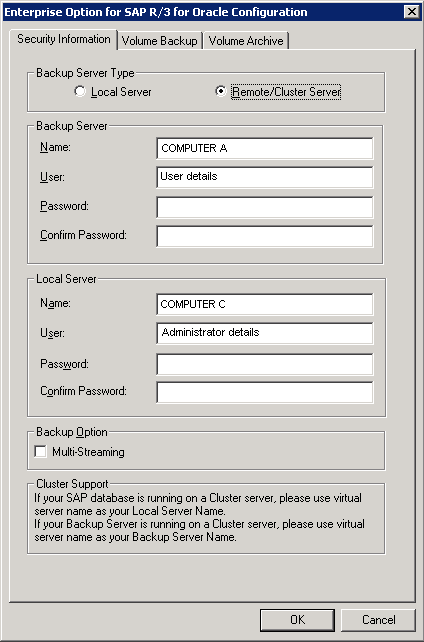
Enterprise Option for SAP R/3 for Oracle Configuration dialog opens.
- Enter the Arcserve Backup name as Computer A and other details on the Enterprise Option for SAP R/3 for Oracle Configuration dialog.
- Install Enterprise Option for SAP R/3 for Oracle and Client Agent on the Computer B.
- Enter the Backup Server Name as Computer A in the Enterprise Option for SAP R/3 for Oracle Configuration dialog to configure the agent and server.
- Create a temporary folder SAPRestore under the C: Drive on the Computer B.
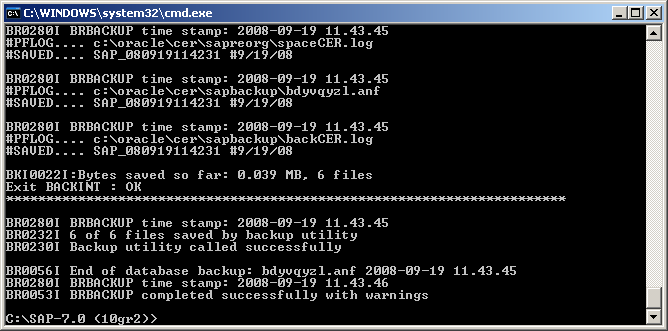
- Run brbackup.exe –d util_file –t online –m all on Computer C to back up full database.
The backup process is complete.
- Run brarchive -d utl_file -s on Computer C to back up archived logs.
The archive logs are backed up.
- You must shutdown the CER database on Computer B.
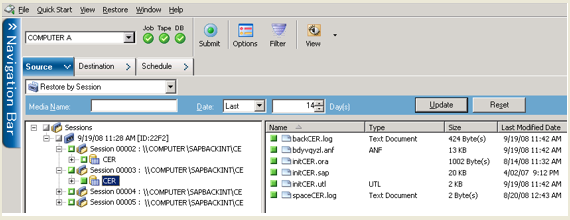
- On the Restore Manager on Computer A, select Source, Restore by Session, and select the session, backed up in the step 8, containing the Configuration Files and Backup History Files of the Option.
The files are selected.
- Select Destination and clear Restore files to their original location(s) option.
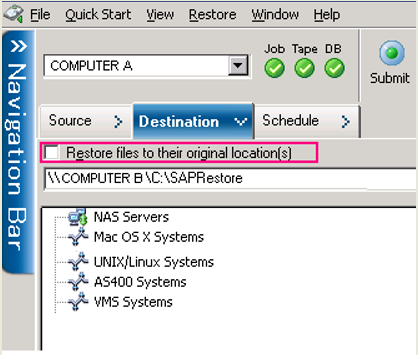
- Add Computer B under the Windows Systems. Browse the Computer B, and select the temporary folder SAPRestore.
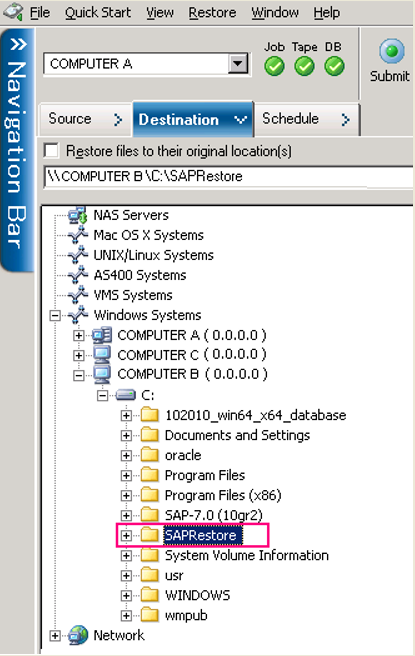
- Click Submit and start the restore process.
The restore process is complete.
- On the Restore Manager on Computer A, select Source, Restore by Session and select the session, backed up in the step 9, containing the Configuration Files and Backup History Files of the Option.
Select destination and clear Restore files to their original location(s) option.
- Add Computer B under the node Windows Systems. Browse the Computer B, and select the temporary folder SAPRestore.
- Click Submit on the toolbar to submit the restore job.
- Open the temporary folder to view the directory hierarchy. The directory hierarchy has cer as the directory of SAP Software, while product is the directory of Oracle Software and Oracle Home.
- You must now navigate the directory “C:\SAPRestore\product\10.2.0\db_1\database for the following files:
- initCER.ora — The init file of Oracle Database CER.
- initCER.sap — The configuration file of SAP.
- initCER.util —The configuration of SAP Agent which meets the requirement of SAP BACKINT.
- Copy all the files except initCER.utl to the folder C:\ product\10.2.0\db_1\database to the Computer B. InitCer.utl is created automatically by BACKINT Configuration option.
- Navigate the directory C:\SAPRestore\cer\sapbackup for the database backup history files of SAP and copy them to the folder C:\cer\sapbackup, which is the SAP Software on Computer B.
- Navigate the directory C:\SAPRestore\cer\saparch for the Archived Logs backup history files of SAP and copy them to the folder C:\cer\saparch, which is the SAP Software on Computer B.
- Navigate the directory C:\SAPRestore\cer\sapreorg and copy the spaceCer.log file to the folder C:\cer\sapreorg, which is the SAP Software on the Computer B.
- On Computer B, run brrestore -d util_file -b last -m 0 to restore the Control File.
The Control file is restored.
- On Computer B, execute the brrestore.exe –d util_file –b last –m all to restore the Control File.
The Control file is restored.
- On Computer B, execute the brrestore.exe –d util_file –a 1-152 to restore the Archived Logs. The Sequence number (1-152) depends on what it generated when back up.
The archive logs are restored.
- Log into the Database on the Computer B and start up the database to mount and recover it.
- Verify if the data is the same as the one on Computer C to complete the restore process.
Copyright © 2016 .
All rights reserved.
|
|