

Arcserve Backup lets you back up data that resides in VMware VMs. Use the following steps to submit backup jobs on local disk-based virtual machines (VMs) and SAN-based VMs.
Follow these steps:
Note: For information about browsing volumes, see How to Browse Virtual Machine Backup Volumes.
Note: For more information about backup modes, see How Global and Local Backup Options Work.
Note: For more information about filters, see Filter VM Backup Data.
Important! If the Backup Mode specified is Raw Mode and you specify filters, Arcserve Backup does not filter the VM backup data.
Note: For more information about specifying a destination or using staging to back up data, see the Administration Guide.
To use multistreaming to transmit backup data, click the Multi Stream check box.
Note: For more information about job scheduling options, see the Administration Guide.
Note: For more information about filtering VM data, see Filter VM Backup Data. For more information about specifying filters, click the Help button on the Filter dialog.
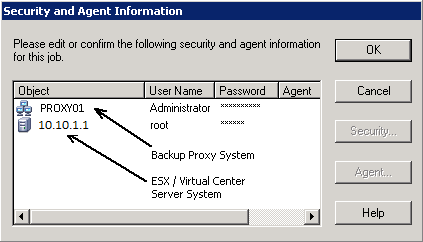
You must provide credentials for the VMware ESX Host system or the vCenter Server system and the backup proxy system to submit the job.
Note: Arcserve Backup does not support logging in to systems with passwords that are greater than 23 characters. If the password on the system you are attempting to log in to is greater than 23 characters, you must modify the password on the agent system such that it is 23 characters or less, and then you can log in to the agent system.
Arcserve Backup applies your security credentials and the Submit Job dialog opens.
Note: For more information about Submitting Jobs, click Help on the Submit Job dialog.
Arcserve Backup submits the job. For more information about viewing job status and other job-related tasks, see the Administration Guide.
|
Copyright © 2016
|
|