Restore and Recover Virtual Machines › Restore Methods › Restore from Recovery Points
Restore from Recovery Points
The Browse Recovery Points restore method lets you find successful backups (named recovery points) from a calendar view. You can then browse for and select the backup content, including applications, you want to restore. The procedure for restoring with the Browse Recovery Points method is the same as if using CA ARCserve D2D, with one exception. To restore virtual machine recovery points, you cannot use the restore to original location option.
Follow these steps:
- Log in to the application and click Node on the Navigation bar.
From the Node screen, expand the group containing the node that you want to restore.
Click the check box next to the node that you want to restore and then click Restore on the toolbar.
- From the Restore dialog, click Browse Recovery Points.
The Restore dialog opens and the Backup Location is provided for you based on the node you selected. If desired, change it to another backup destination and provide the user credentials.

- Click the recovery point date and then click a recovery point time. Select the content that you want to restore. Select an entire volume or a file, folder, database, or application. Solid green boxes next to a selection indicate that it is selected for restore. Click Next when done.
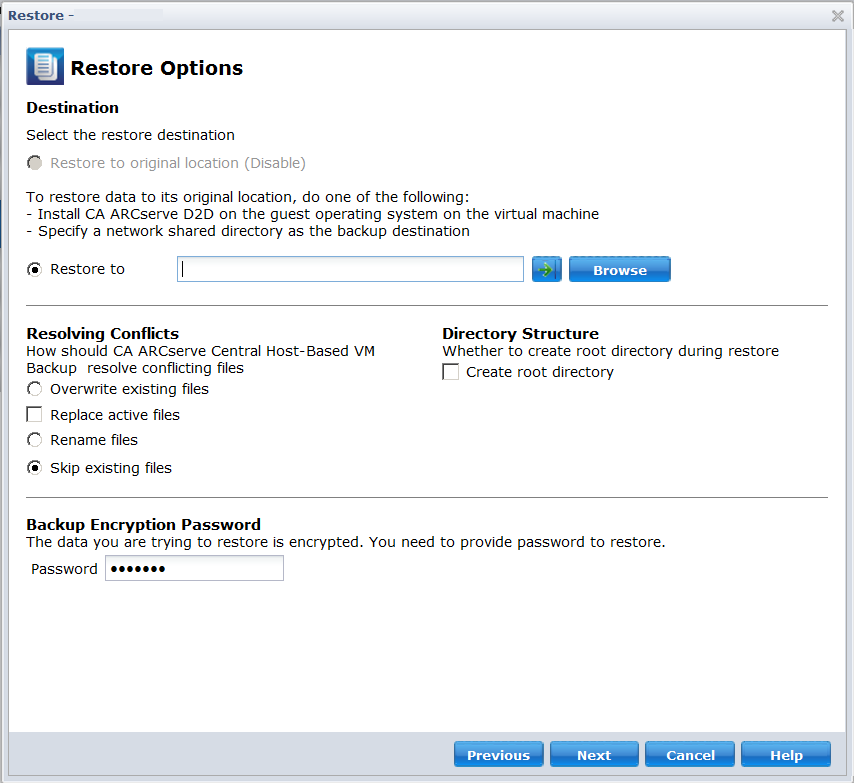
- On the Restore Options dialog, specify the restore destination.
- Restore to original location (disable)--for CA ARCserve Central Host-Based VM Backup sessions, you cannot restore to the original location. To restore files or folders to their original location in the Guest OS of a VM, you need to either install CA ARCserve D2D in the guest OS of the VM or restore to a network shared folder on the VM.
- Restore to--specify the destination you want to restore to.
- Overwrite existing files--Replaces files located at the destination.
- Replace active files--Replaces files in use or being accessed at reboot time.
- Rename files--Creates a new file if the file name exists. This option copies source files to the destination with the same file name but a new extension. Data is restored to the file with the new extension.
- Skip existing files--Skips over and does not replace existing files that are located on the destination. This is the default setting.
- Create root directory--Recreates the same root directory structure on the destination found in the backup image.
- Click Next. On the Restore Summary screen, verify that all options are correct. If not, click Previous to go back. If yes, click Finish to launch the restore process.
|
Copyright © 2012 CA.
All rights reserved.
|
|

