

|
|
|
Virtual Standby lets you update information about nodes that were added previously.
Note: You cannot update nodes that were imported from a CA ARCserve Central Host-Based VM Backup server.
Follow these steps:
From the Navigation Bar on the home page, select Node.
The Node screen displays.
The nodes that are associated with the group appear in the nodes list.
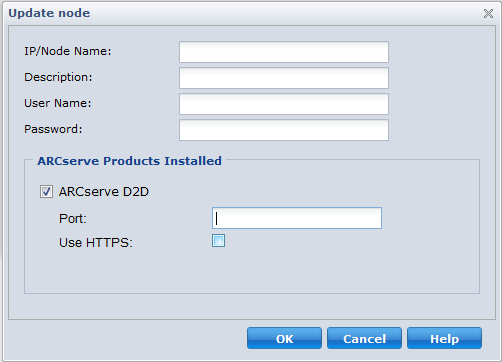
The Update Node dialog opens.
Note: To update all nodes in the node group, right-click the Node Group name and then click Update Node from the pop-up menu.
Note: To update multiple nodes on the Node list, select the desired nodes, right-click any node, and click Update Node from the pop-up menu. The user name and password are the same for all selected nodes. By default, the Specify new credentials option and the Take control of the node check box is selected. You can specify a new user name and password for the selected nodes and can force this server to manage the nodes. In addition, you can select Use existing credentials to apply the current user name and password. The fields become disabled.
The Update Node dialog closes and the nodes are updated.
Note: If changes were made to CA ARCserve D2D nodes, the Update Node dialog opens to let you specify more details.
The node is updated.
| Copyright © 2012 CA. All rights reserved. |
|