

Use the Browse Recovery Points option to restore from a recovery point. When you select a recovery date, all the associated recovery points for that date are displayed. You can then browse and select the backup content (including applications) to be restored.
Follow these steps:
The restore methods selection dialog opens.
The Browse Recovery Points dialog opens.
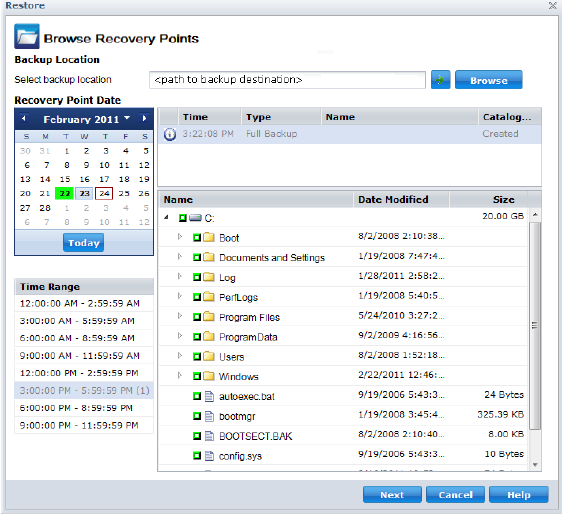
You can click the green arrow button to verify the connection to the specified location. If necessary, enter the Username and Password credentials to gain access to that source location.
The calendar view appears and all the dates containing recovery points for the specified backup source are highlighted in green.
The corresponding recovery points for that date are displayed, with the time of the backup, the type of backup that was performed (Full, Incremental, or Verify), and the name of the backup.
The backup content (including any applications) for the selected recovery point displays.
Note: A clock icon with a lock symbol indicates the recovery point contains encrypted information and may require a password for restore. If you have previously entered an encryption password for this recovery point, CA ARCserve D2D stores this password in a key management database. When called upon, this password is retrieved and applied to the recovery point to be restored. If the password cannot be retrieved, a pop-up dialog appears, requesting you to enter a valid password. (The password may not be retrieved if CA ARCserve D2D has been reinstalled or if you want to restore an old recovery point or a recovery point of another machine).
Note: For sessions that do not have catalog files, the first time you expand the volume node can take a long time. The length of time can increase due to the following reasons:
The Restore Options dialog Opens.
The recovery point and content to restore is specified.
|
Copyright © 2013 CA.
All rights reserved.
|
|