

You create the Central Host-Based VM Backup Integration scenario when you want to replicate the Arcserve created backup files.
Follow these steps:
The Welcome screen of the Scenario Creation Wizard is displayed.
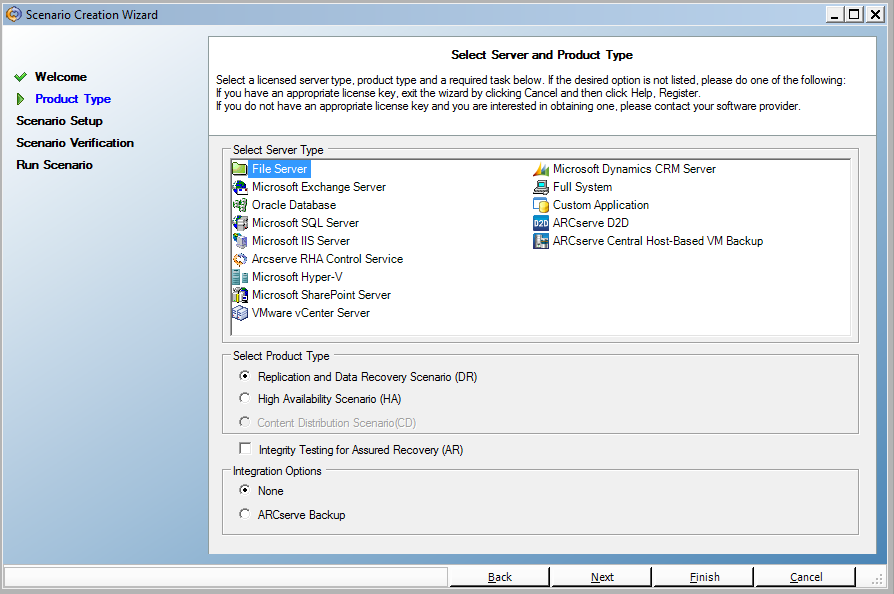
The Select Server and Product Type screen opens.
The Arcserve Central Host-Based Backup server credentials dialog opens.

The Arcserve Central Host-Based VM Backup Destination Host and Virtual Machine Selection screen opens.
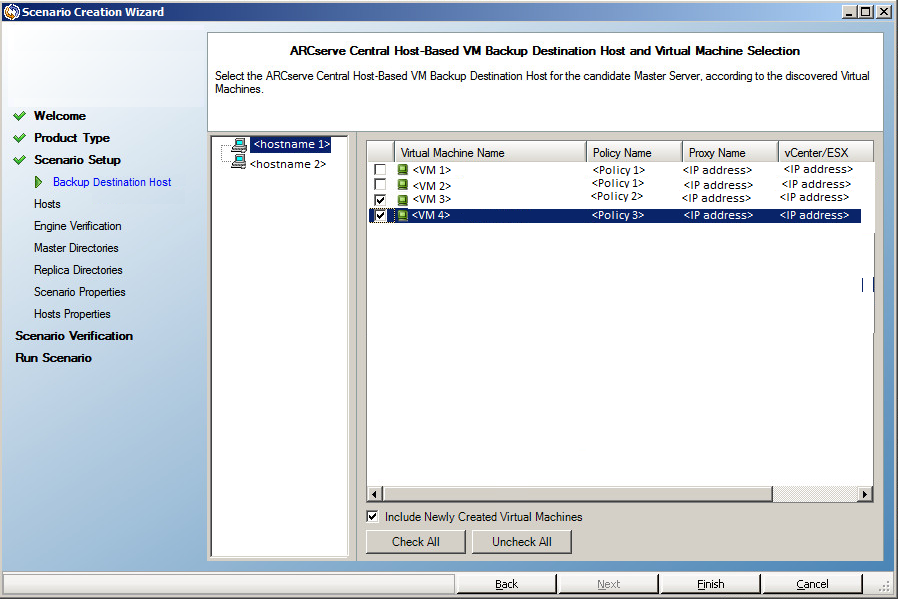
Arcserve RHA connects to the Central Host-Based Backup server to get the policy and display backup destination hosts and its virtual machines.
Include Newly Created Virtual Machines: Specifies that all sub folders in the main host backup folder are replicated when you run this scenario. Any newly created VM backup folders are also replicated. Only the folders for unchecked VMs are excluded. Those folders are marked as excluded folders. If you do not select this option, only the selected backup folders are replicated.
The backup files of the selected virtual machines are replicated when you run this scenario. These are the backup files that are created by Arcserve D2D.
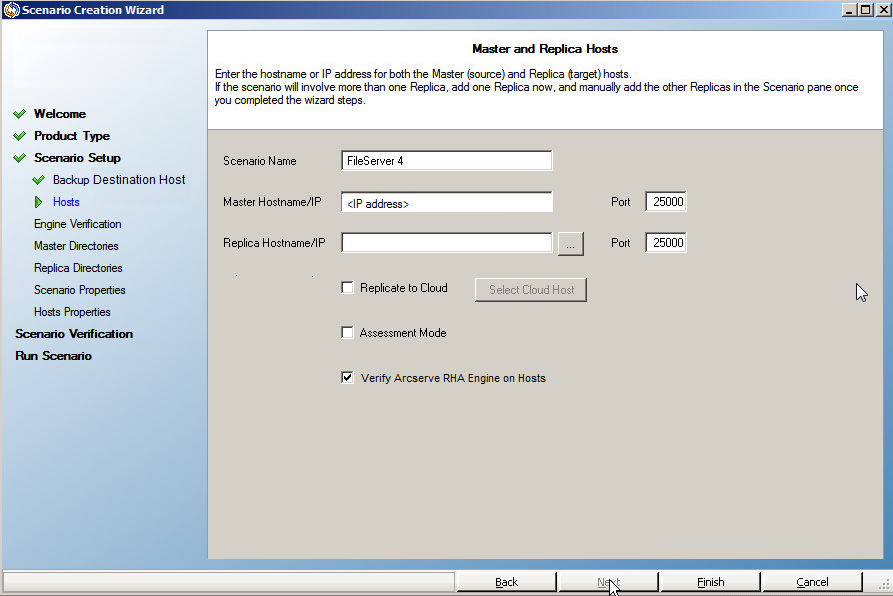
Scenario Name: Accept the default name or enter a unique name.
Master Hostname/IP: Automatically populated based your hostname selection.
Replica Hostname/IP: Enter the host name or IP address of the Replica server. This server is the target server. Use the Browse button to find one.
Port: Accept the default port number (25000) or enter new port numbers for the Master and Replica.
(Optional) Verify Arcserve RHA Engine on Hosts: Enable to verify whether the Engines are installed and running on the specified Master and Replica hosts.
The Engine Verification screen opens.
The Hosts Verification screen opens if you enabled the option, Verify the Arcserve RHA Engine on Hosts. The software verifies the existence and connectivity of the Master and Replica hosts specified on the previous screen.
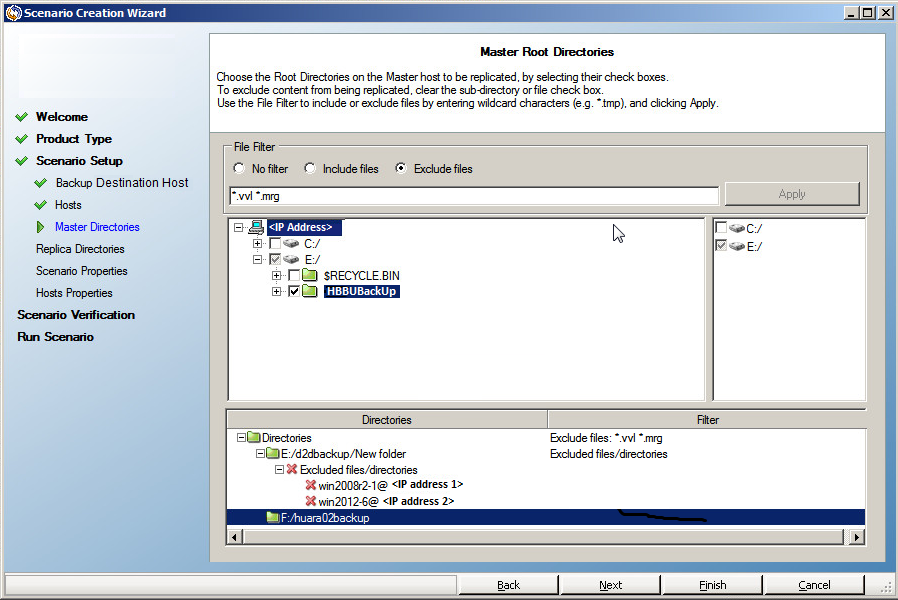
The Master Root Directories screen opens.
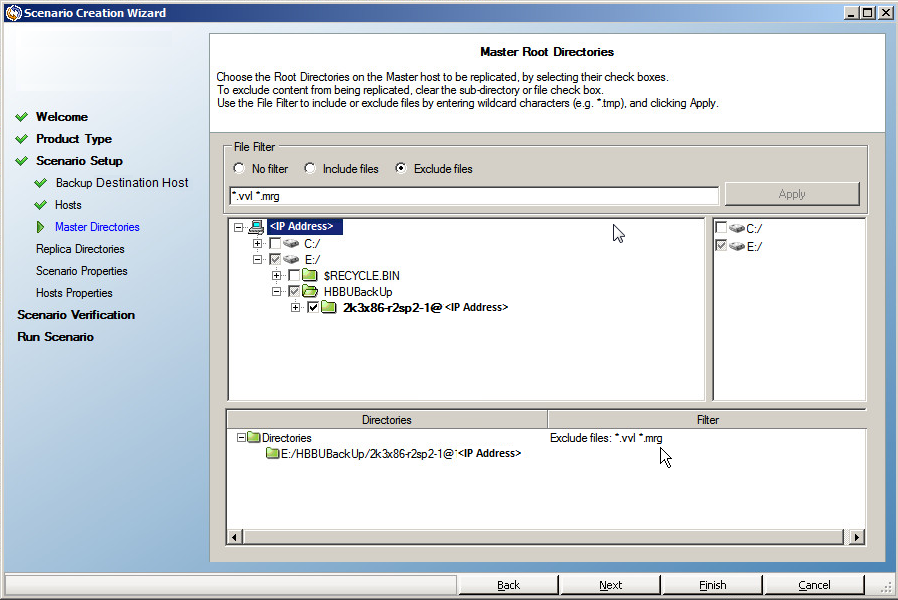
The RHA engine discovers the backup folders of the selected virtual machines. These backup folders are automatically selected.
Note: These folders are the backup folders that are created by Arcserve D2D.
When you select Include Newly Created Virtual Machines in the "Arcserve Central Host-Based VM Backup Destination and Virtual Machine Selection" screen, the main backup folder is selected for replication and the excluded folders are listed in the filter pane.
The Replica Root Directories screen opens.
The Scenario Properties screen opens.
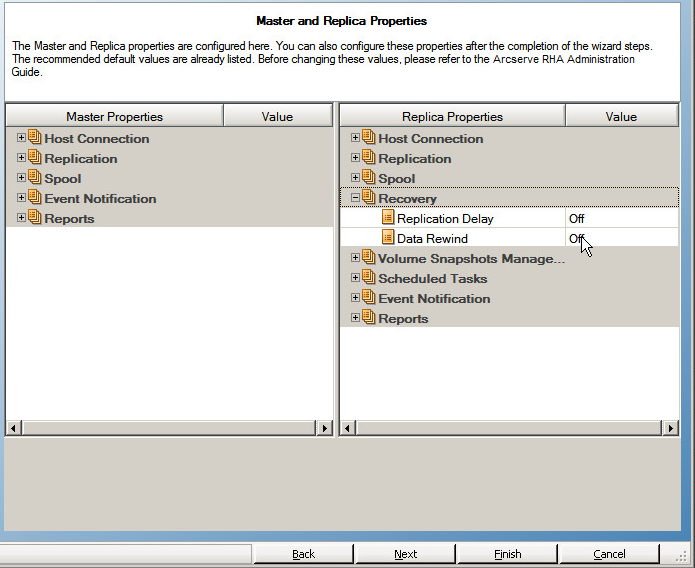
The Master and Replica Properties screen opens.
The Scenario Verification screen opens.
The software validates the new scenario and verifies the parameters for a successful replication. After verification completes, the screen opens, displaying any problems and warnings. The software permits you to continue even if warnings are displayed. Resolve any warnings if required.
The Scenario Run screen opens.
The Arcserve serve Host-Based VM Backup scenario is successfully created. Now you can run this scenario and back up virtual machine files that are created by Arcserve D2D.
|
Copyright © 2015 Arcserve.
All rights reserved.
|
|