VirtualBoot ShadowProtect Backup Images in vSphere
Important: If you are using vLCM Clusters, See vSphere VirtualBoot Remediation for vLCM Clusters before starting the VirtualBoot process.
To VirtualBoot a ShadowProtect SPX backup image in vSphere, follow these steps:
- Start SPX.
- Click
 (the VirtualBoot icon) or select Tools > VirtualBoot.
 - The wizard guides you through the VirtualBoot process.
- Click Add Image File to select your backup image.
- After selecting your backup image click Next.
- On the Select a hypervisor screen, click VMware vSphere (radio button) then click Next.
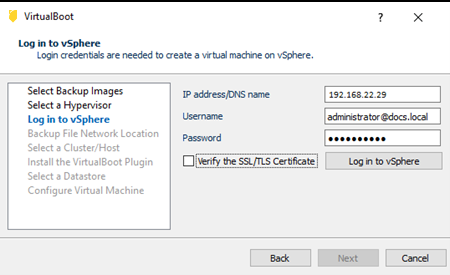
- Log into vSphere.
- Enter the IP address or DNS name.
- Enter the username.
- Enter the password.
- Uncheck the box for Verify the SSL/TLS Certificate.
- Click Log in to vSphere.
- Click Next.
-
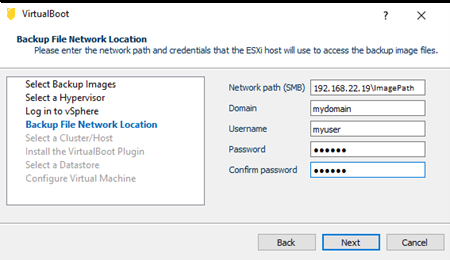
- Select the Backup File Network Location.
-
Important! This is telling the ESXi host where to find your backup images.
- Enter the full path to your backup files folder.
- Enter the Domain name if applicable.
- Enter the Username required to login to the machine where your backup images reside.
- Enter and confirm the password.
- Click Next.
-
- Select a Cluster or Host.
-
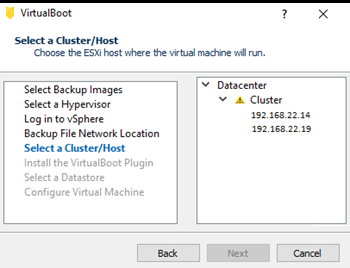
- Note: The yellow warning icon in the image above indicates that the plugin hasn't been installed on this cluster.
- To install the VirtualBoot Plugin, select one of the following:
- Install the VirtualBoot plugin from Arcserve
- Arcserve automatically provides the most up to date plugin if you select this option.
- Install the VirtualBoot plugin from this URL
- If you want to set up your own location for installing the VirtualBoot plugin, see the Install the VirtualBoot plugin from this URL section below.
-
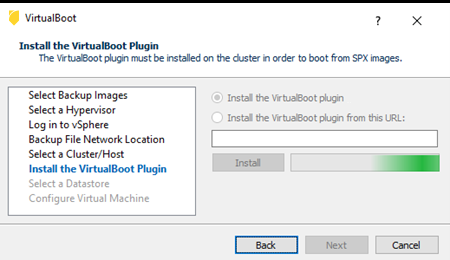
- Note: This window won't display if the plugin is already installed on the cluster (see step 7).
- Select a Datastore.
-
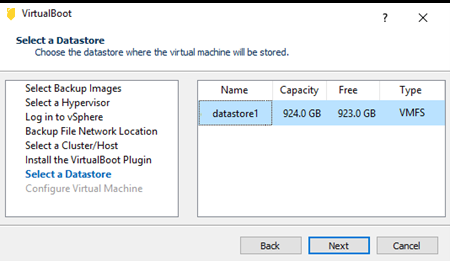
- Note: Only datastores available to the selected host are displayed in this menu.
- Configure the Virtual Machine.
- Enter a machine name for the virtual machine being created.
- Select the number of CPUs for the machine.
- Select the amount of memory you want.
- If you want a permanent virtual machine check the Migrate the data drive to vSphere box.
- If you don't want to automatically start the virtual machine after creating it, uncheck the box.
- Note: If both boxes are checked, the VM will not automatically start until the snapshot (backfill) is complete.
- The new virtual machine will start automatically if you check the "Automatically start the virtual machine" box.