Add a Remote Console
Add a remote console to replicate recovery points to a remotely managed recovery point server. You can use the remote console to create a Replication Plan to Send Data to the Destination Console. To manage the added remote console, see How to Manage a Remote Console.
Follow these steps:
- Log into the Arcserve UDP Console, and then click the resources tab.
- From the left pane, navigate to Destinations, and then click Remote Console.
- The Destinations: Remote Console page is displayed in the center pane.
- Click Add a Remote Console.
- The Add a Remote Console dialog appears.
- Enter the following details:
- Click OK.
-
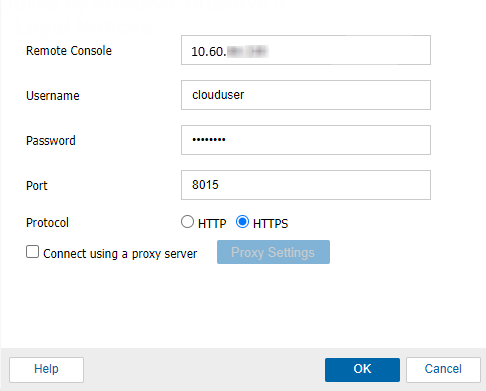
Remote Console
Refers to the IP address (example: 10.xx.xx.xx) or hostname (example: myarcserve.com) of the remote console machine.
Username
Refers to the user name that helps you log into the Remote Console.
Note: Use one of the following formats for the user name: Computer name, domain name/username, or username.
Password
Refers to password for the user name.
Port
Refers to the port number port number that connects to the web-based UI.
Default: 8015.
Protocol
Specify the protocol that you want to use to communicate with the destination server. The available selections are HTTP and HTTPS.
Note: For a more secure communication, select the HTTPS protocol.
Proxy Settings
Specifies the proxy server settings. Select the check box of Connect using a proxy server if you want to enable this option. If you select this option, you must also include the IP address (or machine name) of the proxy server and the corresponding port number that is used by the proxy server for internet connections. You can also select this option if your proxy server requires authentication. Then, you must provide the corresponding authentication information (Domain Name\Username and Password) that is required to use the proxy server.
The remote console is added successfully.