Ad-hoc Virtual Standby to Microsoft Azure
This section provides information about how to configure virtual machine settings for creating an Ad-hoc Standby VM to Microsoft Azure
Follow these steps:
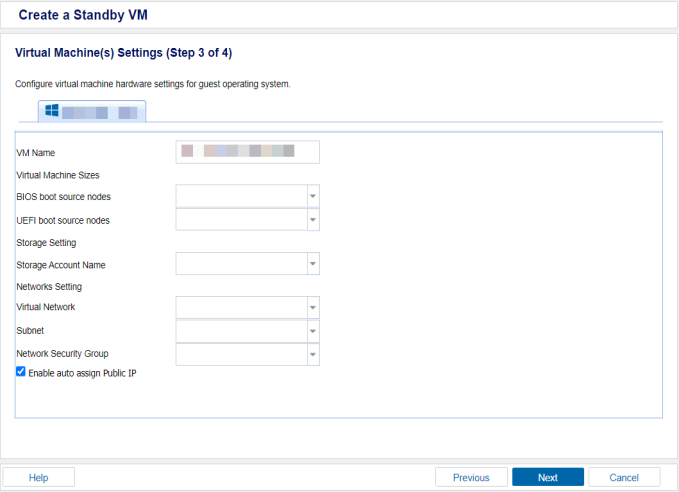
- On the Virtual Machine(s) Settings (Step 3 of 4) screen, specify the configuration details for the ad-hoc standby VM hardware.
-
- Click Next.
VM Name Prefix
Specify the prefix that you want to add to the display name for the virtual machine on the Azure.
Default value: UDPVM_
Virtual Machine Sizes
Microsoft Azure provides a wide selection of virtual machine sizes optimized to suit different use cases. These virtual machines have different CPU, memory, storage, and networking capacity combinations. For more information about virtual machine sizes and how they meet your computing needs, see Sizes for Windows virtual machine in Azure.
Note: Microsoft Azure supports both Generation 1 and Generation 2 VMs. Generation 1 (V1) VMs refer to MBR based source machines and Generation 2 (V2) VMs refer to UEFI based source machines.
BIOS boot source nodes
From the drop-down list, select the virtual machine sizes for the BIOS boot source nodes as needed.
UEFI boot source nodes
From the drop-down list, select the virtual machine sizes for the UEFI boot source nodes as needed.
Storage Account Name
Select a Storage Account Name. You should have a Storage Account Name in Azure. For Storage Account kind, either select Storage (general purpose v1) or StorageV2 (general purpose v2). For more information, see Storage account in Azure in the Microsoft documentation.
Virtual Network
Select a Virtual Network. You should have a Virtual Network in Azure. For more information, see Virtual Network in Azure in the Microsoft documentation.
Note:The IP address of the source machine cannot be inherited automatically into the Ad-hoc Standby VM.
Subnet
Select a Subnet according to selected Virtual Network. You should have a Subnet in Azure. For more information, see Subnet in Azure in the Microsoft documentation.
Network Security Group
Select a Network Security Group. You should have a Network Security Group in Azure. Configure the security group rules to open the related ports, including 3389 for remote desktop, 8014, 8015 for Arcserve UDP communication. For instructions, see Network Security Group in the Microsoft documentation.
Enable auto assign Public IP
When the auto assign public IP is enabled, the public IP will be assigned to Standby VM automatically when it is started in Azure.
The Summary screen appears.