Ad-hoc Virtual Standby to Microsoft Hyper-V
This section provides information about how to configure virtual machine settings for creating an Ad-hoc Standby VM to Microsoft Hyper-V.
Follow these steps:
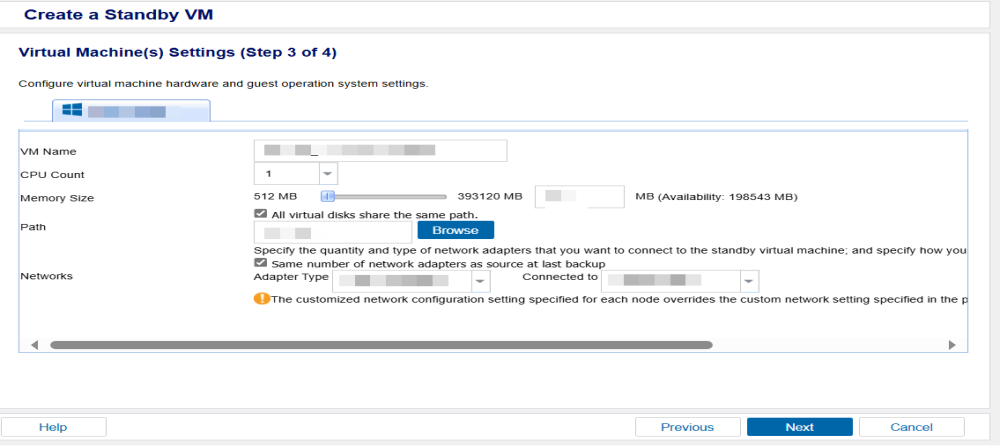
- On the Virtual Machine(s) Settings (Step 3 of 4) screen, specify the configuration details for the ad-hoc standby VM hardware.
-
- Click Next.
VM Name
Specifies the prefix you want to add to the display name for the virtual machine on the Hyper-V system.
Default value: UDPVM_
CPU Count
Specifies the minimum and maximum CPU count the standby virtual machine supports.
Memory Size
Specifies the total amount of RAM in MB to be allocated for the standby virtual machine.
Note: The amount of RAM specified must be a multiple of four.
All virtual disks share the same path
Select this option to specify the location on the Hyper-V server where you want to store the conversion data.
Clear the check box to specify the location on the Hyper-V server where you want to store the conversion data for each virtual disk.
Note: The Arcserve UDP solution does not support creating virtual disk images (VHD/VHDX files) on compressed volumes and volumes that are encrypted by the file system. If the path specified resides on compressed or encrypted Hyper-V volumes, Arcserve UDP prevents you from creating the Virtual Standby task.
VM Network
Specifies the adapter type and the network connection.
Lets you define the NICs, virtual networks, and paths that the Hyper-V server uses to communicate with the virtual machines.
Note: The IP address of the source machine cannot be inherited automatically into the Ad-hoc Standby VM.
Same number of network adapters as source at last backup
Select this option to define how to map the virtual NIC to the virtual network. Specify this option when the virtual machine contains virtual NICs and a virtual network.
Clear the check box to define the name of the virtual network that you want the NIC to use to communicate.
The Summary screen appears.