Ad-hoc Virtual Standby to Nutanix AHV
The Ad-hoc Virtual Standby machine is created by converting the recovery points to a Nutanix AHV machine format. Standby VM contains same data, same number of disks, and network configurations as Source node.
This section provides the information on how to create an Ad-hoc Virtual Standby Machine to Nutanix AHV.
Notes:
- The Virtual Standby task runs only if the backup task creates a valid recovery point snapshot.
- The Ad-hoc VSB sources will not be listed under Virtual Standby in the left pane of the resources tab.
Important! Verify if you have installed NGT for a VM on Nutanix AHV and restarted before importing the VM. Otherwise, Virtual Standby Agentless task fails to deploy and displays an error message.
Follow these steps:
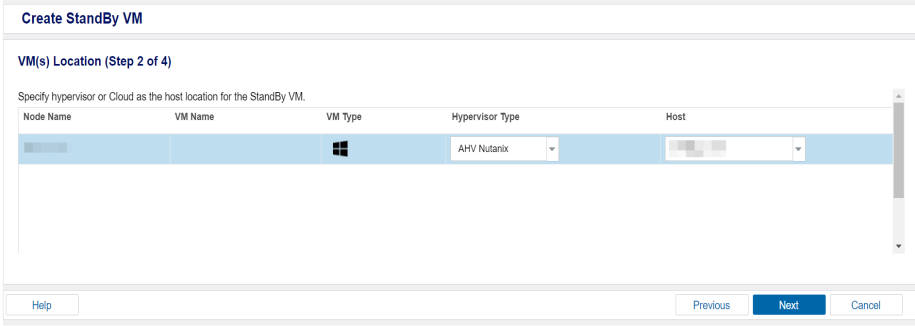
- On the VM(s) Location Step (2 of 4) screen, specify the hypervisor details for the ad-hoc standby VM.
- From the Hypervisor Type drop-down list, select Nutanix AHV as the hypervisor.
- From the Host drop-down list, select the existing hypervisor or add a new hypervisor.
- To add a new hypervisor, follow these steps:
- From the Host drop-down list, click +Add New Hypervisor.
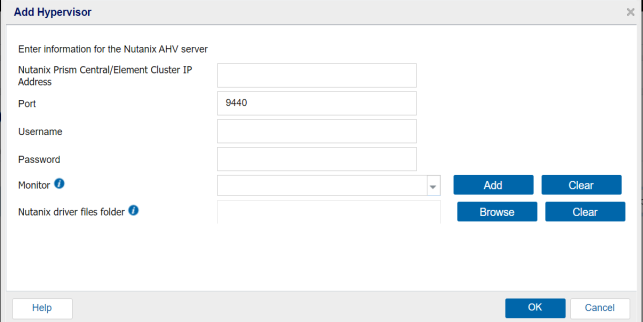
- On the Add Hypervisor dialog, specify the following details as needed, and then click OK:
- The monitor server must be virtual machine (Windows 2016 or higher version) in Nutanix AHV.
- You cannot use the backup source server as the monitor server.
-
- The new hypervisor is added as a host for Ad-hoc Standby VM.
-
- Click Next.
Nutanix Prism Central/Element Cluster IP Address
Specify the Nutanix AHV Cluster Virtual IP Address.
Username
Specify the username that is required to log into Nutanix AHV.
Password
Specify the password for the username that is required to log into Nutanix AHV.
Port
Specify the port to connect Nutanix AHV. The default value is 9440.
Monitor
Select a host name of the server that you want to monitor the status of the source server.
Notes:
If you have not added any Monitor server, then click Add. Then the Add Virtual Standby Monitor Server dialog opens. Specify the Hostname of monitor server and username, password, and then click OK.
Nutanix driver files folder
Select the folder where the Nutanix driver files are available on the monitor server. For more information, see Preparing and Selecting Nutanix Driver Folder.
The Virtual Machine(s) Settings screen appears.