How to Set Up the Arcserve Appliance
After the appliance restarts with the new hostname, the Unified Data Protection wizard opens. The wizard lets you create a basic plan to schedule backups. The plan lets you define the nodes that you want to protect and schedule when to run backups. The backup destination is the appliance Server.
Note: If Appliance is configured in Domain, complete the Appliance wizard configuration using the Administrator login as a domain user cannot configure the appliance wizard.
All the steps on the Arcserve Appliance Configuration wizard are optional, you can skip by clicking Cancel and directly open the UDP console and create plans.
Follow these steps:
- Log into the Arcserve UDP console.
- The Unified Data Protection wizard first opens and the Arcserve Appliance Management dialog appears. You can manage the UDP console either as a stand-alone instance or you can remotely manage from another UDP console. The remote console management function is useful when you are managing multiple UDP consoles.
-
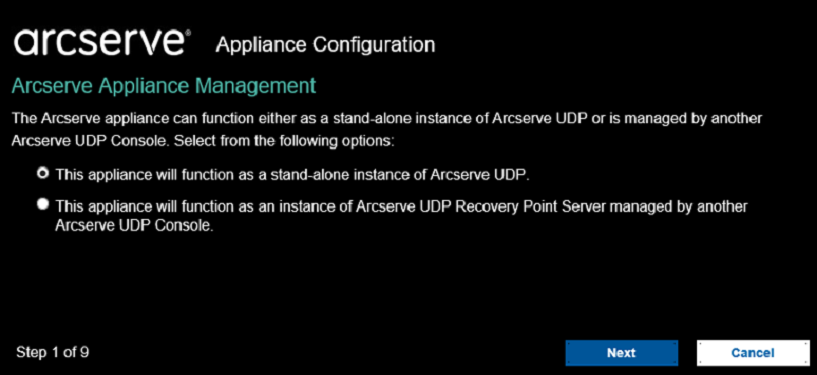
- Select whether you want to manage the appliance locally (default) or from another UDP console. If the appliance is managed from another UDP console, then specify the UDP console URL, username, and password.
- Click Next.
- The Data Stores dialog opens. A data store is a physical storage area on the appliance and is used as the destination for your backups.
- By default, Arcserve UDP creates a data store called <hostname>_data_store. This data store is deduplication and encryption enabled. For more information about deduplication and encryption, see Data Deduplication in Arcserve UDP Solutions Guide.
- Note: As the data store is encrypted, you must specify an encryption password.
-
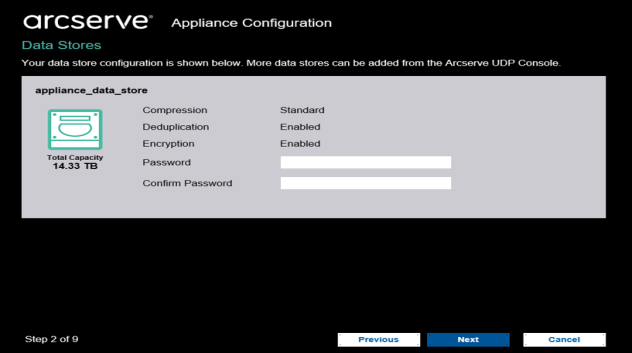
- Enter and confirm the encryption password for this data store.
- Click Next.
- The Email and Alert dialog opens. You can define the email Server that is used to send alerts and the recipients who would get the alerts. You can select options to get alerts based upon successful jobs, failed jobs, or both.
-
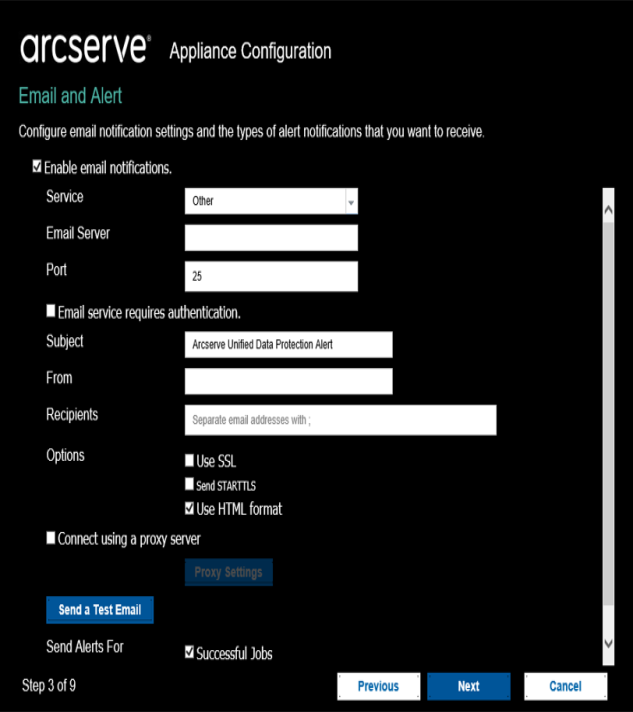
- Specify the following email and alert details:
Service
Specifies the email services such as Google Mail, Yahoo Mail, Live Mail, or Other.
Email Server
Specifies the email Server address. For example, for Google Server email, specify smtp.gmail.com.
Port
Species the email Server port number.
Requires Authentication
Specifies whether the email Server requires authentication. If yes, specify the account name and password for authentication.
Subject
Specifies the subject of the email that is sent to the recipients.
From
Specifies the email ID of the sender. The recipients will receive the mail from this sender.
Recipients
Specifies the recipients who will receive the alerts. You can use semicolons ";" to separate multiple recipients.
Options
Specifies the encryption method to use for the communication channel.
Connect using a proxy Server
Specifies the proxy Server user name and port number if you are connecting to the mail Server through a proxy Server. Also, specify a username and password if the proxy Server requires authentication.
Send a Test Email
Sends a test mail to the recipients. You can verify the details by sending a test mail.
- Click Next.
- The Replication to Remote RPS dialog opens.
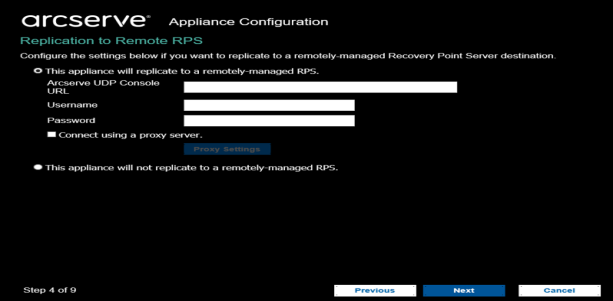
- Specify the following details if you want the appliance to replicate to a remotely-managed recovery point Server (RPS). For more information on a remotely-managed RPS, see Arcserve UDP Solutions Guide.
Arcserve UDP Console URL
Specifies the URL of the remote Arcserve UDP console.
Username and Password
Specifies the username and password to connect to the remote console.
Connect using a proxy Server
Specifies the proxy Server details if the remote console is behind a proxy Server.
- If you do not want the appliance to replicate to a remotely-managed RPS, select the This appliance will not replicate to a remotely-managed RPS option.
- Click Next.
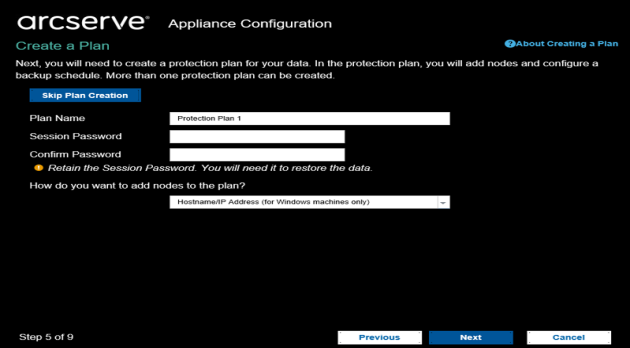
- The Create a Plan dialog opens. You can create a basic plan where you specify the nodes that you want to protect and the backup schedule.
-
- Note: If you do not want to create basic plans using the wizard, perform the following steps:
- Click Skip Plan Creation.
- The Next Steps dialog opens.
- Click Finish to open the UDP console and create plans.
- Specify the following details to create a plan:
Plan Name
Specifies the name of the plan. If you do not specify a Plan Name, the default name "Protection Plan <n>" is assigned.
Session Password
Specifies a session password. The session password is important and required when you restore data.
How do you want to add nodes to the plan?
Specifies the method to add nodes to the plan. Select one of the following methods:
- Hostname/IP Address
Refers to the method to manually add the nodes using host name or IP address of the node. You can add as many nodes as you want.
- Discovering Nodes from Active Directory
Refers to the method to add nodes that are in an active directory. You can first discover the nodes using the active directory details and then add the nodes.
- Importing from a vCenter/ESX Server
Refers to the method to import virtual machine nodes from ESX or vCenter Servers. This option lists all the virtual machines that are discovered on the provided host name or IP address.
- Importing from a Hyper-V Server
Refers to the method to import the virtual machine nodes from Microsoft Hyper-V Servers.
After you select a method, specify the details on each dialog.
- Hostname/IP Address
- After the nodes are added to your plan, click Next.
- The Backup Schedule dialog opens.

- Enter the following schedule:
- Arcserve UDP agent install or upgrade schedule: The latest version of the Arcserve UDP agent is installed on source nodes that do not have the agent installed. Any previous agent installations is upgraded to the latest version.
- Incremental backup schedule: A full backup is performed for the first time, and then incremental backups are performed.
- Note: If the time of backup is scheduled before the time of install/upgrade, then the backup is automatically scheduled for the next day. For example, if you schedule the agent installation for Friday at 9:00 PM and backup schedule for 8:00 PM, then the backup is performed on Saturday at 8:00 PM.
- Cancel Plan Creation: To cancel the plan that you just created, click Cancel Plan Creation.
- Click Next.
- The Plan Confirmation dialog opens.
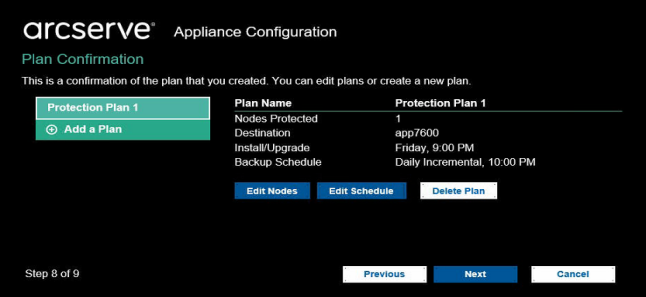
- From the dialog, review the details of your plan. If necessary, you can edit the nodes or the schedule by clicking Edit Nodes or Edit Schedule, or you can add or delete a plan.
Edit Nodes
Modifies the source nodes you want to protect.
Edit Schedule
Modifies the backup schedule.
- After verifying the plans, click Next.
- The Next Steps dialog opens.
- You have successfully completed the configuration and you are now ready to work in the Arcserve UDP Console. You can add more nodes to protect, customize plans with features such as virtual standby, and add more destinations by including Recovery Point Servers and Data Stores.
-
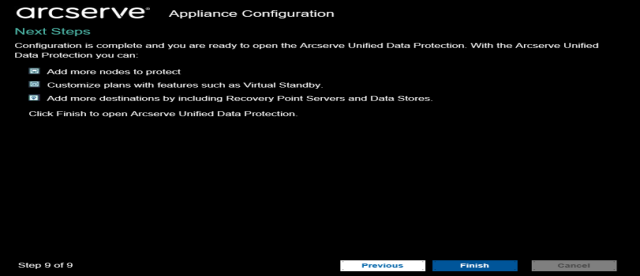
- Click Finish to exit the wizard and open the Arcserve UDP Console.
Note: To log into the UDP console using domain credentials, see Assigning Admin Privileges and Roles to a Domain User.