How to Configure OAuth 2.0 Authentication for Office 365/Outlook Mail
This section provides information about how to configure OAuth 2.0 authentication for Office 365/Outlook Mail.
Follow these steps:
- Log into the Azure Portal.
- If you have access to multiple tenants, click the Directories + subscriptions filter in the top menu to switch to the tenant in which you want to register the application.
- To register an application, follow these steps:
- To navigate to the App registrations page, do one of the following:
- From the left pane, select Microsoft Entra ID, and then click App registrations.
- Search for App registrations in the search bar, and then select App registrations.
- On the Arcserve- App registrations page, click New registration.
-

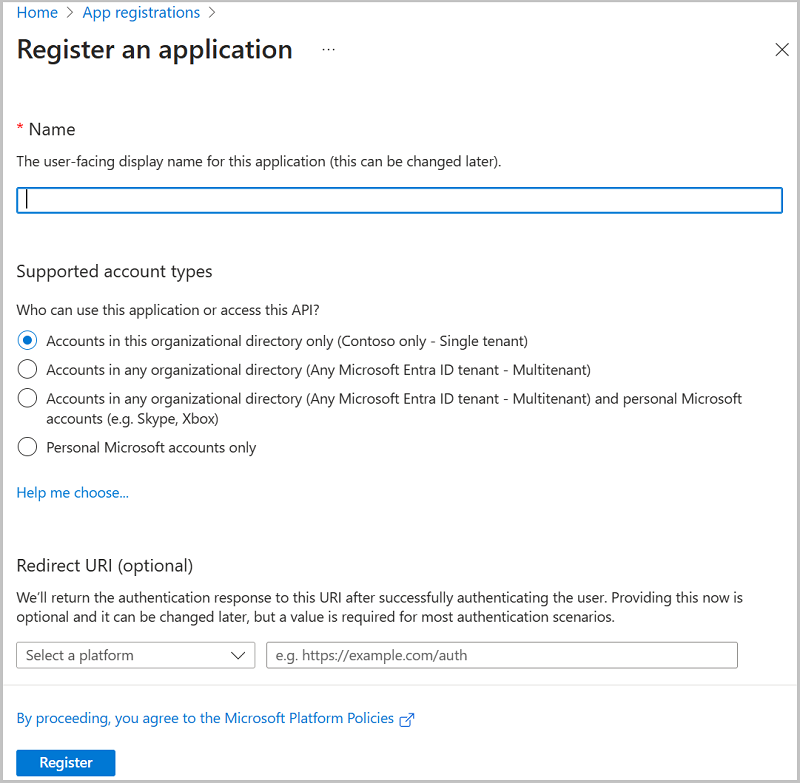
- On the Register an Application page, do the following, and then click Register:
- Name - Enter a display name for the application.
- Supported account types – Select the Accounts in any organizational directory (Any Microsoft Entra ID tenant - Multitenant) and personal Microsoft accounts (e.g. Skype, Xbox) option as a supported account type.
-
- After the registration is completed, the app registration's Overview page appears and displays the Application (client) ID. Use the client ID for email settings in UDP application.
-
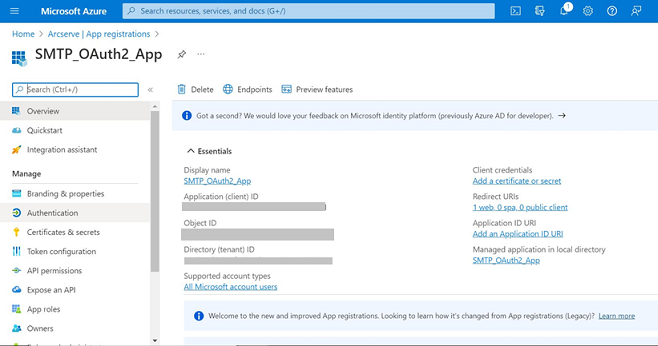
- The application is registered successfully.
- To configure platform settings, do the following:
- Under Manage, select Authentication.
- On the Authentication page, click Add a platform.
- On the Configure platforms dialog, under Web applications, select the Web box.
-

- Under redirect URIs, specify the following redirect URIs, and then click Configure:
- https://localhost:8015/management/oauth2callback/
- https://localhost:8014/WebServiceImpl/oauth2callback/
- Notes:
- Configure the redirect URIs based on the domain name and port used for logging in.
- Redirect URIs must start with https or http://localhost. The http protocol is supported only for localhost URIs.
-

- Click Save to complete the platform configuration.
- Notes:
- When you add the redirect URI for the first time and click Configure, the platform settings get saved automatically, and the Save button remains disabled.
- After you click Configure and try to add another redirect URI on the Platform configurations page, the Save button gets enabled. Click Save to save the settings.
- The platform settings are configured successfully.
- To get the client secret, follow these steps:
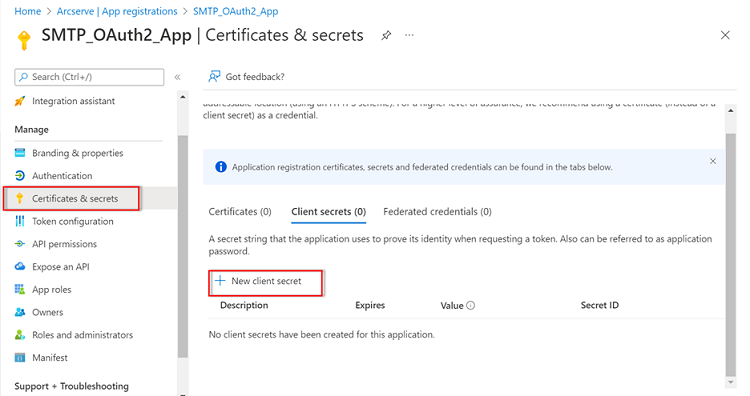
- Under Manage, select Certificates & secrets.
- On the Certificates & secrets page, click New client secret to add a new client secret.
-
- On the Add a client secret page, enter a description, select an expiry interval from the drop-down list as needed, and then click Add.
-
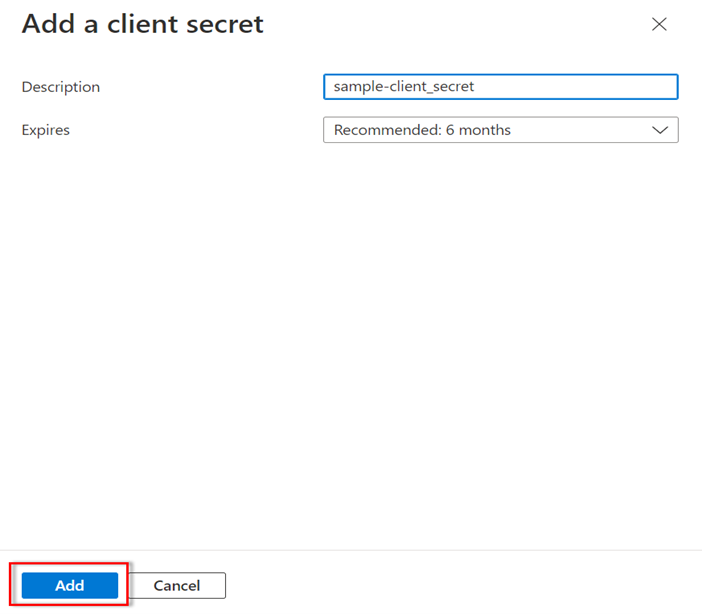
- Note: We recommend that you select the 24 months option as the expiry interval to avoid generating the client secret repeatedly.
- The client secret value displays.
-
Important! Copy and save the client secret value as you cannot retrieve it later. If you forget to save the value, delete the existing client secret, and create a new client secret as mentioned in step 6.
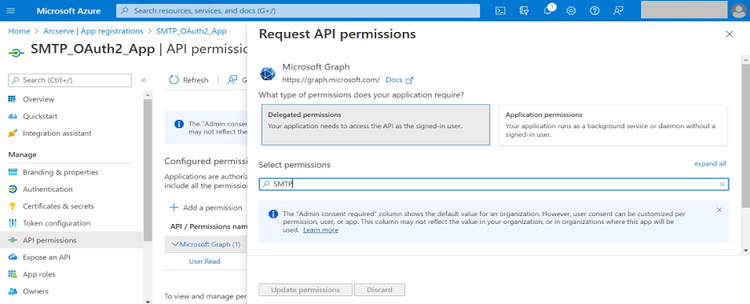
- To configure API permissions, follow these steps:
- Under Manage, select API permissions.
- On the API Permissions page, click Microsoft Graph.
- On the Request API permissions dialog, select the Delegated permissions box.
-
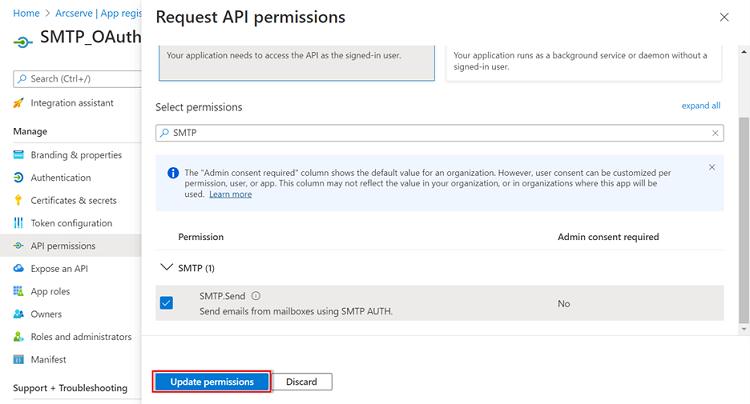
- Select the SMTP.Send and offline_access permissions, and then click Update permissions.
-
- To grant admin consent to the SMTP permission, click Grant Admin Consent for <tenant name>.
-

- Note: The Grant admin consent for <tenant name> option is enabled only if you have enabled the SMTP authentication for the mailbox to be used. You can enable (or disable) SMTP authentication for each mailbox in the Microsoft 365 admin center. For more information about how to enable SMTP authentication for the mailbox, see Enable SMTP Authentication.
- A confirmation message appears.
- Click Yes on the confirmation dialog.
- After configuring all the required Microsoft Entra ID application settings, go to UDP application, and then navigate to settings > Email and Alert Configuration. To configure email alerts, see How to Configure Email and Alert.
The admin consent is added successfully for the required permissions.
The OAuth 2.0 authentication is configured successfully for Office 365/Outlook Mail.