How to Manually Install the Microsoft NFS Client on a Windows Server
This section provides information about how to manually install the Microsoft NFS client on a Windows server.
Follow these steps:
- Log into the Windows server.
- Open the Server Manager, go to Manage, and then click Add Roles and Features.
-

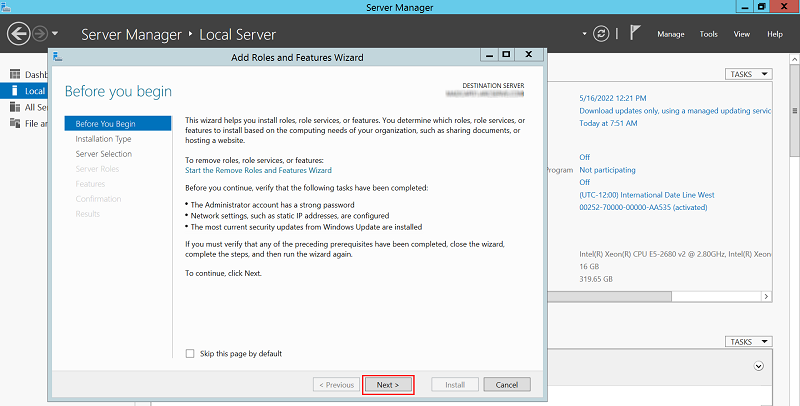
- On the Before you begin page, click Next.
-
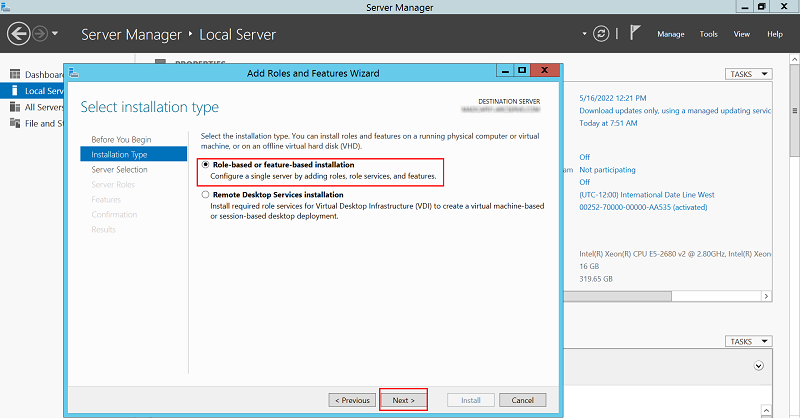
- On the Select installation type page, select the Role-based or feature-based installation option, and then click Next.
-
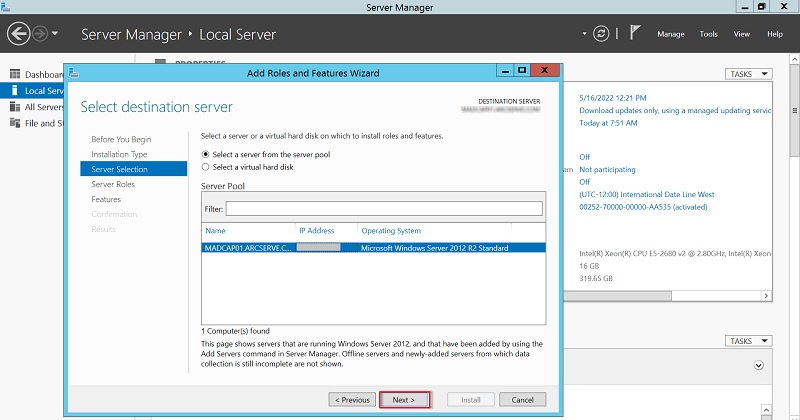
- On the Select destination server page, select a server from the server pool on which you want to install the Network File System for Server role service, and then click Next.
-
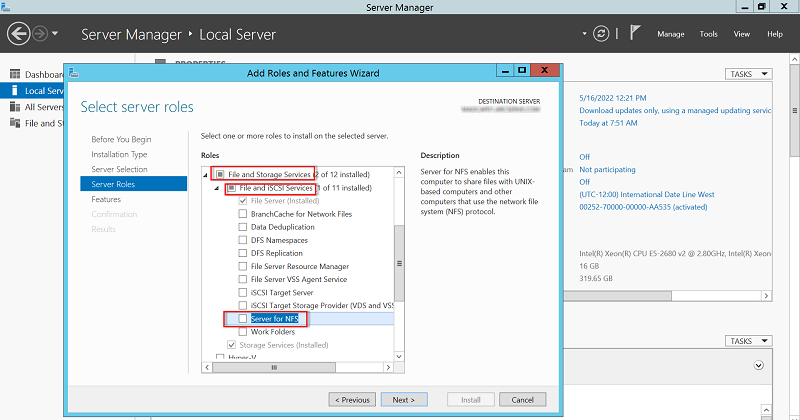
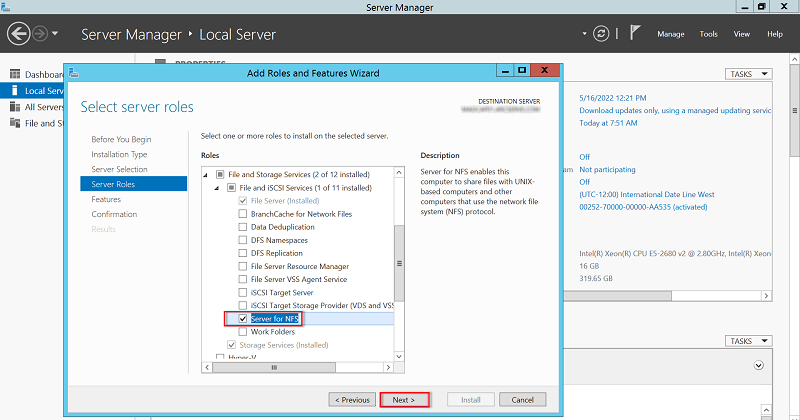
- On the Select server roles page, navigate to File and Storage Services > File and iSCSI Services, and then select the Server for NFS check box.
-
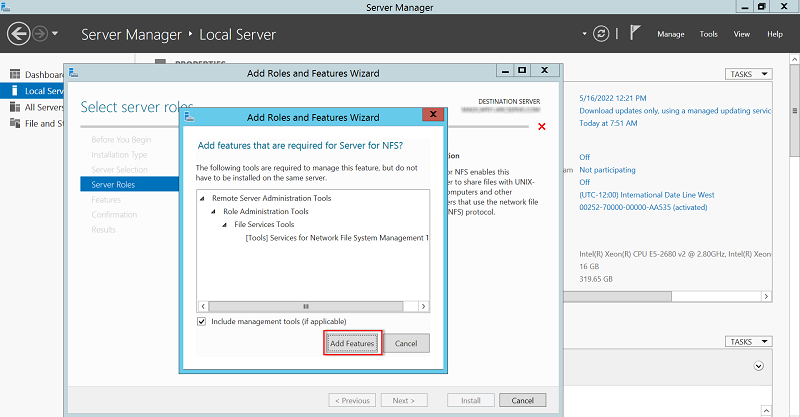
- On the Add Roles and Features Wizard dialog, to include required features and management tools the NFS server needs, click Add Features.
-
- Make sure the Serve for NFS check box is selected, and then click Next.
-
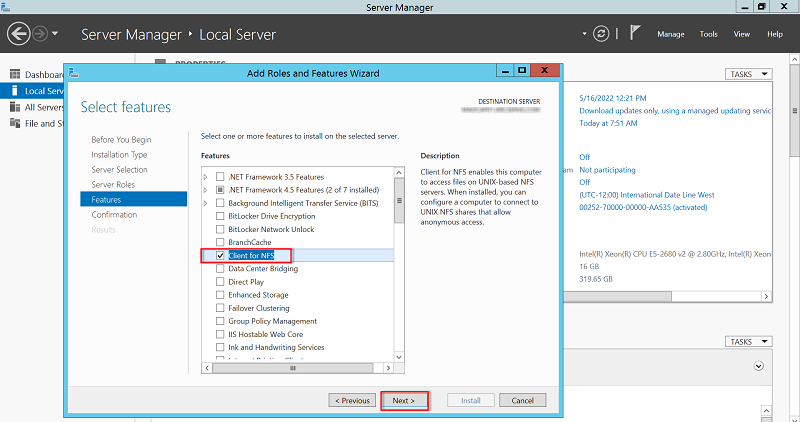
- On the Select features page, select the Client for NFS check box, and then click Next.
-
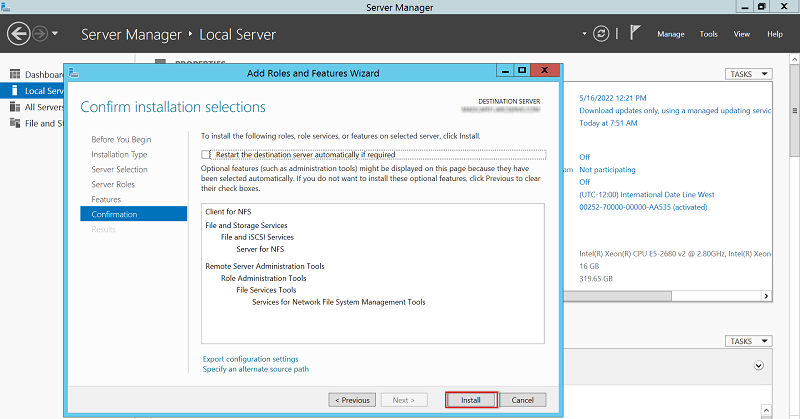
- On the Confirm installation selections page, review your selections, and then click Install.
-
- After the installation is completed, review the results, and then click Close.
- Note: After the successful installation of NFS server on Windows Server, create the NFS share. To create the NFS share, see How to Create the NFS Share on Windows Server.