Define the Restore Options
After you specify a recovery point and content to restore, define the copy options for the selected recovery point.
Note: For SQL granular level restore from the recovery points that are backed up from any VM using the Host-based backup, only the database file dump is supported.
Follow these steps:
- On the Restore Options page, select the restore destination, and then click Next.
- Note: If the data you attempt to restore is encrypted, provide the password as needed.
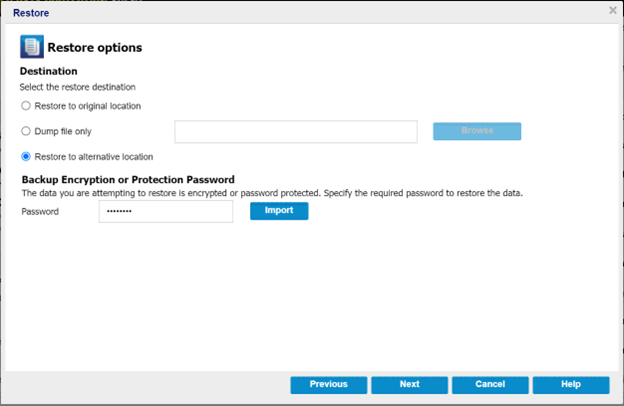
- The available options are as follows:
- The Restore - Job level Options page appears.
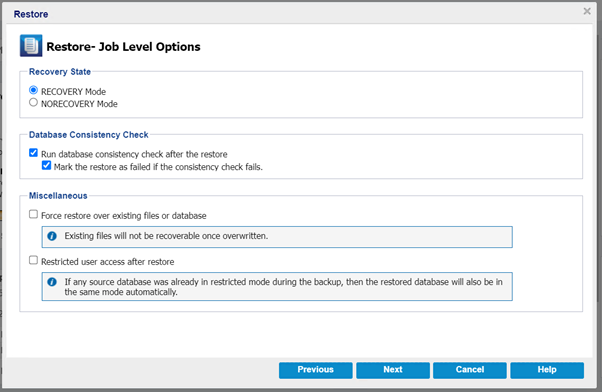
- On the Restore - Job level Options page, do the following, and then click Next:
- Recovery State
- RECOVERY Mode: By default, this option is enabled. It makes the SQL database online to allow data recovery and provides you permission to access the restored database. For an example of restoring to the original location using RECOVERY Mode, see RECOVERY Mode Example.
- NORECOVERY Mode: The database transitions to a ‘RESTORING’ state to prevent users from accessing the database. To restore the last backup and bring the database online for usage, use the RECOVERY Mode option. For an example of restoring to the original location using NORECOVERY Mode, see NORECOVERY Mode Example.
- Database Consistency Check
- To make sure that the database is consistent after a restore, select the Run database consistency check after the restore checkbox. This option checks the physical and logical integrity of objects in an SQL Server database. The Mark the restore as failed if the consistency check fails option indicates when the restore job fails if the database consistency check fails for the selected database.
- Miscellaneous
- Force restore over existing files or database: This option overwrites the existing database files located at the restore destination. Not selecting this option for an existing database file can make the restore incomplete. You can skip this option when the database file is new.
- Restricted user access after restore: This option restricts access to the database file for a specific group of users such as sysadmin, dbcreator, and/or db_owner. These users have permissions to modify the database.
- Note: If the source database was already in the restricted mode during the backup, the restored database automatically stays in the same mode.
-
- Do one of the following based on the restore destination selected:
- On the Restore Options- Original Location page, to configure or change the configuration at a database level, click the Configure button.
-
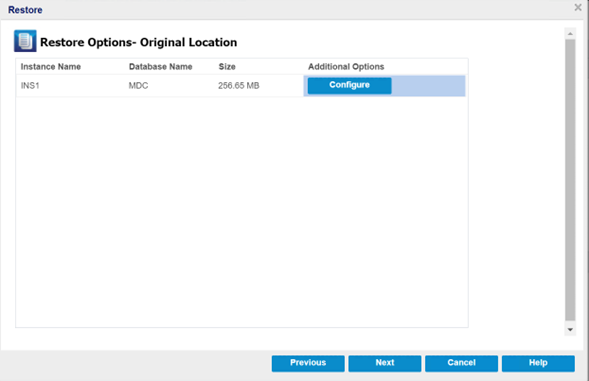
- The Additional Database Options dialog appears.
- Verify and make any changes to the database options, as needed, and then click OK to return to the Restore Options- Original Location page.
- Click Next.
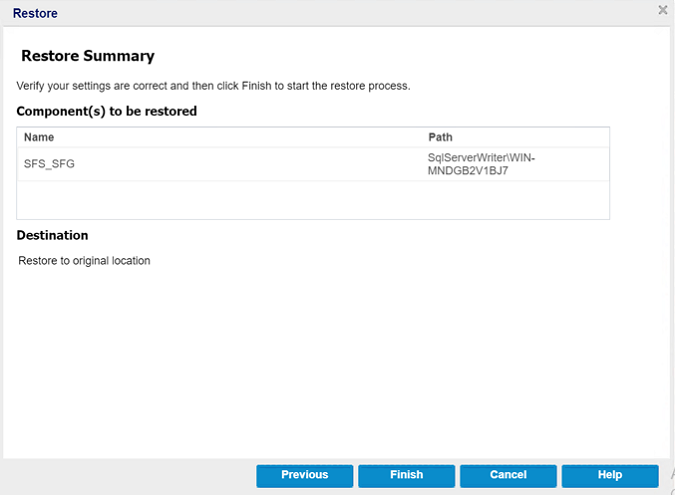
- The Restore Summary page appears.
- To start the restoring process to the original location, click Finish.
-
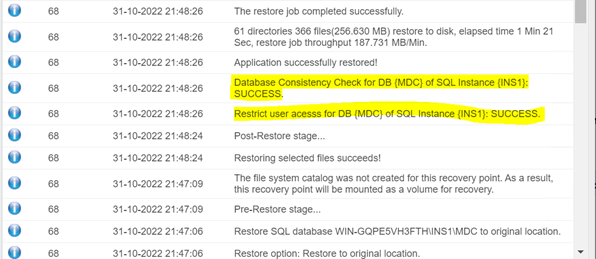
- After the restore finishes, view the restore status in the Activity Log.
-
- On the Restore Options- Alternate Location page, click the Destination Instance Name drop-down list to view the size and the FileStream enabled status of the selected database.
- Note: If a database is FileStream Enabled, the Destination Instance Name field lists only FileStream Enabled servers. However, if the FileStream is not enabled, the Destination Instance Name displays both FileStream enabled and disabled databases.
- To rename the database, type the New Database Name as needed.
-
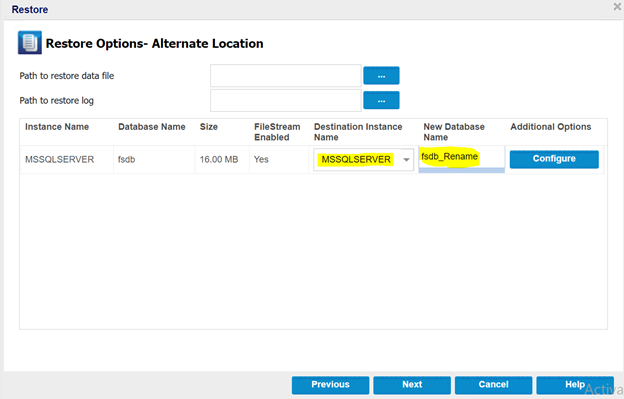
- To configure or change the configuration at a database level, click the Configure button.
- The Additional Database Options dialog appears.
- In the Recovery Options tab, verify and make any changes to the database options, as needed.
- In the Database Settings tab, do the following:
- To select the Destination Location, click the Browse (…) button.
- Note: When you change the destination location, it also updates the destination for all the database files.
- Under File Name Settings (Optional), you can change the file names partially or fully. To replace the file name, provide the original file name in the Destination File Name Substring field and the new file name in the Replace With field.
- Click Apply to make the changes.
- Note: The new file names appear under the Destination File Name column.
-
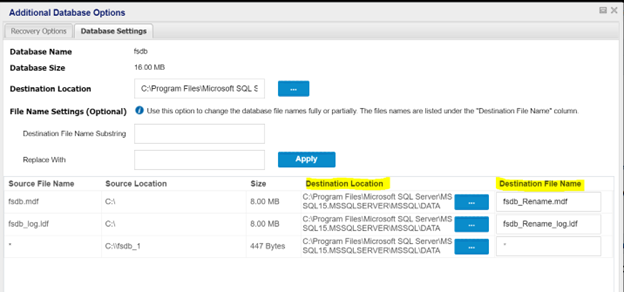
- Click OK to return to the Restore Options- Alternate Location page.
- Click Next.
- The Restore Summary page opens.
- Verify if the settings are correct, and then click Finish to start the restore process.
-
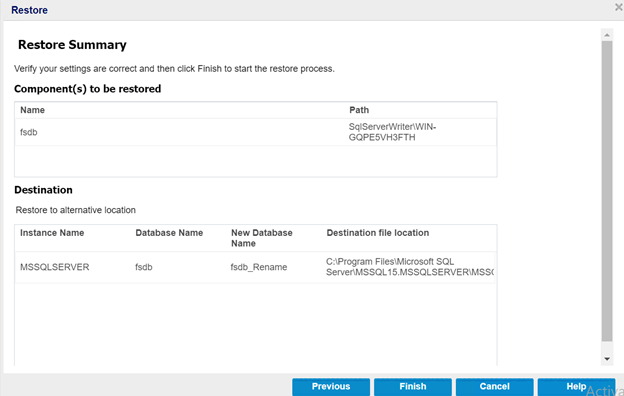
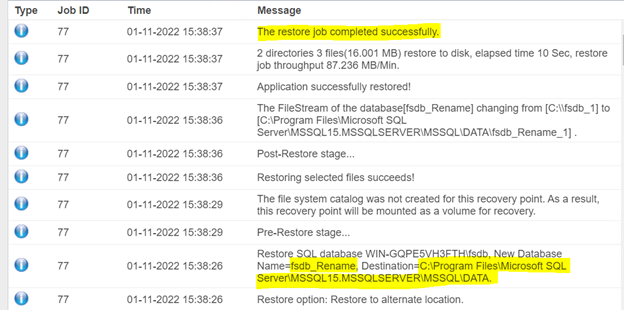
- After the restore finishes, view the restore status in the Activity Log along with the rename of the database.
-
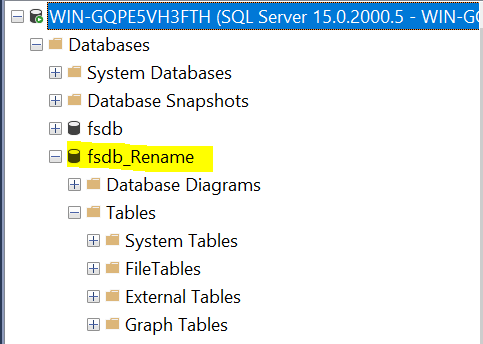
- The change in the database name reflects in the SQL Management Studio.
-
Restore to original location
Restores to the original location from where the backup image was captured.
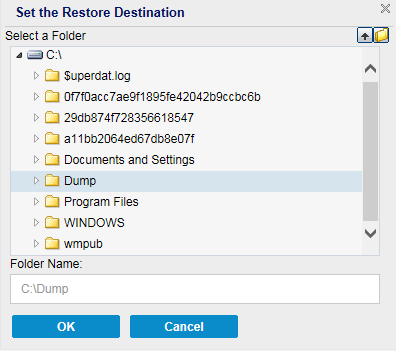
Dump file only
For this option, Arcserve UDP Agent (Windows) dumps the selected Microsoft SQL database files to the specified folder. When you select this option, you can specify or browse to the folder location where the dump file needs to be restored.
Restore to alternative location
Restores to an alternate location (not the original location).
