Configuring Multi-Factor Authentication as Admin User
This section provides information about how to configure multi-factor authentication for all users.
Follow these steps:
- Log into the Arcserve UDP Console using admin credentials.
- Go to Settings > User Management.
-
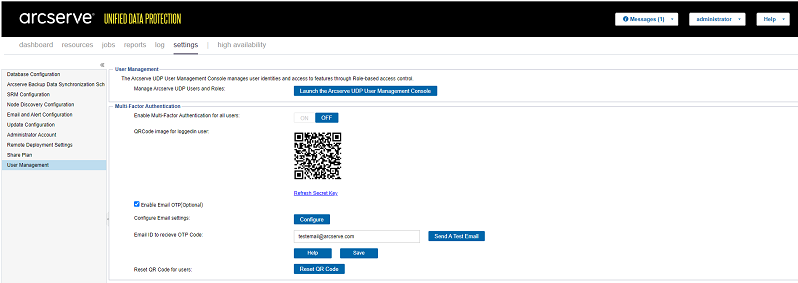
- To enable multi-factor authentication for all users, under the Multi-Factor Authentication section, turn the setting ON.
- The QR code image for logged-in user appears.
- Note: If you want to disable multi-factor authentication for all users, turn the setting OFF.
- To generate the TOTP, scan the QR code image using an authenticator app.
- Notes:
- You can use any of the mobile authenticator apps such as Google Authenticator App or Microsoft Authenticator App on your mobile device. Alternatively, you can also use the Authenticator extension on your Chrome browser.
- To generate new TOTP, under the QR code image, click the Refresh Secret Key link.
- When you use an authenticator app for multiple user accounts, the hostname of the user account differentiates TOTPs. On the authenticator app, you can view hostname and respective TOTP.
-

- (Optional) If you want to enable email OTP, select Enable Email OTP (Optional) and then do the following:
- For configuring the email settings, click the Configure button.
- The Email Settings dialog appears.
-

- On the Email Settings dialog, do the following, and then click OK:
- Mail Server: Type the address of the email server.
- Port: Type the port number for the email server.
- If the specified email server requires authentication, select the Requires Authentication check box.
- Account Name: Type the user name or email address of the specified email server.
- Password: Type the password to authenticate.
- From: Type the sender's email address as needed.
- If the specified email server requires STARTLS protocol command, select the Send STARTLS check box.
- For Email ID to receive the OTP Code, type one or more email addresses.
- Note: You must provide an email address to receive the OTP during login process. If you want to provide multiple email addresses, use semicolons (;) to separate them.
-

- To check whether the configured email addresses are receiving OTP, click Send A Test Email.
- Click Save.
- A Confirm dialog appears.
- Note: The confirm dialog appears to restart the Identity service only when you configure, modify, or remove the email settings.
- On the Confirm dialog, to restart the Identity service, click Yes.
- After the Identity service is restarted, refresh the browser. This is required for the email settings to apply.
To reset QR code, see How to Reset QR Code.