

Using the RDX Cleaner Utilities › How to Execute the RDX Cleaner Utility
How to Execute the RDX Cleaner Utility
Before you can use the RDX Cleaner utility, you must download a copy of the utility from the file transfer site.
Follow these steps:
- Download the appropriate RDX Cleaner utility from the file transfer site:
- X64 Platform - RDXCleanerX64.exe
- X86 Platform - RDXCleanerX86.exe
- Copy the appropriate version of the RDX Cleaner utility to your local machine (for example C:\) or to any location you specify.
- From the Arcserve UDP Agent (Windows) home page (or Arcserve UDP Agent (Windows) Monitor), select Settings from the taskbar and then select the Backup Settings tab. When the Backup Settings dialog opens, select Pre/Post Backup.
The Pre/Post Backup Settings dialog opens.
- In the Actions section, specify your pre/post backup setting options:
- Select the Run a command before backup is started check box.
- Enter the path to the location where you downloaded the RDX Cleaner utility in the command field. For example:
- C:\RDXCleanerX64.exe
- C:\RDXCleanerX86.exe
- Select the On exit code check box and enter a zero in the On exit code field.
Note: The exit code corresponds to the completion status of the RDX Cleaner command. A zero (0) exit code specifies to run the backup job only when the RDX Cleaner utility successfully completes the deletion of the backup destination content.
- Select Run Job.
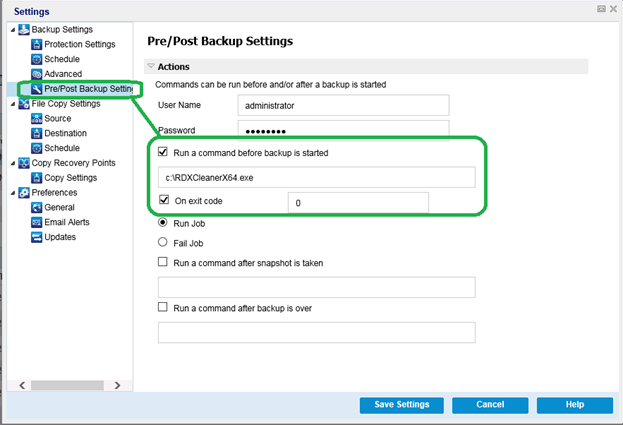
- Click Save Settings.
Your pre/post backup settings are saved.
Note: For information about running this utility, see Post Cleaning Verification (RDX Cleaner).
Copyright © 2016 .
All rights reserved.
|
|