Previous Topic: Troubleshooting OverviewNext Topic: Glossary


Pre-requisites to download patches from Patch Manager

Edit the APMClient.xml file

  1. Navigate to "%ProgramFiles(x86)%\CA\SharedComponents\APM\PatchManager" (64-bit machines) and “%ProgramFiles%\CA\SharedComponents\APM\Patch Manager" (32-bit machines).
  2. Open APMClient.xml file.

    The following image represents the current APMClient.xml file.
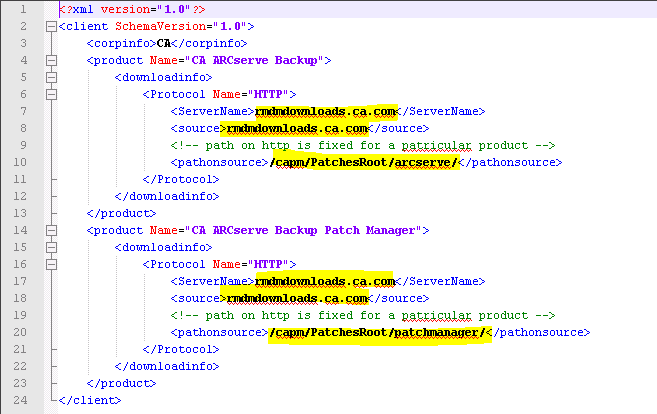
  3. Change highlighted part of the text in APMClient.xml file as following:
    1. For the product "CA ARCserve Backup", replace the path in the pathonsource tag.

    Existing Code:

    	<pathonsource>/capm/PatchesRoot/arcserve/ </pathonsource>
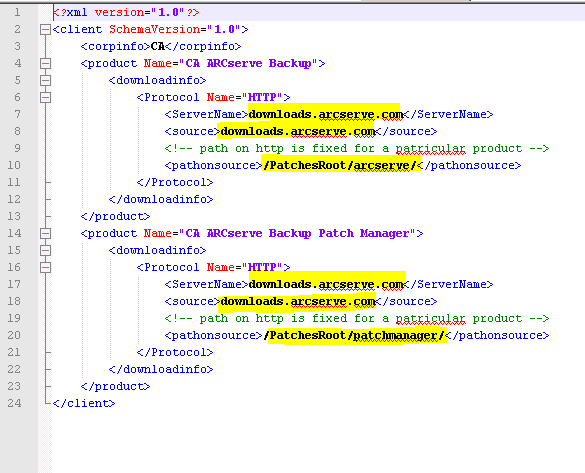
    

    New Code:

    	<pathonsource>/PatchesRoot/arcserve/</pathonsource>
    
    1. For product "CA ARCserve Backup Patch Manager", replace the path in the pathonsource tag.

    Existing Code:

    	<pathonsource>/capm/PatchesRoot/patchmanager/</pathonsource>
    

    New Code:

    	 <pathonsource>/PatchesRoot/patchmanager/</pathonsource>
    
    1. Replace the address in the <ServerName> tag.

    Existing Code:

    	<Server Name> rmdmdownloads.ca.com </Server Name>
    

    New Code:

    	<Server Name>downloads.arcserve.com</Server Name>
    
    1. Replace the address in the source tag.

    Existing Code:

    	<source> rmdmdownloads.ca.com </source>
    

    New Code:

    	<source>downloads.arcserve.com</source>
    
    1. Restart Patch Manager after performing the changes.

    The following image represents the edited APMClient.xml file.

Replace Commandbase.dll file on all the Patch Manager Clients and Staging Server

Follow the steps below after editing the APMClient.xml file.

  1. Click on the following link to download the new CommandBase.dll file.

    http://arcserve.vo.llnwd.net/v1/PatchesRoot/arcserve/PatchManager.zip

  2. Extract PatchManager.zip and navigate to the folder of the version of the Arcserve Backup that you are using on your computer.
  3. Rename CommandBase.dll.USA to CommandBase.dll from the appropriate folder of Arcserve version you are running.
  4. Stop the "CA ARCserve Backup Patch Manager" service from Windows Services.

  5. Replace the old CommandBase.dll file with the new CommandBase.dll file that you have renamed in Step 3 in the folder, “%ProgramFiles(x86)%\CA\SharedComponents\APM\Patch Manager” (64-bit machines) or “%ProgramFiles%\CA\SharedComponents\APM\Patch Manager" (32-bit machines).
  6. Restart the "CA ARCserve Backup Patch Manager" service.

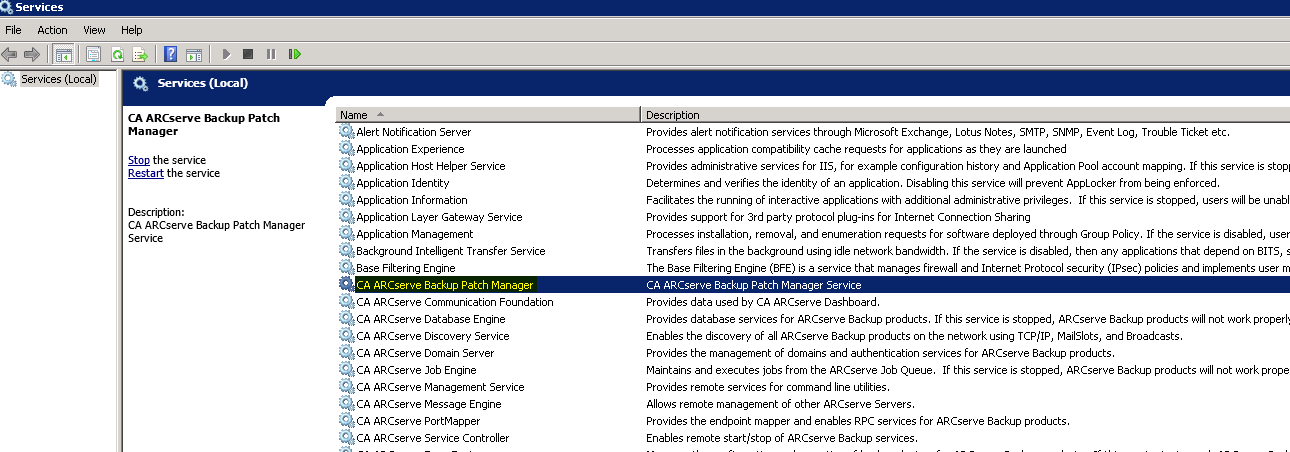
Configure the Staging Server

  1. Navigate to Control Panel, Administrative Tools and open IIS Manager on Staging Server and browse to Default Website.
  2. Right click on Default Web Site and add a virtual directory by clicking on Add Virtual Directory.
  3. In Alias text field type “PatchesRoot” and select the physical path as “C:\Program Files (x86)\CA\SharedComponents\PatchesRoot” (64-bit machines) or “C:\Program Files \CA\SharedComponents\PatchesRoot” (32-bit machines).