

|
|
|
On Windows Server 2008 systems, use the Failover Cluster Management utility to prepare MSCS cluster resources.
Note: On Windows Server 2008 systems, the utility is named Failover Cluster Management. On Windows Server 2008 R2 systems, the utility is named Failover Cluster Manager. The steps that follow describe how to prepare cluster resources on Windows Server 2008 systems.
To prepare MSCS cluster resources on Windows Server 2008 systems
The High Availability Wizard, Before You Begin dialog opens.
The Failover Cluster Management window opens.
The Select Service or Application dialog opens.
The Client Access Point dialog opens.
Click Next.
The Select Storage dialog opens.
Click Next, and then click Finish.
The cluster resource is prepared.
You can install CA ARCserve Backup in an MSCS cluster-aware environment using the installation wizard.
To install CA ARCserve Backup in an MSCS cluster-aware environment
Note: If the CA ARCserve Backup Installation Browser does not appear, run Setup.exe from the root directory on the installation media.
From the right column on the Product Installation Browser, click Install CA ARCserve Backup for Windows.
The Prerequisite Components dialog opens.
Be aware of the following behavior:
Note: If you are installing CA ARCserve Backup on the active node in a cluster-aware environment, the cluster resources are transferred from the active node to the passive node while the active node restarts. After the active node restarts, you should transfer the cluster resources back to the original active node.
The following list describes dialog-specific information about installing CA ARCserve Backup.
When you select the remote installation option, you can install CA ARCserve Backup on multiple systems.
With remote installations, the target remote systems can consist of different ARCserve server types, different CA ARCserve Backup agents and options, or both.
Note: The setup program for cluster machines does not support remote installation of the CA ARCserve Backup base product or the CA ARCserve Backup agents. This remote install limitation for the CA ARCserve Backup agents (for example, the Agent for Microsoft SQL Server and the Agent for Microsoft Exchange Server) only applies if you use a virtual host. Remote installation of CA ARCserve Backup agents using the physical hosts of clusters is supported.
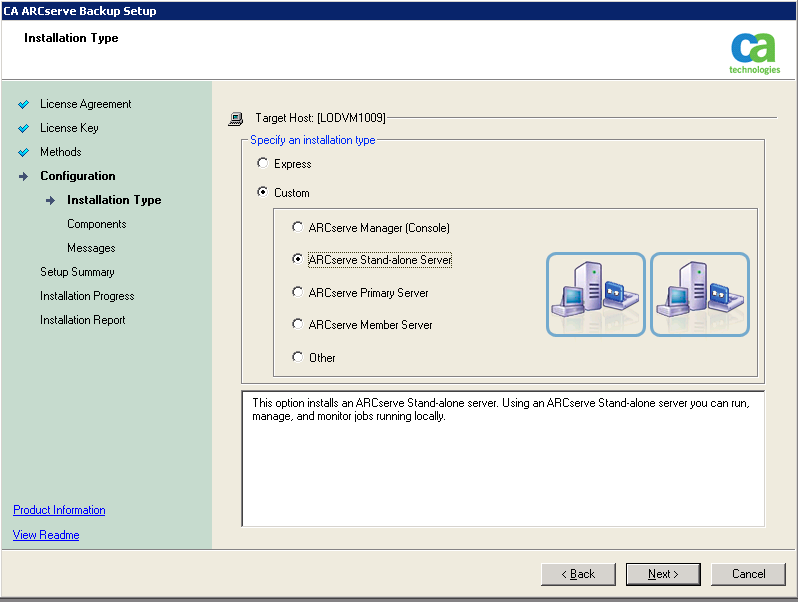
Lets you specify the type of CA ARCserve Backup components that you want to install, by selecting either the Express or Custom installation type.
Note: When you upgrade from a previous release, the installation wizard detects your current ARCserve configuration and selects the Installation/Upgrade type that is appropriate for your new installation. For more information, see Types of CA ARCserve Backup Server Installations and CA ARCserve Backup Server Options.
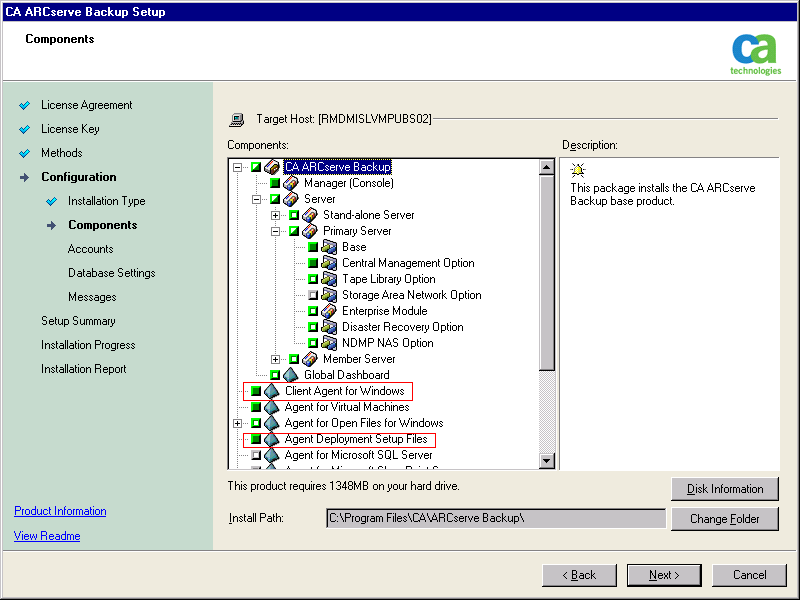
Lets you specify the CA ARCserve Backup components that you want to install on the target system.
Be aware of the following considerations:
- Member Server and supported options
- Agent for Open Files
- Agent for Virtual Machines
- Client Agent for Windows
- Disaster Recovery Option
The following diagram illustrates the default installation path for the Client Agent for Windows and Agent Deployment is specified:
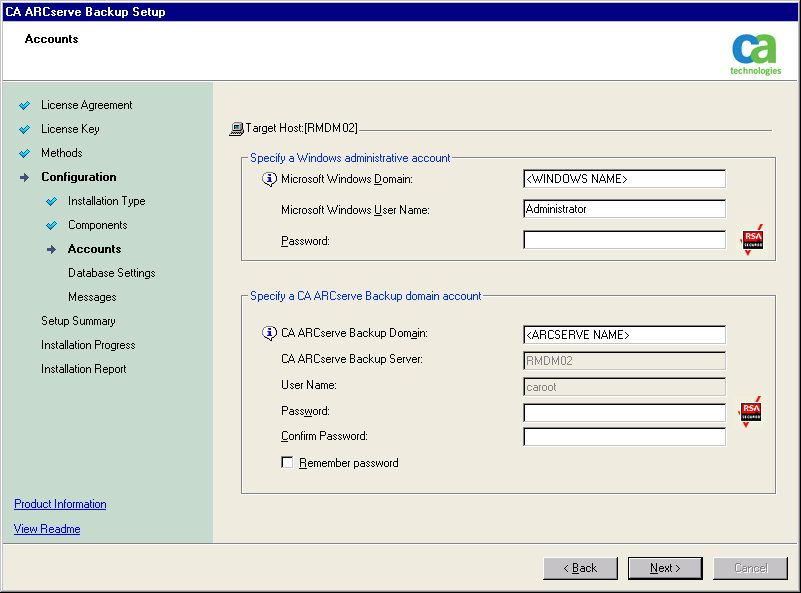
Lets you set up your CA ARCserve Backup accounts.
If Setup detects a cluster-aware application running in your environment, and you want to install CA ARCserve Backup in the cluster-aware environment, check the Cluster Environment Installation option and specify the path to the shared disk where you want to install CA ARCserve Backup.
Note: CA ARCserve Backup server names and CA ARCserve Backup domain names cannot exceed 15 bytes. A name totaling 15 bytes equates to approximately 7 to 15 characters.
The Cluster Setting dialog opens only if Setup detects that you are installing CA ARCserve Backup into a cluster-aware environment. You must complete all fields on this dialog to continue.

For Cluster Installations, be aware of the following database installation considerations:
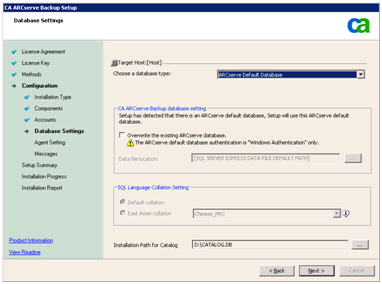
Lets you configure the CA ARCserve Backup database.
After you specify a database application (ARCserve Default Database or Microsoft SQL Server) complete the required fields on this dialog and click Next.
Note: If you protect data that contains Unicode-based characters from East Asian languages (for example, JIS2004) you must enable SQL collation to ensure that CA ARCserve Backup can search and sort the data. To do this, click East Asian collation and then select a language from the drop-down list.
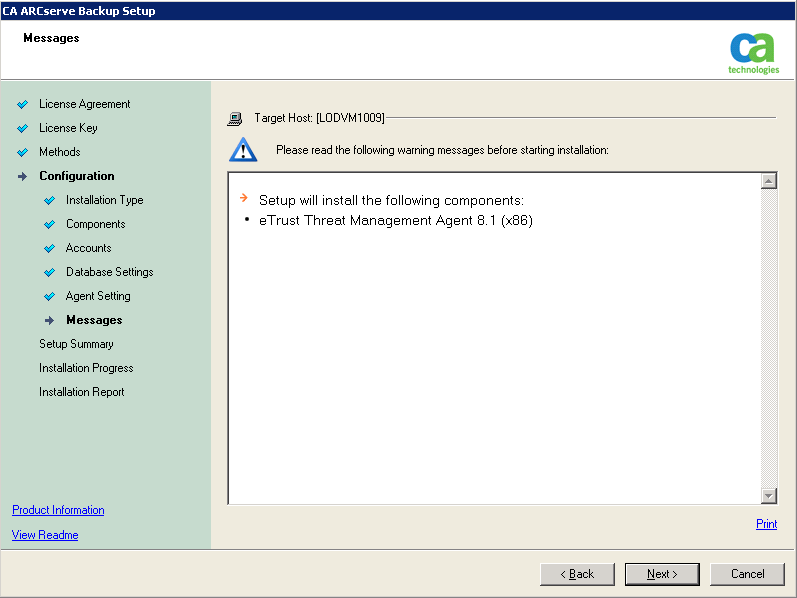
As you review the messages in the Messages dialog, you should attempt to resolve the problems at this time.
The following dialog illustrates the Messages dialog:
To modify the components that you want to install, click Back as often as necessary to return to the dialog containing the installation options that you want to change.
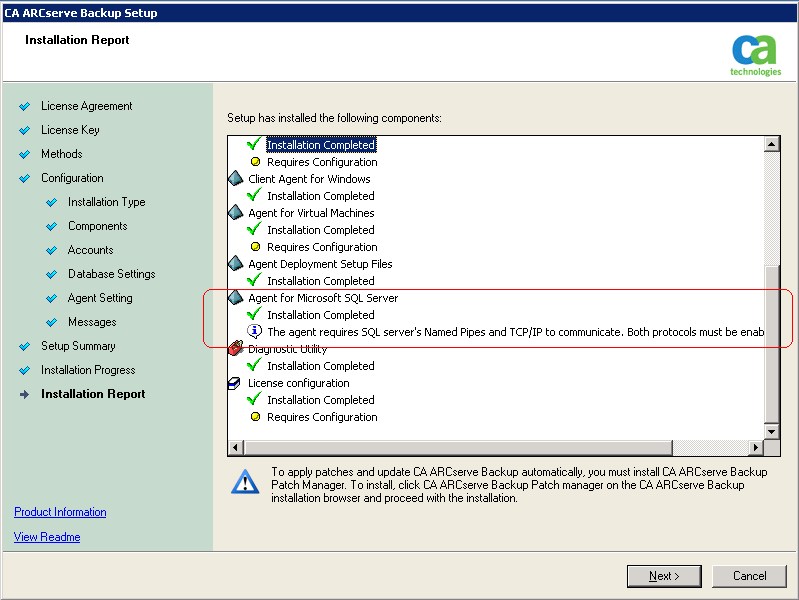
If any components you select require configuration, Setup displays the necessary configuration dialogs at the end of the installation. You can configure the component immediately or configure it later using Device Configuration or Enterprise Module Configuration. For example, if you are using a single-drive autoloader that requires configuration, Setup lets you start Device Configuration by double-clicking the message for it on the Install Summary dialog.
The diagram that follows illustrates the Installation Report dialog. The Agent for Microsoft SQL Server requires configuration.
Note: You may be required to restart the server after you install CA ARCserve Backup. This depends on whether all of the files, services, and registry settings have been updated on the operating system level.
If any components you select require configuration, Setup displays the necessary configuration dialogs at the end of the installation. You can configure the component immediately or configure it later using Device Configuration or Enterprise Module Configuration. For example, if you are using a single-drive autoloader that requires configuration, Setup lets you start Device Configuration by double-clicking the message for it on the Install Summary dialog.
To enter license keys, locate the components, agents, and options that you are installing, select the Use License Key option, and enter the license key for the component.
Click Continue to close the License Verification dialog.
Note: Repeat Steps 1 to 5 to install CA ARCserve Backup on the passive node.
Be aware of the following:
Cluster Administrator is a utility provided by Microsoft and is installed on servers that have MSCS installed. From the Cluster Administrator, you perform most of the configuration and management tasks associated with clusters.
| Copyright © 2011 CA. All rights reserved. | Tell Technical Publications how we can improve this information |