

Arcserve Backup lets you back up D2D/UDP recovery points and stores the data on Arcserve Backup media. The D2D/UDP Recovery Points are stored on Arcserve Backup media as raw sessions.
Arcserve Backup lets you recover Arcserve UDP data at file, folder, and application level granularity with respect to Microsoft SQL Server and Microsoft Exchange Server applications. However, if you want to recover individual email messages from the mailbox from Exchange GRT enabled backups, recover the raw sessions to the D2D/UDP server, and then use D2D/UDP to recover the individual email messages from the Exchange GRT sessions from the D2D/UDP server. To recover individual email messages, open the D2D/UDP home page and browse the recovered raw session to locate the objects that you want to recover.
The raw sessions can also be used to perform bare metal recovery (BMR) of D2D/UDP servers. Using the raw sessions, the BMR process is a two-phased approach:
Note: For information about recovering files and folders and performing BMR on D2D/UDP servers, see the D2D/UDP documentation.
Be aware of the following:
Example: E:\restore is the alternative location.
E:\restore\VSTORE\<original session number>\
E:\restore\CATALOG\<original session number>\
The steps listed below describe how to perform the following recoveries:
Note: The following steps describe how to submit restore jobs using the Restore by Session method. The process of restoring D2D/UDP Agent-based or agentless nodes using the Restore by Tree method is identical to that of all other types of data. For more information about the Restore by Tree method, see "Restoring Data."
Follow these steps:
From the Quick Start menu, click Restore.
The Restore Manager window opens.
The sessions appear in the Session tree.
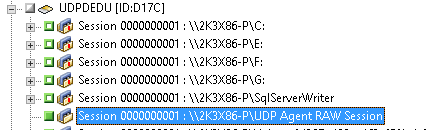
Click the check box next to the raw session.
Click the Destination tab.
The Destination options appear.
Click the Schedule tab.
The Schedule options appear.
Note: For more information, see Global Restore Options.
The Restore Media dialog opens to display a list of the media that is required to perform the operation.
The Session User Name and Password dialog opens.
The Submit Job dialog opens.
The job is submitted.
After the restore job completes, use the sessions that you restored to an alternative location to recover the D2D/UDP data.
|
Copyright © 2016
|
|