

|
|
|
CA ARCserve D2D allows you to not only protect and recover your data, but also helps you to get the Microsoft SQL Server application that uses that data back up and running. The Microsoft SQL Server recovery can only be made using the Restore by Recovery Point method.
|
|
|
|
CA Support: |
|
|
YouTube: |
|
Restore Microsoft SQL Server Application
The restore methods selection dialog opens.
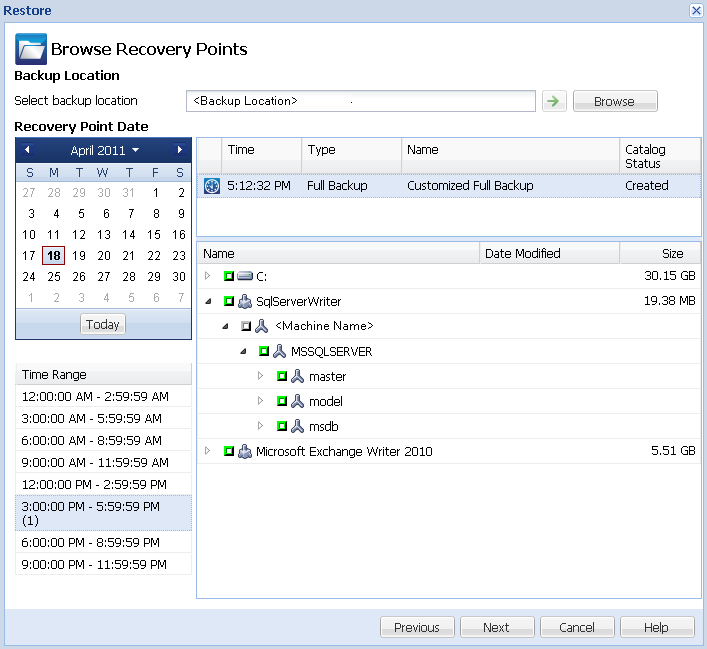
The Browse Recovery Points dialog opens.
The corresponding marker box becomes filled (green) to indicate that the database has been selected for the restore. You can select a single database or multiple databases to be restored.
The Restore Options dialog opens.
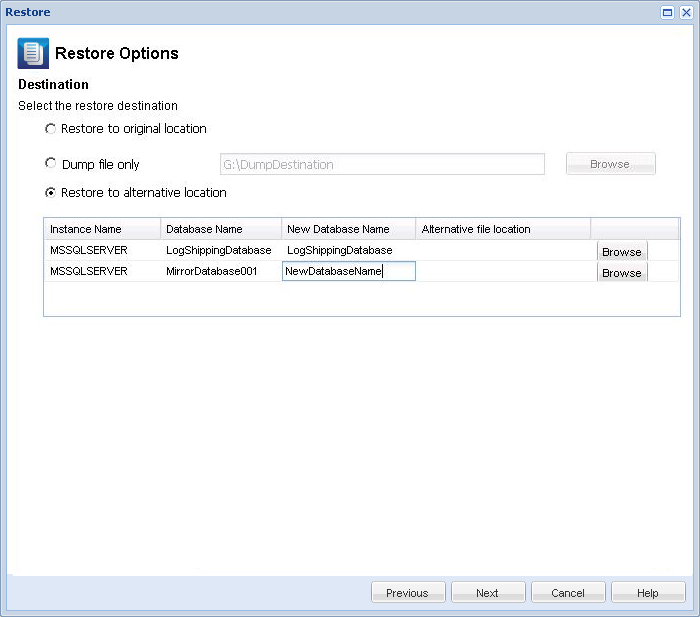
The available options are to restore to the original location of the backup, restore the dump file only, or restore to an alternate location.
Note: When restoring a Microsoft SQL Server 2012 database that is part of an AlwaysOn Availability Group (AAG), there are some considerations that you should be aware of. For more information, see MS SQL Server 2012 AAG Restore Considerations.
Restores to the original location from where the backup image was captured.
Restores the dump files only.
Dump files are created when an application crashes and contains additional (time-stamped) information that can be used to troubleshoot the cause of the problem.
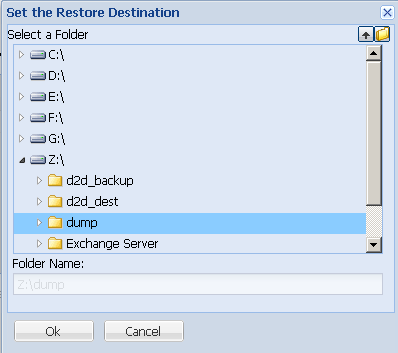
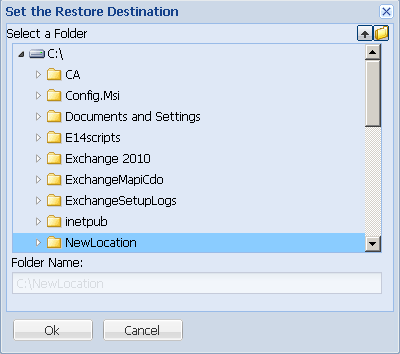
When you select this option, you can then specify or browse to the folder location where the dump file will be restored to.
Restores to an alternate location (not the original location).

Because backups can be copied to network locations, they can be used by multiple SQL Server instances. Multiple database restore can be performed (simultaneously) from the instance level. From this listing, you can select the database instance and specify a new database name and alternate location to restore the database to. In addition, you can also browse to the alternate location where the database will be restored to.
When restoring a Microsoft SQL Server application to an alternate location, there are some considerations that you should be aware of. For more information, see MS SQL Server Restore to Alternate Location Considerations.
The Restore Summary dialog opens.
| Copyright © 2012 CA. All rights reserved. |
|