

CA ARCserve D2D lets you specify the recovery point copy settings. Before you copy a recovery point, configure the copy recovery point settings. For a better understanding about how the options on this dialog can be used to configure your recovery point copy schedule, see Copy Recovery Points - Example Scenarios.
Note: The recovery point copy process is a copy and paste operation only and not a cut and paste operation. As a result, whenever a scheduled copy recovery point job is performed CA ARCserve D2D creates an additional copy of the recovery point to the specified copy destination, while still retaining the original copy of the recovery point at the backup destination that was specified in Backup Settings.
Follow these steps:
The Settings dialog opens.
The Copy Recovery Points dialog opens.
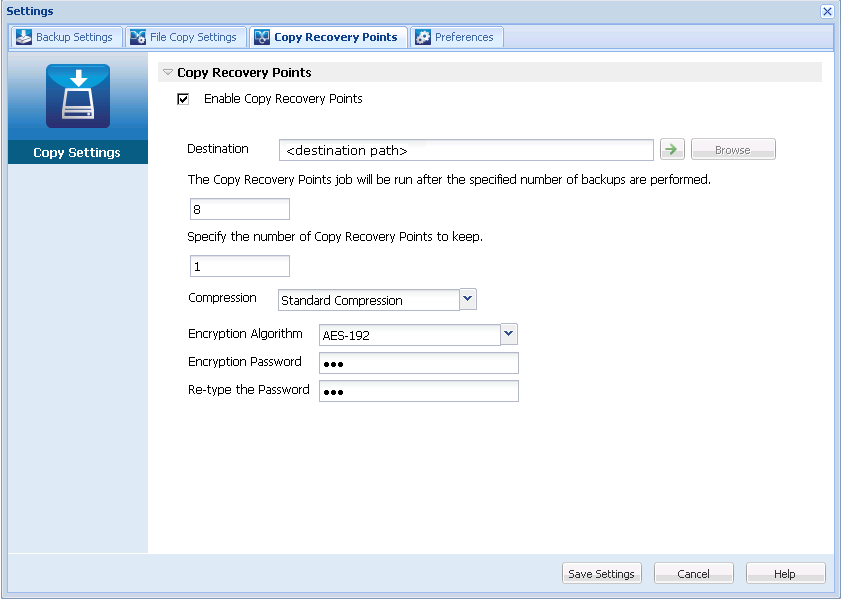
When selected, enables the copying of recovery points.
Note: If you do not select this option, no scheduled copying of recovery points is performed.
Specifies the storage location for the copy of the selected recovery point. (Optional) You can click the green arrow button to verify the connection to the specified location.
Note: The maximum length for the specified destination path is 158 characters.
Specifies when the scheduled recovery point copy process is automatically launched. This process is launched based on your selected copy policies and specified number of successful backups (Full, Incremental, and Verify).
You can use this setting to control how many times a recovery point copy process is triggered each day. For example, if you schedule to run a backup job every 15 minutes, and copy job after every 4 backups, then it performs 24 recovery point copy jobs each day (1 each hour).
Default: 8
Minimum: 1
Maximum: 1344
Important! If you schedule backup and copy jobs to run at regular intervals and if the copy job is currently running (in active state) when the scheduled time for the backup job time arrives, the backup job fails. (The next backup job will run as scheduled and should be successful if it does not conflict with another copy job). Because the copy operation takes almost same amount of time as performing a full backup, the best practice is not to set a frequent schedule for your recovery point copy jobs.
Specifies the number of recovery points that are retained and stored at the specified copy destination. Discards the oldest recovery point, when this number is exceeded.
Note: If you do not have sufficient free space at the target destination, reduce the number of saved recovery points.
Default: 1
Maximum: 1344
Compression is typically performed to decrease your disk space usage, but also has an inverse impact on your backup speed due to the increased CPU usage.
The available options are:
Note: If your backup image contains uncompressible data (such as JPG images or ZIP files), additional storage space can be allocated to handle such data. As a result, if you select any compression option and you have uncompressible data in your backup, it can actually result in an increase in your disk space usage.
Specifies the type of encryption algorithm that is used for the recovery point copies.
The available format options are No Encryption, AES-128, AES-192, and AES-256.
Lets you specify and confirm the encryption password being used to encrypt the destination session.
Your recovery point copy settings are saved.
The copy recovery point settings are successfully configured.
|
Copyright © 2013 CA.
All rights reserved.
|
|