

CA ARCserve D2D provides a list of available recovery points and lets you select the recovery point to create a copy. You can specify the destination, recovery point date, and time range to copy a recovery point.
Follow these steps:
The Copy Recovery Point dialog opens.
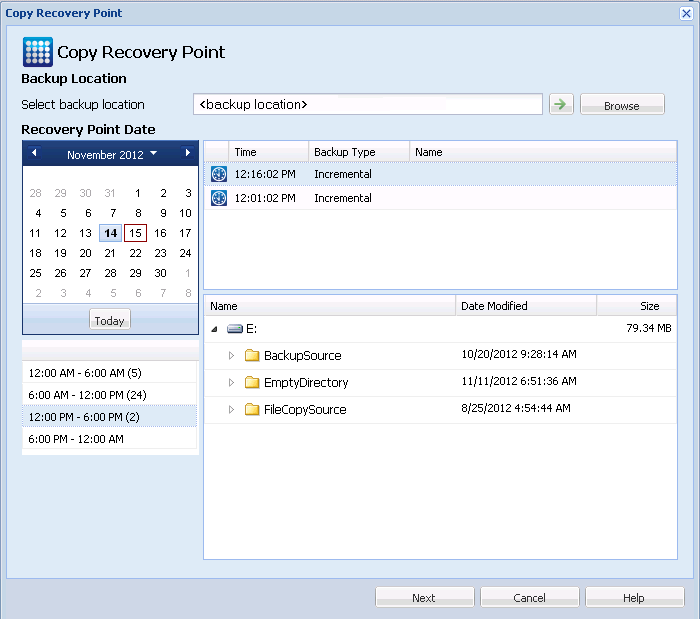
You can click the green arrow button to verify the connection to the specified location. If necessary, enter the Username and Password credentials to gain access to that location.
The calendar view appears.
Note: All the dates containing recovery points for the specified location are highlighted in green.
The corresponding recovery points for that date are displayed, with the time of the backup, the type of backup that was performed, and the name of the backup.
Note: A clock icon with a lock symbol indicates that the recovery point contains encrypted information and can require a password for the restore.
The backup content (including any applications) for the selected recovery point displays.
The Copy Options dialog opens.
The recovery point to copy is specified.
|
Copyright © 2013 CA.
All rights reserved.
|
|