

Installing the Arcserve UDP Appliance › Install Appliance
Install Appliance
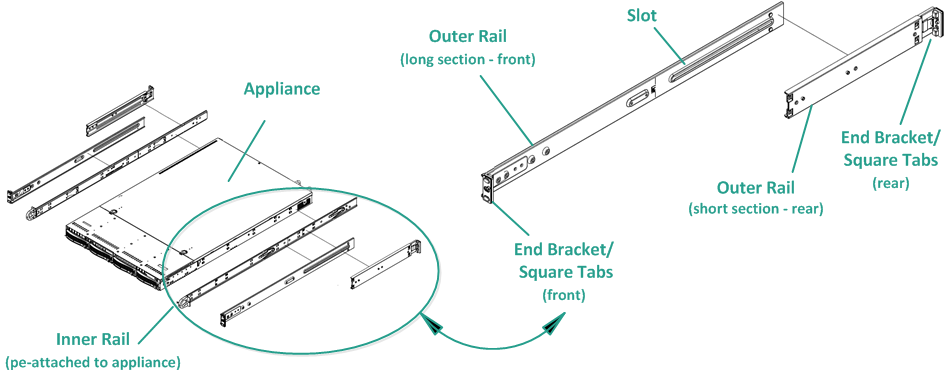
Delivered with the appliance is a rail/rack mounting kit. This kit provides the quick-install outer rails, inner rail extensions, and mounting hardware which can be used as needed to secure the appliance to any rack configuration. (Rail adapters are also provided, but are for use only with the optional standard mounting rails and not the quick-install rails).
Rack mount cabinets and attachments can vary by different manufacturers. Ensure you have sufficient rack mounting hardware to properly secure the rails in your environment.
Important! This appliance is only for use in a restricted location (authorized access and secured/controlled by locking device).
Follow these steps:
- Verify the area where the appliance will be located is dry and well-ventilated (free from front and rear obstructions that could inhibit air flow). In addition, ensure the area maintains a constant cool operating temperature, and does not generate heat, electrical noise, or electromagnetic fields.
Note: Each of the outer rails consists of two sections. When assembled, the long section gets attached to the front rack post and the short section gets attached to the rear rack post.
- Assemble the long section to the short section, aligning the pins with the corresponding slotted openings, and making sure the end brackets are facing in the same direction.
- Locate the short section against the rear post of the rack so that the two square tabs are aligned with the corresponding square holes in the post. Apply pressure to snap (and lock) the rail to the rear post.
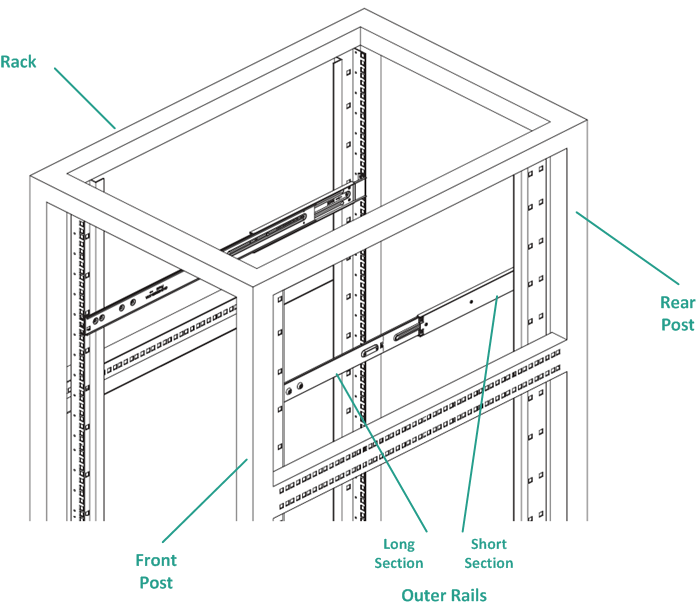
- Adjust the overall length of the assembled outer rails so that the rail will fit snugly (and level) within the rack.
- Locate the long section against the front post of the rack so that the two square tabs are aligned with the corresponding square holes in the post. Apply pressure to snap (and lock) the rail to the front post.
- Repeat steps 2 through 5 for the other outer rail.
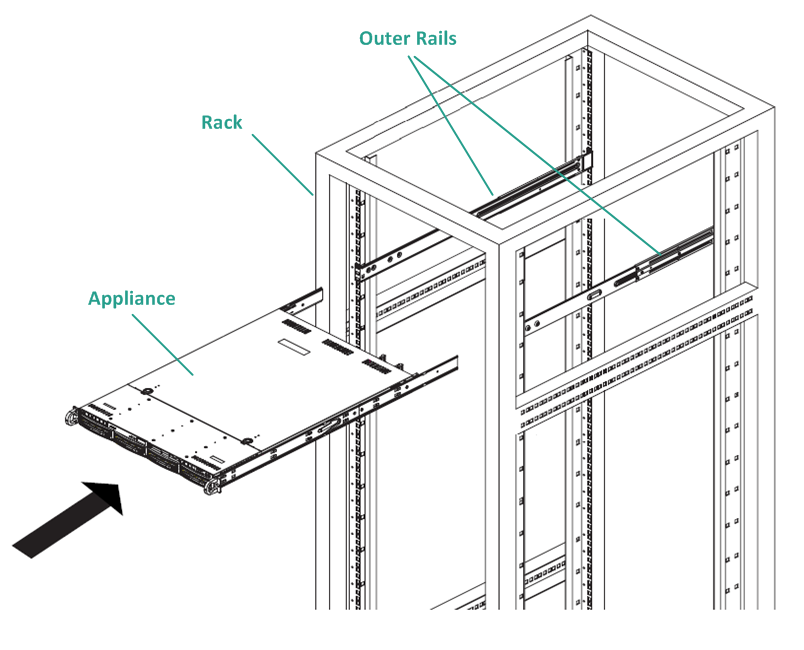
Note: The appliance comes with the inner rails pre-attached to the sides of the appliance. (Inner rail extensions are also provided if needed).
- Carefully raise the appliance so that the rear end of the inner rails are aligned with the front end of the rack-mounted outer rails and using steady pressure on both sides, slide the appliance into the rack until it locks in place (clicking sound)
Copyright © 2016 .
All rights reserved.
|
|