

Source Administrator
To replicate your backup data to the destination recovery point server that is managed from a different console, create a replication plan. This replication plan includes a backup task and a remotely managed replication task. In the replication task, specify the remote server and plan details and connect to the remote server. If the connection is successful, you can select the plan that the destination administrator created for you.
Follow these steps:
The Add a Plan page opens.
Note: For more information about creating a backup task, see the following topics:
A new task is added to the left pane.
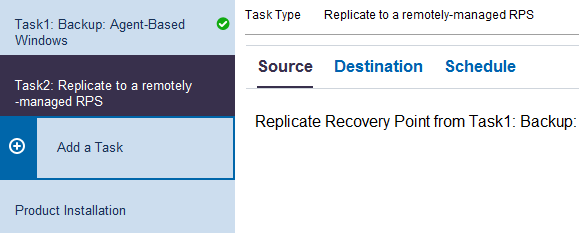
The Replicate task is added and the Source page opens. For the Source tab, the destination of the backup task (for example, Backup: Agent-Based Windows) is the source for the Replicate to a remotely-managed RPS task.
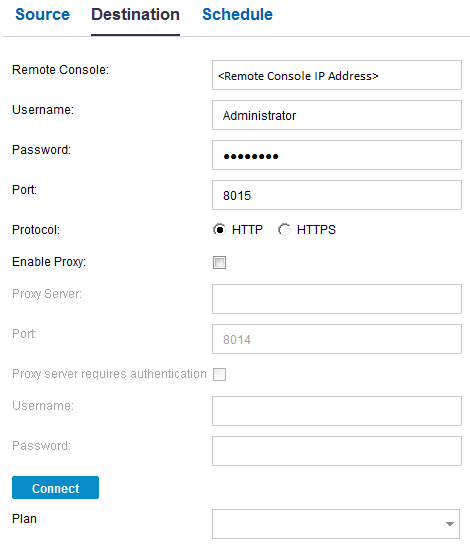
Specify the IP address of the destination Console. The destination administrator provides you the destination Console address.
Specify the username created by the destination administrator. The destination administrator provides you the username.
Specify the password created by the destination administrator. The destination administrator provides you the password.
Specify the port number of the destination Console. The destination administrator provides you the port number of the destination Console.
Specify the protocol used by the destination administrator to connect to the destination Console.
Select the checkbox to enable the proxy server selection.
Specify the address of the proxy server.
Specify the port number of the proxy server.
Select the checkbox to enable the authentication fields for the proxy server.
Specify the username to connect to the proxy server.
Specify the password to authenticate the proxy server connection.
Verifies the connection between the source Console and the destination Console. If the connection is successful, then you can see the plan name in the Plan field. This plan name is assigned to this Console by the destination administrator.
Specify the plan that the destination administrator has created for you. If there are multiple plans in the list, then contact the destination administrator to know the correct plan.
Reruns the replication job after the specified time if there is a failure. Enter a value from 1 to 60 and the time is defined in minutes.
Specify the number of retries that you want to perform if there is a job failure. After the number of retries is over, the replication job will run only at the next scheduled time. Enter a value from 1 to 99.
Specify the date and time to start the replication jobs. You can edit or delete a replication job schedule.
Specify the maximum speed (Mbps) at which the replication is done. You can throttle the replication speed to reduce the CPU or network usage. For a replication job, the jobs tab displays the average Read and Write speed of the job in progress and the configured throttle speed limit.
You can edit or delete a replication throttle schedule.
The plan is saved and runs per the schedule.
You have successfully created and automatically deployed a replication plan. When the plan runs, the data gets replicated from the source location to the destination data location over a network.
Note: After the replication process is complete, the replicated node details are automatically added to the destination Console.
You have successfully replicated data between two data stores managed from different UDP Consoles.
|
Copyright © 2016
|
|