

Creating Plans to Protect Data › How to Create a Virtual Standby Plan › Add a Virtual Standby Task to the Plan › Configure the Standby VM Network
Configure the Standby VM Network
You can power on the Standby VM with customized network settings. You can configure the following network settings on the standby VM:
- Specify the virtual network and NIC (Network Interface Card), and TCP/IP settings for each network adapter from the Network Adapter Settings tab.
- Update the DNS servers to redirect clients from the source computer to the virtual standby virtual machines based on the TCP/IP settings from the DNS Update Settings tab.
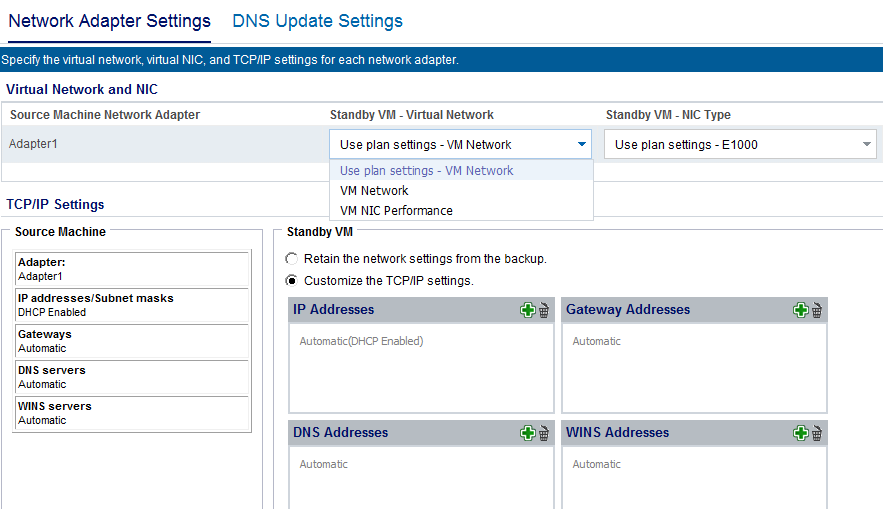
The following diagram displays the Network Adapter Settings tab of Standby VM Network Configuration:
Follow these steps:
- From the resources tab, navigate to the Virtual Standby node group.
The Virtual Standby nodes are displayed on the center pane.
- On the center pane, select the node and click Standby VM Network Configuration.
The Standby VM Network Configuration - <node name> page opens.
- On the Network Adapter Settings tab, select the virtual network from the Standby VM - Virtual Network list.
- Select the NIC type from the Standby VM - NIC Type list.
- Select Customize the TCP/IP settings.
- Click the Add address button and add IP Addresses, Gateway Addresses, DNS Addresses, and WINS Addresses.
Note: If you add DNS Addresses, then configure the DNS servers in the DNS Update Settings tab.
- Click Save.
The Standby VM Network Configuration - <node name> page closes.
The Standby VM network is configured.
Copyright © 2016 .
All rights reserved.
|
|