- Log in to the Console.
- Click resources, Nodes.
- Right click the node, which is in the plan for SharePoint Environment.
- Click Create an Instant VM to create instant virtual machines for SharePoint environment machine.
The Create an Instant VM wizard opens.
- Browse recovery points from a location and select a recovery point to start the instant VM.
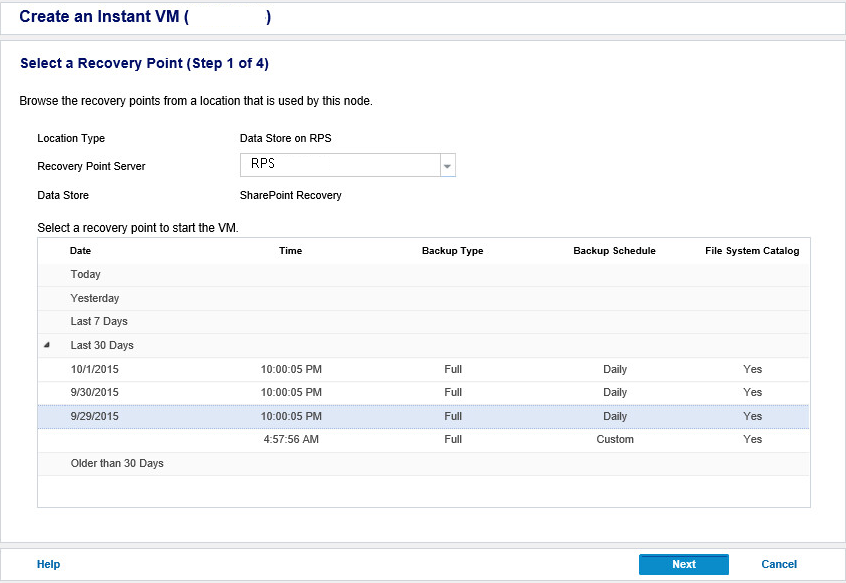
- Click Next.
- Specify a location on VMware vSphere or Microsoft Hyper-V to host the instant VM. For example: Hypervisor Type is VMware vSphere.
- Click Next.
- Specify a machine to run instant VM.
- Click Next.
- Configure instant VM hardware and system settings.
- Create a new Virtual Network as an isolate network environment for SharePoint recovery. For more information on creating an isolate, see Create an isolated network for SharePoint recovery.
- Click the (plus) sign to add network adapter.
- Select the correct virtual network, which is an isolate network environment for SharePoint recovery, and use the default configuration of TCP/IP Settings "Source:XXX.XXX.XXX.XXX".
Important! When creating an instant VM for a machine which is Web-Front-End Servers for SharePoint Environment, add one more Network Adapter for transferring the backup data file. The IP address of the new adapter should be in the same Virtual Network with the original Web-Front-End Servers for SharePoint, and in the same IP segment. Then, the original SharePoint Environment can use the network adapter to access any shared folder with the instant VM.
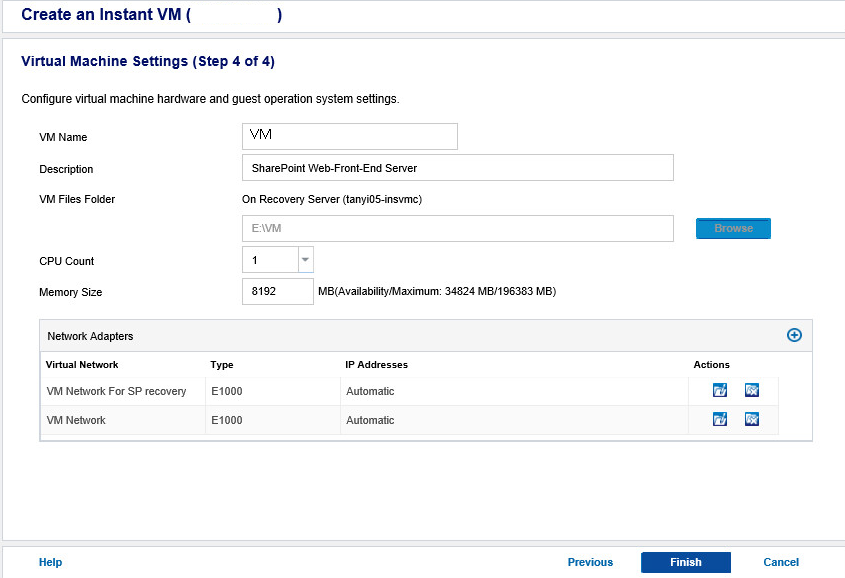
- Click Finish.
The Boot VM dialog opens.
- Click Boot Later.
A new Instant VM is created that appears in Infrastructures, Instant Virtual Machines on the Console.
- Create Instant VM for all the nodes in the SharePoint Farm environment.
- After the Instance VMs of all nodes are created, boot them up one by one.
- Start the Domain Controller first, and then the DNS server.
- After that, start the Database Server and at last, Web Front End Servers.
- Right-click the Instance VM that you want to boot and select Power on to start the Instant VM.
- Wait for these instant VMs for SharePoint Environment machines to power on.
The temporary SharePoint Environment has been set up.
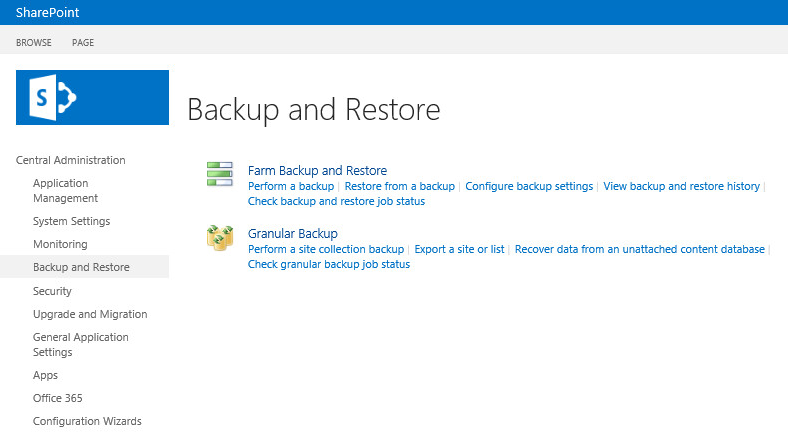
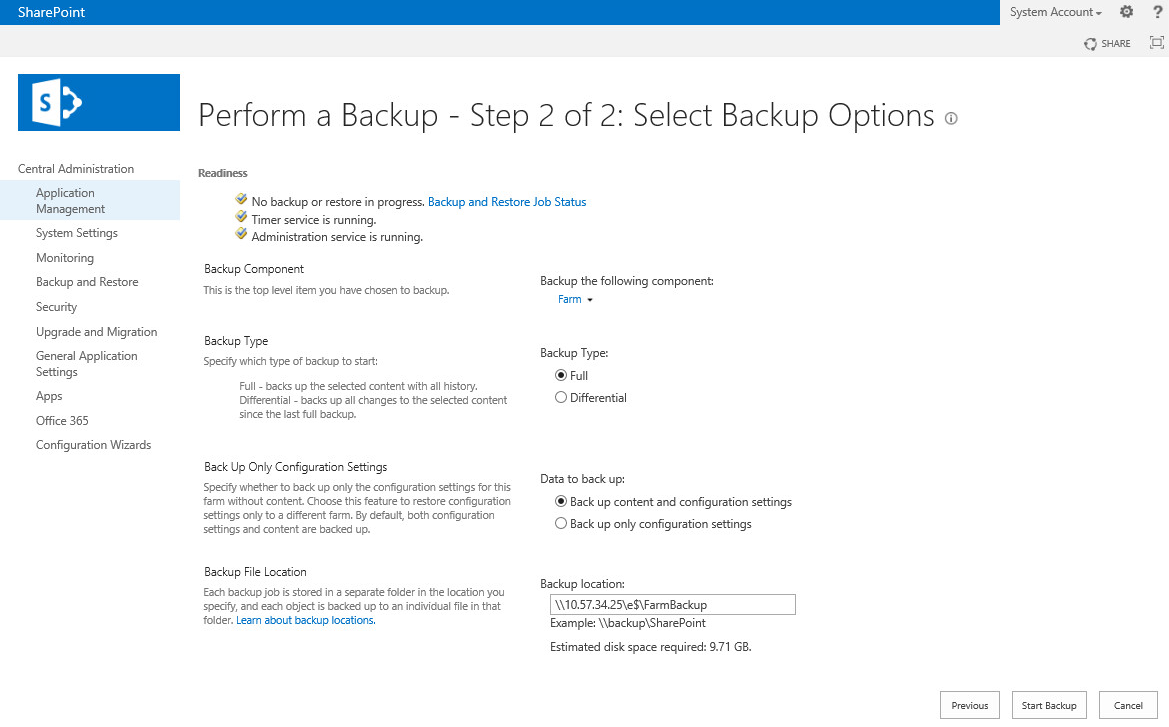
- Log on the instant VM where the machine is Web-Front-End Servers for SharePoint Environment. Open Central Administration, click Backup and Restore heading, and select the Perform a backup link.
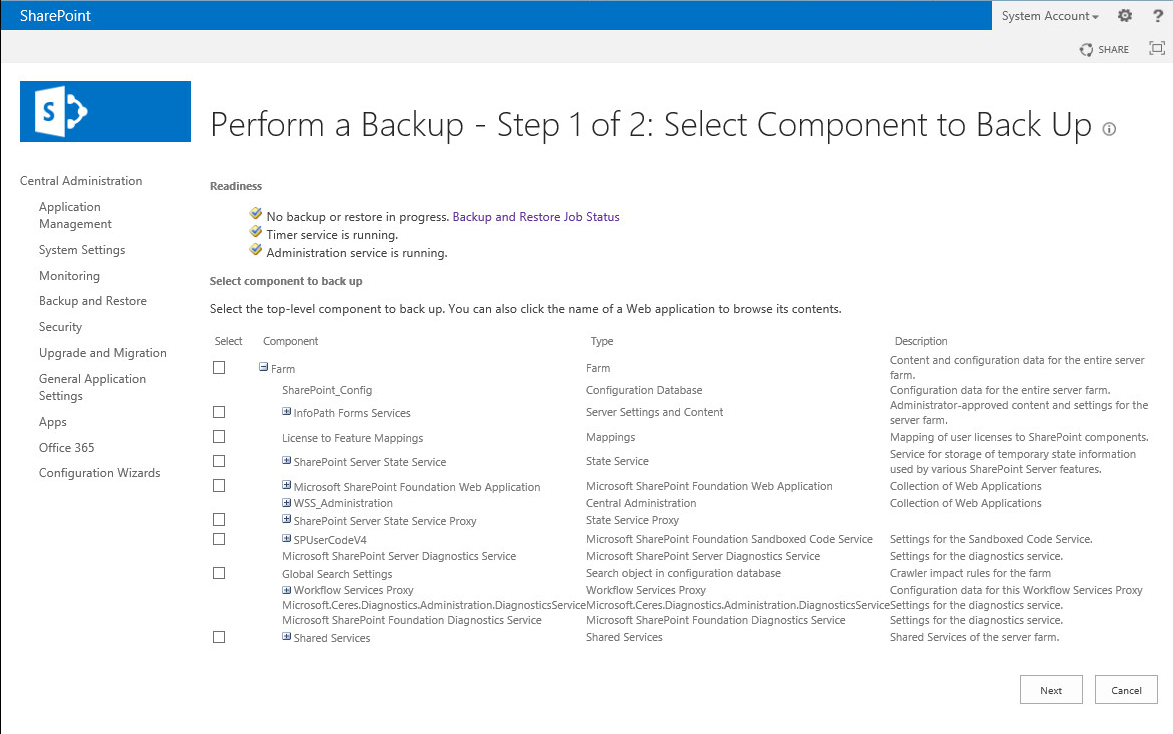
- Select the component that you want to restore for Farm and then click Next.
For example: Back up Web Applications SharePoint – 80. Expand node Microsoft SharePoint Foundation Web Application and select the component SharePoint – 80
Back up Access Services. Expand node Shared Services Applications under Shared Services and select the component Access Services 2010
.
- Specify Backup Type to Full.
- Create a Shared Folder on the instant VM, where the machine is Web-Front-End Servers for SharePoint Environment.
- Provide Full Control access to everyone on the shared folder.
- Provide the shared folder path in Backup File Location to store the backup file, and then click Start Backup.
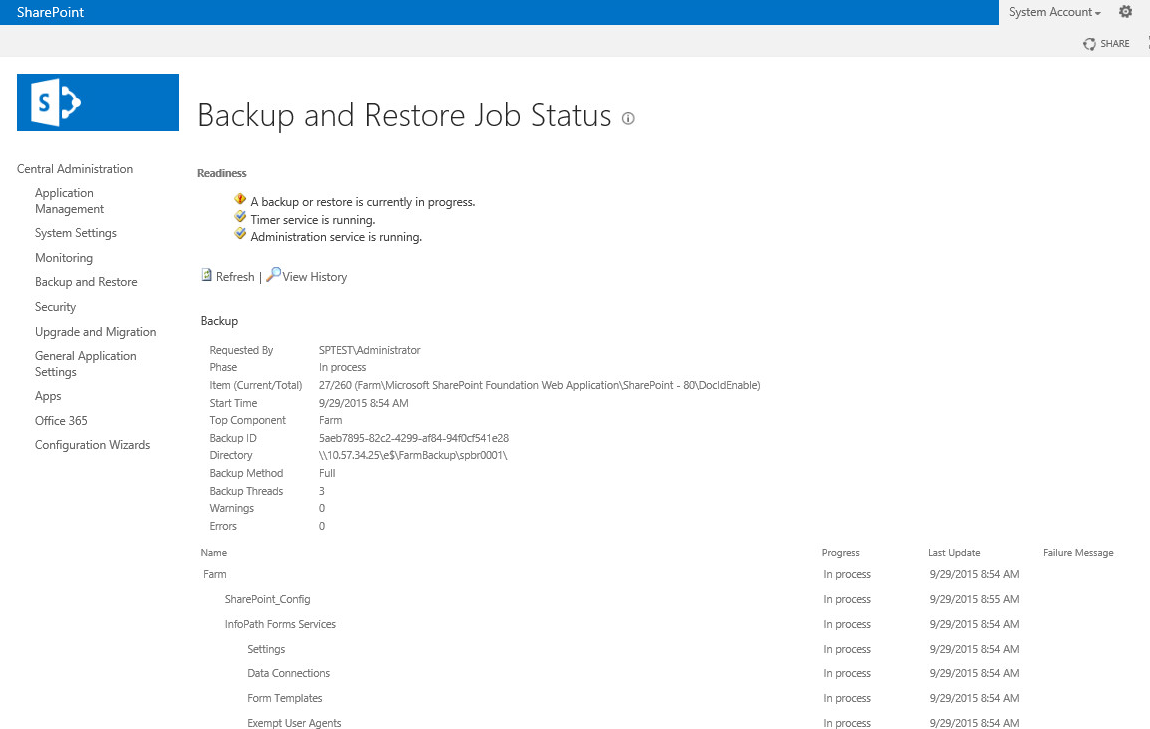
- Wait for the backup job to complete.
- After the Farm backup job completes, log in to the machine that is Web-Front-End Servers for the original SharePoint Environment.
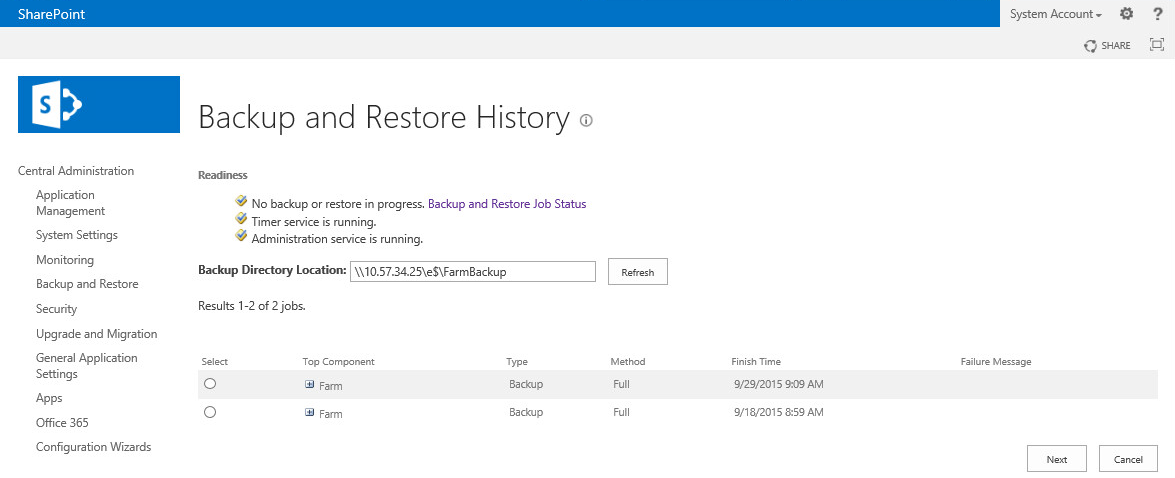
- Open Central Administration, click Backup and Restore, and select the Restore from a backup link.
- Provide the Shared Folder on Backup Directory Location field, and click Refresh.
Note: Shared folder is already created in one of the previous steps.
- Select the backup instance from the history list and click the Next button.
- Select the configuration and content in the farm to restore, and then click Next.
For example, select all Farm component or SharePoint Services component or Web Applications component.
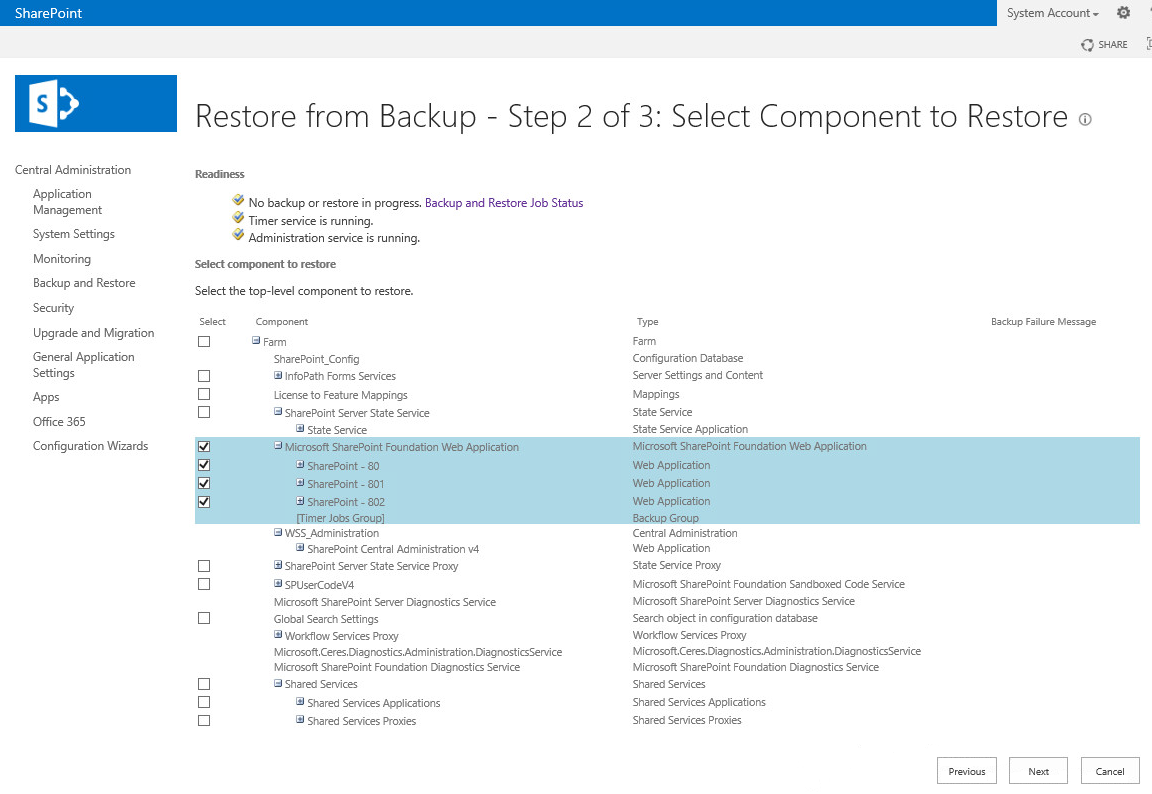
The page displays various options for the selected service and content configuration.
- Choose whether you want to:
- Restore content and configuration settings or Restore only configuration settings
- Overwrite configuration or create new in restore options.
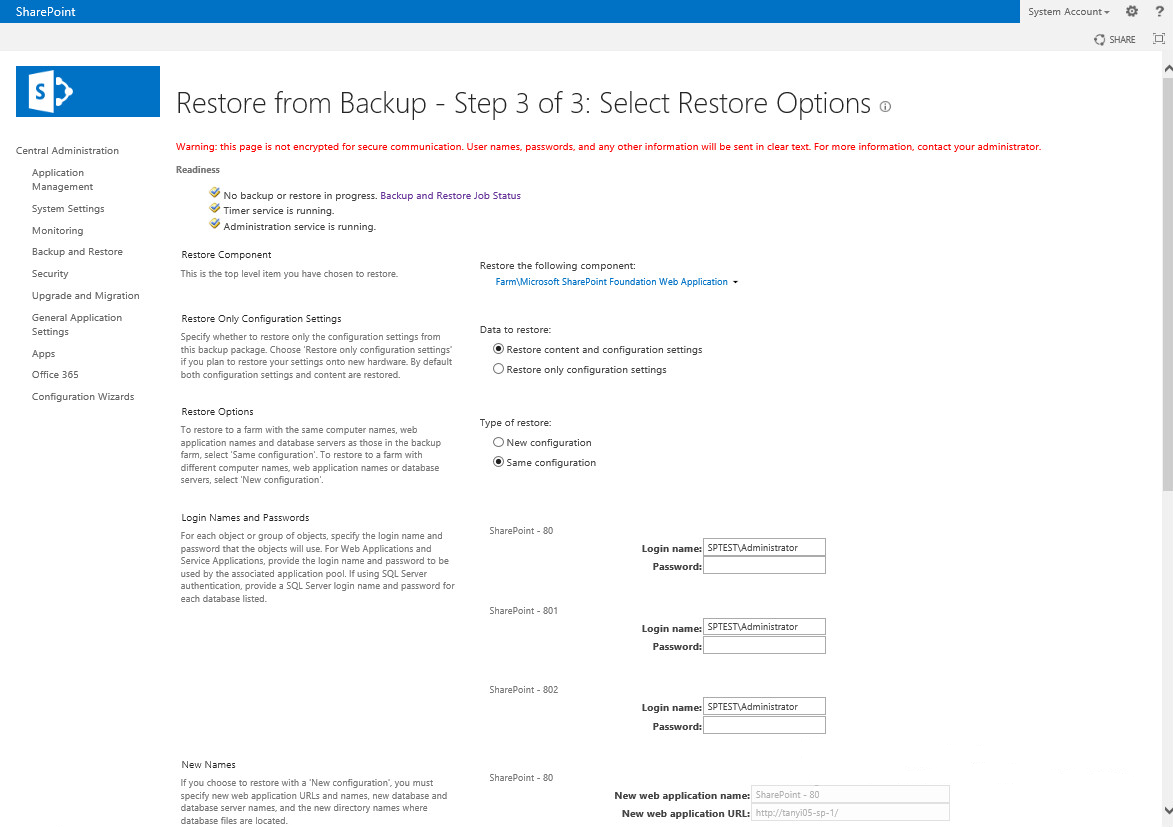
- Click the Start Restore button to begin the restore process.
After the restore job is completed, the selected components in Farm are restored.

