

Each time CA ARCserve D2D performs a successful backup, a point-in-time snapshot image of your backup is also created. Before creating a Virtual Hard Disk (VHD) file from a CA ARCserve D2D backup, you must have at least one CA ARCserve D2D recovery point available.
Follow these steps:
The Copy Recovery Point dialog opens.
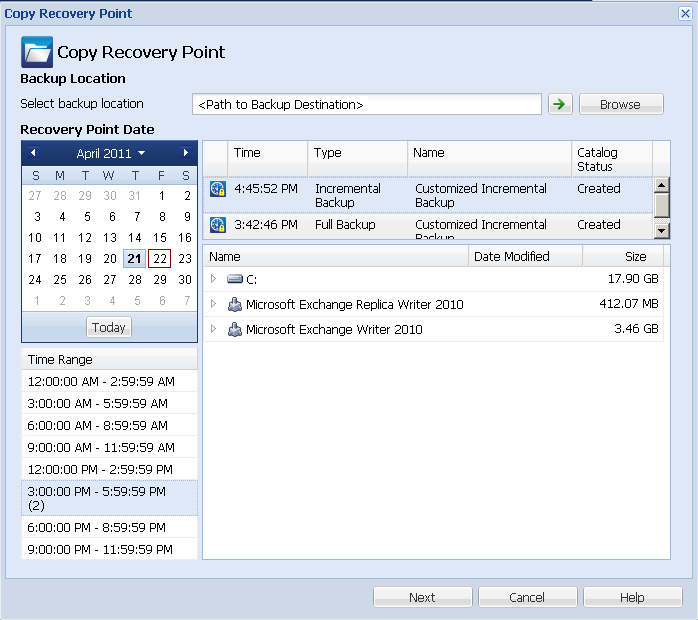
The calendar view highlights (in green) all dates during the displayed time period that contain recovery points for that backup source.
The corresponding recovery points for that date are displayed, with the time of the backup, the type of backup that was performed, and the name of the backup.
The corresponding backup content (including any applications) for that recovery point is displayed.
Note: Verify that you select a location that has sufficient free space available to hold the entire VHD.
Compression is not performed. Files are converted to .vhd format directly, without the need for manual operations. This option has the lowest CPU usage (fastest speed), but also has the highest disk space usage for your backup image.
A status notification window appears and the copy process for the selected recovery point type is launched immediately.
The recovery point image is copied from the backup source to the destination.
"VStore\S0000000001"
For example, if your computer name is "Department_A" and you copied the recovery point (backup) to "E:\export_vhd\" you would navigate to:
E:\export_vhd\Department_A\VStore\S0000000001
Each of these files corresponds to an actual physical disk on the source computer which can be used as regular VHD files.
Important! The VHD created by CA ARCserve D2D during the copy process may not boot in the hypervisor because the VHD files may not contain the correct drivers for the VM.
|
Copyright © 2013 CA.
All rights reserved.
|
|