

During the Restore VM configuration process, specify where the recovered virtual machine is stored. The available selections are Restore to the Original Location and Restore to an Alternative Location.
This procedure explains how to restore a virtual machine to alternate location or different data store.
Follow these steps:
The Restore Options dialog expands to display additional restore to alternative options.
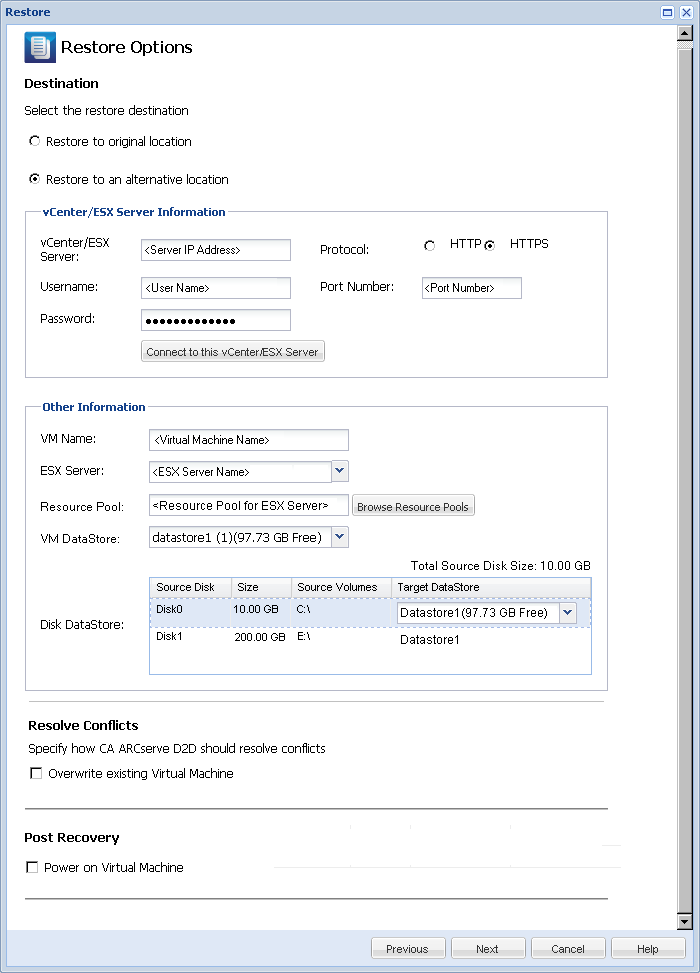
Specifies the host name or IP address for the destination vCenter or ESX server system.
Specifies the user name that has access rights to log in to the vCenter/ESX server where you plan to restore the virtual machine.
Specifies the corresponding password for the User Name.
Specifies the protocol that you want to use for communication with the destination server. The available selections are HTTP and HTTPS.
Default: HTTP.
Specifies the port that you want to use for data transfer between the source server and the destination.
Default: 443.
If the alternative server access credential information is correct, the Other Information fields become enabled.
Specifies the host name of the virtual machine that you are restoring.
Specifies the destination ESX server. The drop-down menu contains a listing of all ESX servers that are associated with a vCenter server.
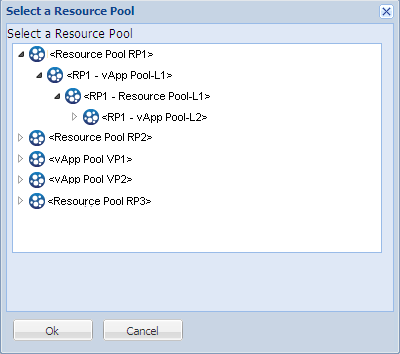
Selects the Resource Pool or vApp Pool you want to use for the virtual machine recovery.
Note: A Resource Pool is a configured collection of CPU and memory resources. A vApp Pool is a collection of one or more virtual machines that can be managed as a single object.
Default: empty.
Click the Browse Resource Pool button to display the Select a Resource Pool dialog. This dialog contains a listing of all Resource Pools and vApp Pools available for the destination ESX server. Select the pool to use for the virtual machine recovery. You can leave this field blank when you do not want to assign a Resource Pool or vApp Pool to this virtual machine recovery.
Specify the destination VM DataStore for the virtual machine recovery or each virtual disk within the virtual machine.
A virtual machine can have multiple virtual disks and you can specify a different data store for each virtual disk.
For example:
Important! For VM DataStore, this field only populates if the user has full VMware system administrator permissions. If the user does not have proper administrator permissions, CA ARCserve D2D will not continue the restore process after you connect to the vCenter/ESX Server.
The Restore Summary dialog opens.
The restore options for alternate location are defined.
|
Copyright © 2013 CA.
All rights reserved.
|
|