

CA ARCserve D2D lets you specify the Advanced Settings for your backups.
Note: To view a video that is related to these Backup Settings, see Manage Backup Settings.
Follow these steps:
The Advanced dialog opens.
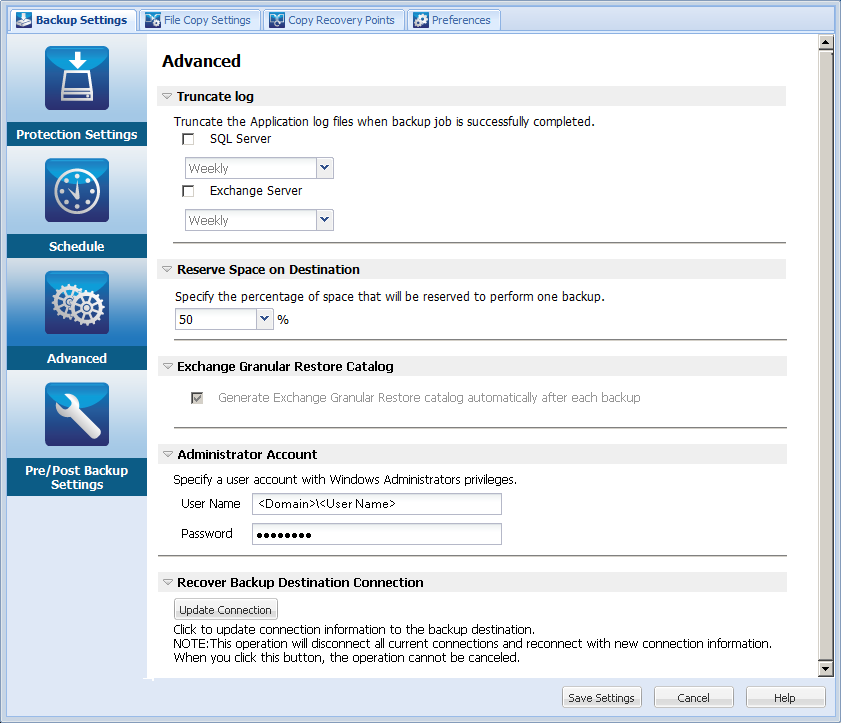
Truncates the accumulated transaction log files for the selected applications after the next successful backup.
CA ARCserve D2D backups consist of a snapshot image and the transaction log files that were created for it. At some point in time, the older (committed) transaction log files are no longer needed and can be purged to make space for new log files. The process of purging these log files is truncating the log. This option enables truncating of committed transaction log files, which conserves disk space.
The available options are SQL Server and Exchange Server. You can select either, both, or none of these applications. If you select any of these applications, you can also specify a scheduled time period (Daily, Weekly, or Monthly) for automatic log truncation:
Note: The transaction log files cannot be truncated without performing a successful backup.
If a backup job is already running at the same time the purging is scheduled to be performed, the purging operation is moved to the next scheduled job.
Example:
You scheduled an Incremental Backup to run automatically every day at 5:00 pm, and then started a Full Backup manually at 4:55 pm. You assume that the backup successfully finishes at 5:10 pm.
In this case, the Incremental Backup that is scheduled for 5:00 pm is skipped because the ad-hoc Full Backup is still in progress. Now the committed transaction log files are purged after the next successful backup job and be performed on the next day after the scheduled Incremental Backup completes successfully at 5:00 pm.
This value indicates a percentage of the calculated space that is necessary to perform a backup. This amount of continuous space is then immediately reserved on the destination before the backup starts writing data and helps improve backup speed.
Default: 10%.
Example: Set the value to 10% and the current backup has 50 GB of data to back up. Before the backup starts writing data, it first reserves 5 GB of disk space. After the 5 GB of disk space is used up, it then reserves the next 5 GB of disk space. If the data remaining for the backup is less than 5 GB (suppose 2 GB are remaining to back up), then the remaining GB (in this example 2 GB) are reserved.
Enables automatic generation of the Exchange Granular Restore catalogs after each backup.
An Exchange Granular Restore backup captures information about the mail message, the mail folder, and the mailbox levels of Exchange in a single pass backup through the Exchange database. With this option enabled, you can then perform granular recoveries of the Exchange database by selecting from a list of objects inside Exchange and specifying exactly what you want to recover without first having to recover or dump the Exchange database to an alternate location.
Specifies the User Name and Password with access rights to perform the backup. CA ARCserve D2D verifies that the name and password are valid and the user belongs to an administrator group.
Important! If the Administrator Account credential information for the CA ARCserve D2D server is changed (User Name/Password), you must also reconfigure/update the Administrator Account information in this dialog.
Note: To specify a domain account, the format for the user name is a fully qualified domain user name in the form of "<domain name>\<user name>".
Lets you update (resynchronize) the connection information to your backup destination.
You can use this option if you are performing periodic backups to a remote share computer and then you can change the access credentials (user name/password) for that remote computer. In this case, typically your next backup would fail because the access credentials configured at your local computer do not match the new credentials at the remote computer.
Note: When you click the Update Connection button and the resynchronize process begins, you cannot cancel it.
Before you click this Update button, perform the following tasks:
net session \\<computer name or IP address> /d
Your advanced backup settings are saved.
|
Copyright © 2012 CA.
All rights reserved.
|
|