

To add nodes that are in an active directory, you must first discover the nodes by providing the active directory details and then adding the nodes to the plan.
Follow these steps:
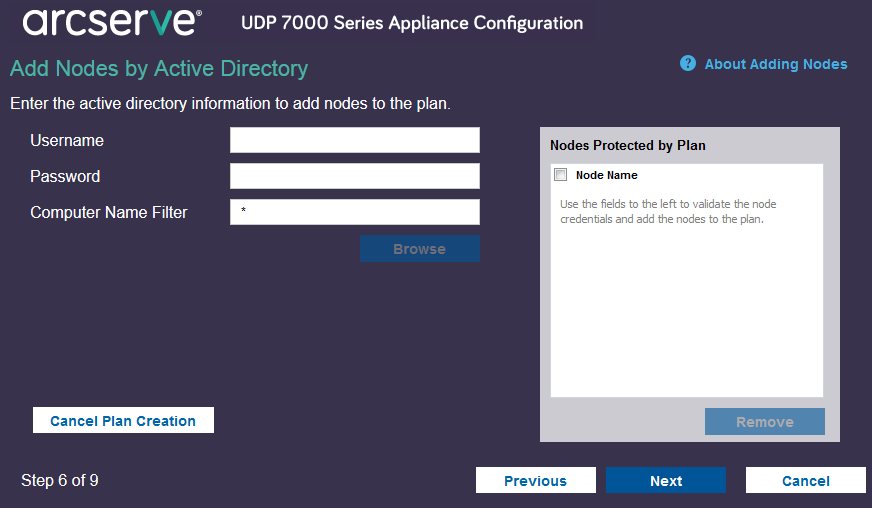
Specifies the domain and user name in the domain\username format.
Specifies the user password.
Specifies the filter to discover node names.
Cancels the plan that you just created.
The discovered nodes are displayed.

To add nodes, you have to select the nodes and verify.
The credentials are verified. Verified nodes are marked with green check marks. If a node fails verification, re-enter the credentials and click Apply again.
Note: You must verify each node before you can add it to the list.
The selected node is added to the right pane.
The nodes are added to the plan.
|
Copyright © 2016
|
|