

The Schedule page lets you define a schedule for Backup, Merge, and Throttle functions to repeat at specific intervals. After you define a schedule, the jobs run automatically per the schedule. You can add multiple schedules and can provide retention settings.
A Backup Schedule refers to regular schedule that is repeated multiple times a day based on the number of hours or minutes you select. Besides the regular schedule, a backup schedule also provides options to add daily, weekly, and monthly schedules.
Note: For more information on scheduling and retention settings, see Understanding Advanced Scheduling and Retention.
Follow these steps:
The backup data is stored as recovery points.
The backup data is stored as recovery sets.
The New Backup Schedule dialog opens.
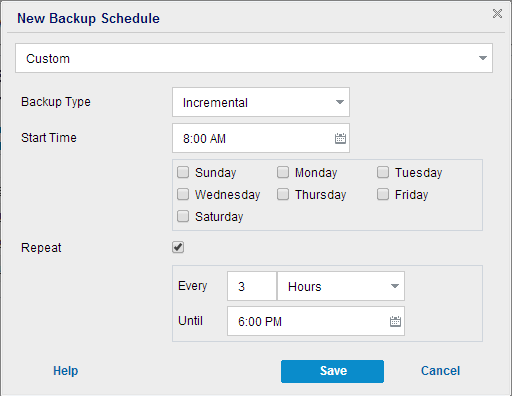
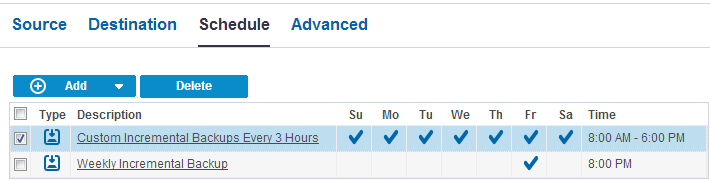
Specifies the backup schedule that repeats multiple times a day.
Specifies the backup schedule that occurs once a day. By default, all the days of the week are selected for Daily backup. If you do not want to run the backup job on a specific day, clear the checkbox for that day of the week.
Specifies the backup schedule that occurs once a week.
Specifies the backup schedule that occurs once a month.
Determines the backup schedule for Full Backups. As scheduled, Arcserve UDP performs a full backup of all used blocks from the source machine. A full backup typically consumes time depending on the backup size.
Determines the backup schedule for Verify Backups.
Arcserve UDP verifies that the protected data is valid and complete by performing a confidence check of the stored backup image to the backup source. If necessary, the image is resynchronized. A Verify Backup looks at the most recent backup of each individual block and compares the content and information to the source. This comparison verifies that the latest backed up blocks represent the corresponding information at the source. If the backup image for any block does not match the source (possibly because of changes in the system since the last backup), Arcserve UDP refreshes (resynchronizes) the backup of the block that does not match. You can also use a Verify Backup (infrequently) to get the guarantee of full backup without using the space required for a full backup.
Advantages: Produces a small backup image when compared to full backup because only the changed blocks (blocks that do not match the last backup) are backed up.
Disadvantages: Backup time is long because all source blocks are compared with the blocks of the last backup.
Determines the backup schedule for Incremental Backups.
As scheduled, Arcserve UDP incrementally backs up only those blocks that have changed after the last successful backup. The advantages of Incremental Backups are that it is a fast backup and it produces a small backup image. This is the most optimal way to perform a backup.
The Backup Schedule is specified and it is displayed on the Schedule page.
The Add New Merge Schedule dialog opens.
The Merge Schedule is specified and it is displayed on the Schedule page.
The Add New Throttle Schedule dialog opens.
The Throttle Schedule is specified and displayed on the Schedule page.
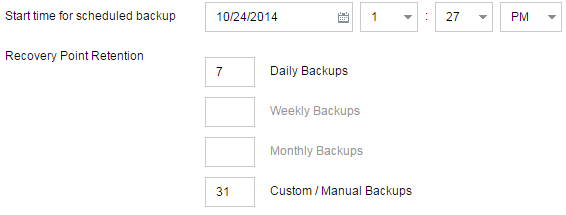
These options are enabled if you have added the corresponding backup schedule. If you modify the retention settings on this page, the changes are reflected on the Backup Schedule dialog.
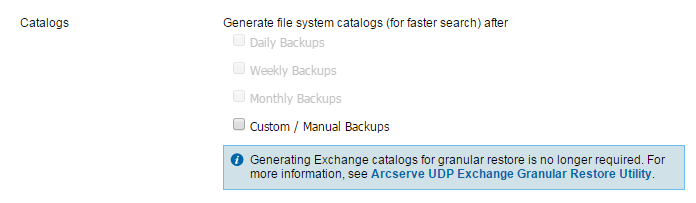
Catalogs let you generate file system catalog. The File System catalog is required to perform faster and easier search. If you select the catalog check boxes, the catalogs are enabled depending on the type of backup that you have specified. Clear the check box to disable generating the catalog.
The schedule is specified.
|
Copyright © 2016
|
|