

After the appliance restarts with the new hostname, the Unified Data Protection wizard opens. The wizard lets you create a basic plan to schedule backups. The plan lets you define the nodes you want to protect and when to create backups. The backup destination is the appliance server.
Note: All the steps on the wizard are optional, you can skip these and directly open the UDP console and create plans.
|
|
|
|
|
|
Follow these steps:
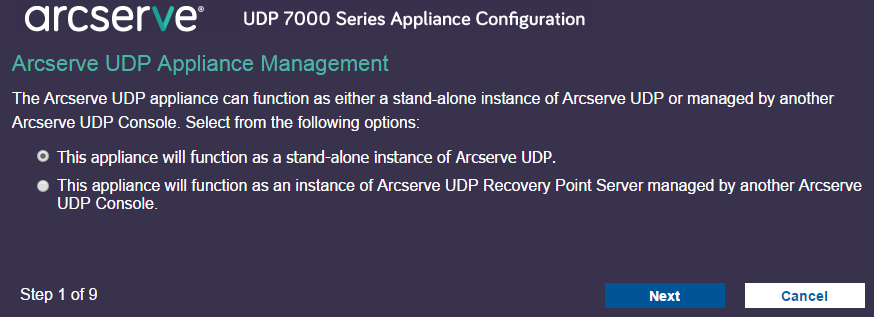
If the appliance is managed from another UDP console, then specify the UDP console URL, username, and password.
Note: To anytime cancel the wizard and open the Arcserve UDP Console, click Cancel.
A data store is a physical storage area on the appliance and can be used as the destination for your backups.
By default, Arcserve UDP creates a data store called <hostname>_data_store. This data store is deduplication and encryption enabled. For more information about deduplication and encryption, see Data Deduplication, Arcserve UDP Solutions Guide.
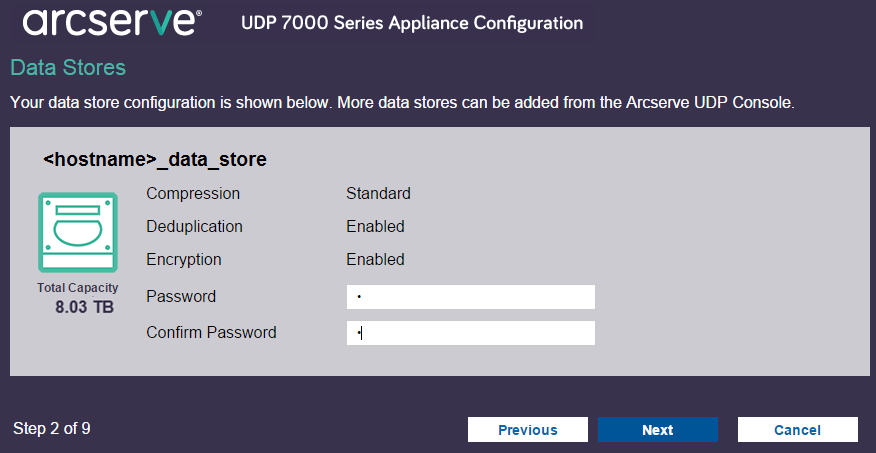
Note: As this data store is encrypted, you must specify an encryption password.
This dialog lets you define the email server that will be used to send alerts and the recipients who would get the alerts. You can select options specify to get alerts based upon successful jobs, failed jobs, or both.
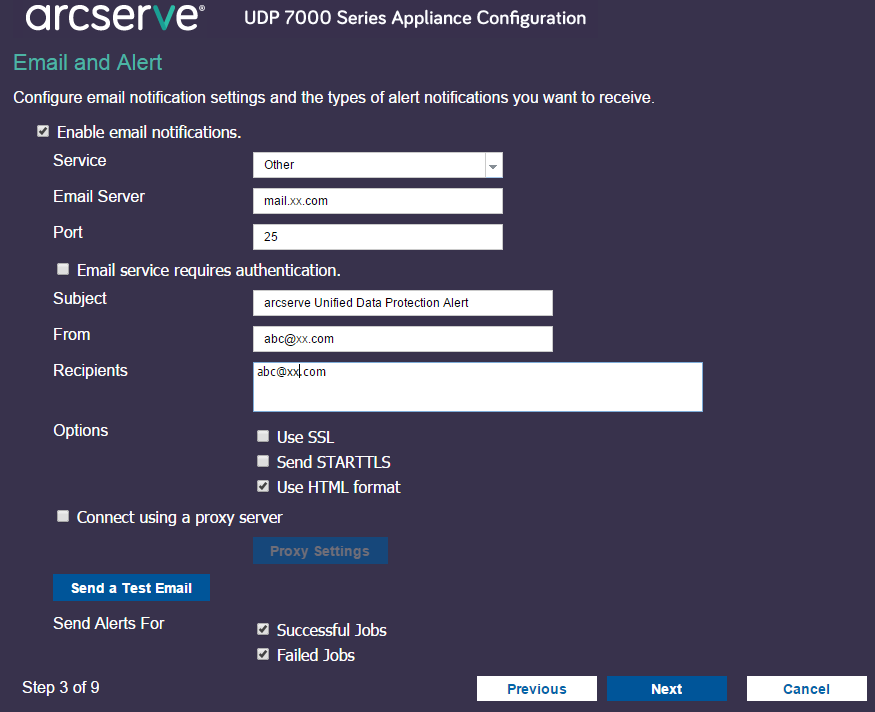
Specifies the email services such as Google Mail, Yahoo Mail, Live Mail, or Other.
Specifies the email server address. For example, for google server email, specify smtp.gmail.com.
Species the email server port number.
Specifies whether the email server requires authentication. If yes, specify the account name and password for authentication.
Specifies the subject of the email that will be sent to the recipients.
Specifies the email ID of the sender. The recipients will receive the mail from this sender.
Specifies the recipients who will receive the alerts. (You can use semicolons ";" to separate multiple recipients).
Specifies the encryption method to use for the communication channel.
Specifies the proxy server user name and port number if you are connecting to the mail server through a proxy server. Also, specify a username and password if the proxy server requires authentication.
Sends a test mail to the recipients. You can verify the details by sending a test mail.
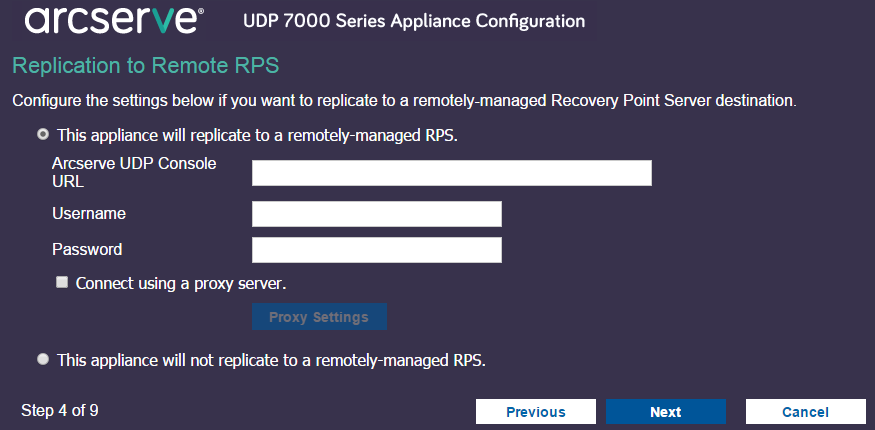
Specifies the URL of the remote Arcserve UDP console.
Specifies the username and password to connect to the remote console.
Specifies the proxy server details if the remote console is behind a proxy server.
Using this dialog you can create a basic plan where you specify the nodes that you want to protect and the backup schedule.

Note: If you do not want to create basic plans using the wizard, click Skip Plan Creation. This will open the last dialog, the Next Steps dialog. Click Finish to open the UDP console and create plans.
Specifies the name of the plan. (If you do not specify a Plan Name, the default name "Protection Plan <n>" will be assigned).
Specifies a session password. The session password is important as it is required when you restore data. Make sure that you do not lose the password.
Specifies the method to add nodes to the plan. Select one of the following methods:
Use this method to manually add the nodes by specifying the node hostname or IP address. You can add as many nodes as you want.
Use this method to add nodes that are in an active directory, you can first discover the nodes by providing the active directory details and then adding the nodes.
Use this method to import virtual machine nodes from ESX or vCenter servers. This option lists all the virtual machines that are discovered on the hostname or IP address you specify here.
Use this method to import the virtual machine nodes from Microsoft Hyper-V servers.
After you select a method, specify the details on each dialog.
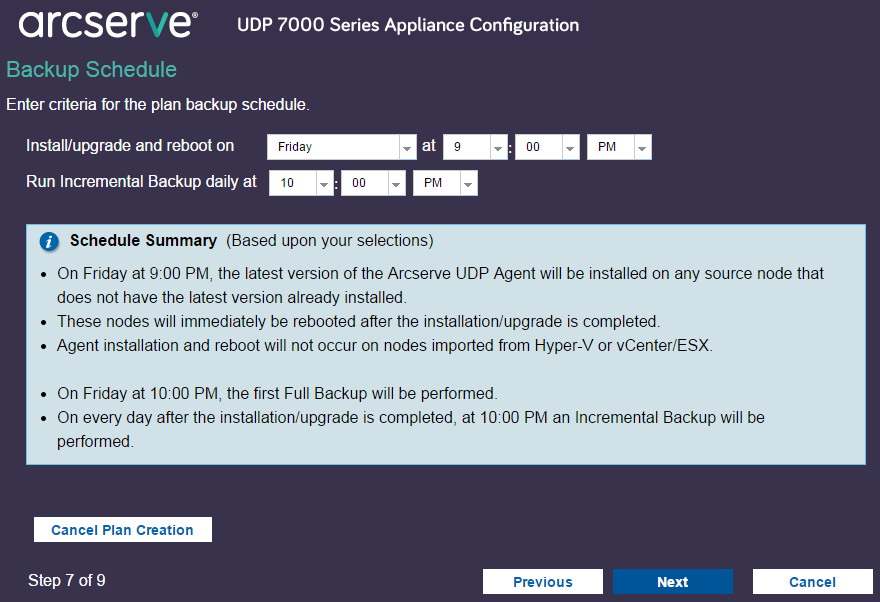
Note: If you specify the backup time earlier than the install/upgrade time, then the backup is automatically scheduled for the next day. For example, if you schedule the agent installation for Friday at 9:00 PM and backup schedule for 8:00 PM, then the backup will be performed on Saturday at 8:00 PM.
Cancel Plan Creation: To cancel the plan that you just created, click Cancel Plan Creation.
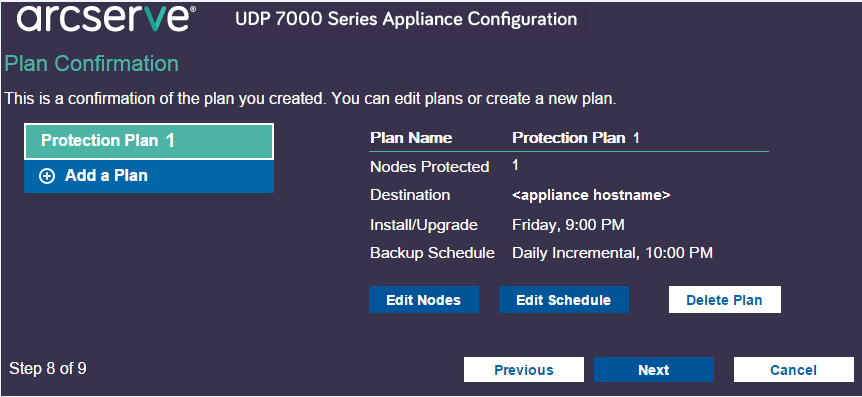
Modifies the source nodes you want to protect.
Modifies the backup schedule.
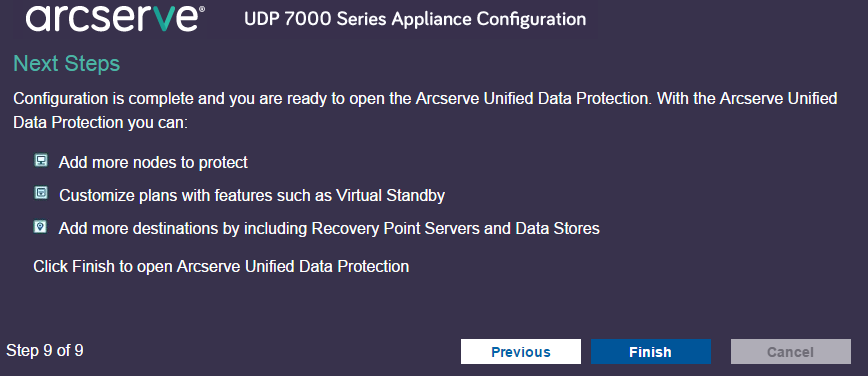
You have successfully completed the configuration and you are now ready to work in the Arcserve UDP console. You will be able to add more nodes to protect, customize plans with features such as virtual standby, and add more destinations by including Recovery Point Servers and Data Stores.
|
Copyright © 2016
|
|